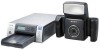
Sony UPX-C300 Operating Instructions - Page 24
Printing a Picture Stored in the Camera’s Built-In Memory - how you adjust print quality
 |
UPC - 027242731219
View all Sony UPX-C300 manuals
Add to My Manuals
Save this manual to your list of manuals |
Page 24 highlights
To adjust black & white print quality When you print a picture in black & white by selecting B&W, the picture is printed by overlaying yellow, magenta, and cyan, and therefore may not be perfectly achromatic. To adjust the black tone, you can use the print quality adjustment function on the printer. Printing a Picture Stored in the Camera's Built-In Memory When a picture is taken, its data is stored in the camera's built-in memory. To print stored pictures, view them in Playback mode and select the picture you wish to print. Then perform the same steps as when printing a picture from the auto-review display (on page 22). For details on viewing pictures stored in memory, see "Viewing a Picture on the LCD" on page 24. Reprinting a Picture Stored in the Printer's Memory (COPY PRINT) The data for the last picture that was printed is stored in the printer's memory. You can reprint this picture. Note If you press the 1 button on the printer and set it to standby mode (so the lamp goes out), the data stored in the printer's memory is deleted, and you cannot reprint the picture. 13 542 1 Press the MENU button. 2 Press V on the control button to display "COPY PRINT [>>]." 3 Press B on the control button. "COPY PRINT: 1 [1 - 9 PRINT: EXEC]" appears. 4 Set the number of sheets to be printed by press v or V on the control button. A value from 1 to 9 can be set. 5 Press the EXEC button. The number of pictures set in step 4 is printed. When printing completes, the READY screen reappears. Viewing a Picture on the LCD 1 2 1 Set the mode switch to . A picture stored in the camera's memory appears on the LCD. 2 Select a picture to view by pressing the b or B control button. The LCD in Playback mode The following is an example of how the LCD may appear when the mode switch is set to . Power source (Battery indicator or AC power adaptor) Resolution Print queue flag 1) STD 001/018 Print queue icon 1) Number of images currently displayed/Total number of images recorded 1) Appears only when print queue mode is turned on. 24 Operations (Shooting and Printing)
-
 1
1 -
2
-
3
-
4
-
5
-
6
-
7
-
8
-
9
-
10
-
11
-
12
-
13
-
14
-
15
-
16
-
17
-
18
-
 19
19 -
 20
20 -
 21
21 -
 22
22 -
 23
23 -
 24
24 -
 25
25 -
 26
26 -
 27
27 -
 28
28 -
 29
29 -
30
-
31
-
32
-
33
-
34
-
35
-
36
-
37
-
38
-
39
-
40
-
41
-
42
-
43
-
44
-
45
-
46
-
47
-
48
-
49
-
50
-
51
-
52
-
53
-
54
-
55
-
56
-
57
-
58
-
59
-
60
-
61
-
62
-
63
-
64
-
65
-
66
-
67
-
68
-
69
 |
 |
