Sony VPL-FX30 Operating Instructions - Page 34
Removing/Attaching the Projection Lens, Removing, Attaching - projector accessories
 |
View all Sony VPL-FX30 manuals
Add to My Manuals
Save this manual to your list of manuals |
Page 34 highlights
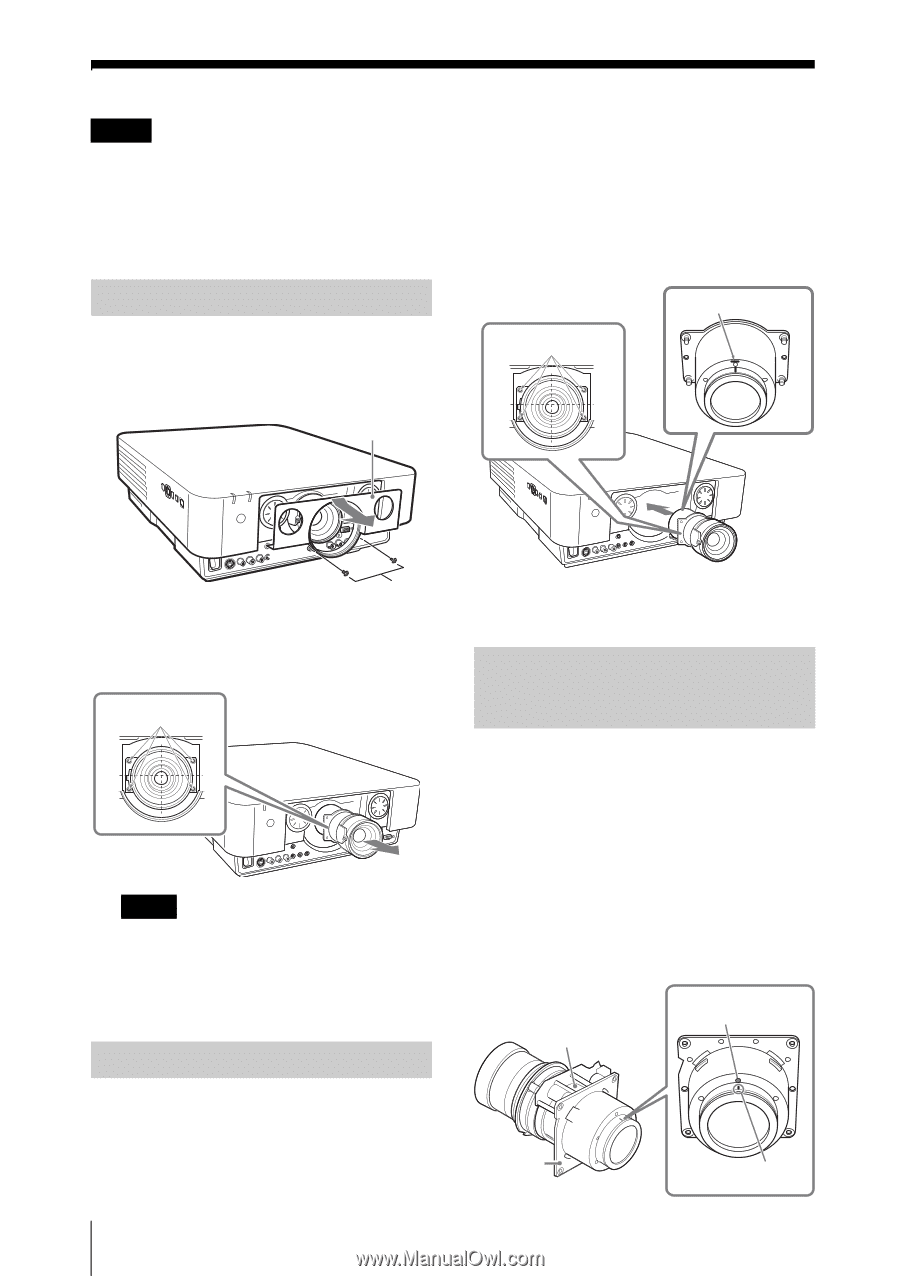
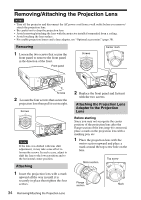
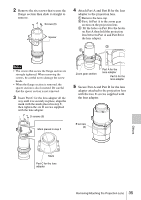
Removing/Attaching the Projection Lens Notes • Turn off the projector and disconnect the AC power cord from a wall outlet before you remove/ attach the projection lens. • Be careful not to drop the projection lens. • Avoid removing/attaching the lens with the projector installed suspended from a ceiling. • Avoid touching the lens surface. • For usable projection lenses and a lens adapter, see "Optional accessories" (page 38). Removing 1 Loosen the two screws that secure the front panel to remove the front panel in the direction of the front. Front panel Screws Center mark Screws 2 Loosen the four screws that secure the projection lens then pull it out straight. Screws Note If the lens was shifted with lens shift adjustment, it may take some effort to loosen the screws. In such a case, adjust to shift the lens to the lower position and to the horizontal center position. Attaching 1 Insert the projection lens with a mark upward all the way in until it is securely in place then tighten the four screws. 34 Removing/Attaching the Projection Lens 2 Replace the front panel and fasten it with the two screws. Attaching the Projection Lens Adapter to the Projection Lens Before starting Since you may not recognize the center position of the projection lens after the flange section of the lens (step 1) is removed, place a mark on the projection lens with a marking pen, etc. 1 Place the projection lens with the motor section upward and place a mark around the top screw hole on the lens. Motor section Top screw Flange section Mark
-
 1
1 -
2
-
3
-
4
-
5
-
6
-
7
-
8
-
9
-
10
-
11
-
12
-
13
-
14
-
15
-
16
-
17
-
18
-
19
-
20
-
21
-
22
-
23
-
24
-
25
-
26
-
27
-
28
-
 29
29 -
 30
30 -
 31
31 -
 32
32 -
 33
33 -
 34
34 -
 35
35 -
 36
36 -
 37
37 -
 38
38 -
 39
39 -
40
-
41
-
42
-
43
-
44
-
45
-
46
-
47
-
48
-
49
 |
 |