Sony VPL-PX10 Operating Instructions - Page 18
Setting Up and Projecting, Installing the Projector, Connecting to a Computer - vpl manual
 |
View all Sony VPL-PX10 manuals
Add to My Manuals
Save this manual to your list of manuals |
Page 18 highlights
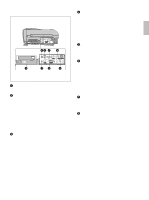
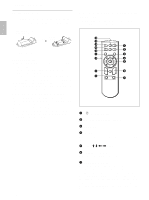
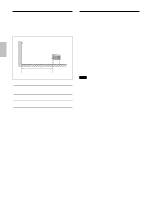
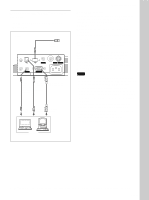
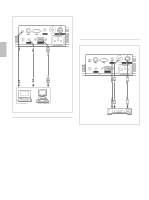
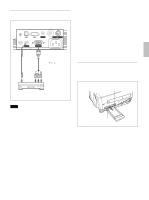
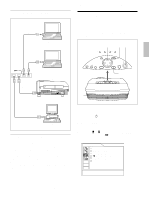
Installing the Projector / Connecting the Projector Installing the Projector This section describes how to install the projector. The distance between the lens and the screen varies depending on the size of the screen. Use the following table as a guide. Distance between the screen and the center of the lens Unit: m (feet) Screen size 40 60 80 100 120 150 180 200 250 300 (inches) Minimum 1.5 2.2 3.0 3.7 4.5 5.6 6.8 7.5 9.4 11.3 Distance (4.8) (7.3) (9.8) (12.3) (14.8) (18.5) (22.3) (24.8) (31.0) (37.3) Maximum 1.8 2.7 3.6 4.5 5.4 6.8 8.1 9.1 11.3 13.6 Distance (5.8) (8.8) (11.8) (14.8) (17.8) (22.2) (26.7) (29.7) (37.2) (44.7) For details, see "Installation Example" on page 34 (GB). For details on ceiling installation, consult with qualified Sony personnel (fee charged). PUSH Connecting the Projector When making connections, be sure to do the following: • Turn off all equipment before making any connections. • Use the proper cables for each connection. • Insert the cable plugs properly; plugs that are not fully inserted often generate noise or cause picture degradation. When pulling out a cable, be sure to pull it out grasping the plug, not the cable itself. Connecting to a Computer This section describes how to connect the projector to a computer. For more information, refer to the computer's instruction manual. Notes • The projector accepts VGA, SVGA, XGA, and SXGA signals. However, we recommend that you set the output mode of your computer to SVGA (VPL-PS10) or XGA (VPL-PX15/PX10) mode for the external monitor. • If you set your computer, such as a notebook type, to output the signal to both your computer's display and an external monitor, the picture of the external monitor may not appear properly. Set your computer to output the signal to only the external monitor. For details, refer to the operating instructions supplied with your computer. • The supplied mouse cable may not work properly depending on your computer. • This projector is compatible with DDC2B (Display Data Channel 2B). If your computer is compatible with DDC1), turn the projector on according to the following procedures. 1 Connect the projector to the computer using the supplied HD D-sub 15-pin cable. 2 Turn the projector on. 3 Start the computer. ...1) DDC™ is a registered trademark of the Video Electronics Standards Association. 18 (GB)
-
 1
1 -
2
-
3
-
4
-
5
-
6
-
7
-
8
-
9
-
10
-
11
-
12
-
 13
13 -
 14
14 -
 15
15 -
 16
16 -
 17
17 -
 18
18 -
 19
19 -
 20
20 -
 21
21 -
 22
22 -
 23
23 -
24
-
25
-
26
-
27
-
28
-
29
-
30
-
31
-
32
-
33
-
34
-
35
-
36
-
37
-
38
-
39
-
40
-
41
-
42
-
43
-
44
-
45
-
46
-
47
-
48
-
49
-
50
-
51
-
52
-
53
-
54
-
55
-
56
-
57
-
58
-
59
-
60
-
61
-
62
-
63
-
64
-
65
-
66
-
67
-
68
-
69
-
70
-
71
-
72
-
73
-
74
-
75
-
76
-
77
-
78
-
79
-
80
-
81
-
82
-
83
-
84
-
85
-
86
-
87
-
88
-
89
-
90
-
91
-
92
-
93
-
94
-
95
-
96
-
97
-
98
-
99
-
100
-
101
-
102
-
103
-
104
-
105
-
106
-
107
-
108
-
109
-
110
-
111
-
112
-
113
-
114
-
115
-
116
-
117
-
118
-
119
-
120
-
121
-
122
-
123
-
124
-
125
-
126
-
127
-
128
 |
 |
