Sony VPL PX31 Operating Instructions - Page 14
Installing the Projector - lens
 |
UPC - 027242578814
View all Sony VPL PX31 manuals
Add to My Manuals
Save this manual to your list of manuals |
Page 14 highlights
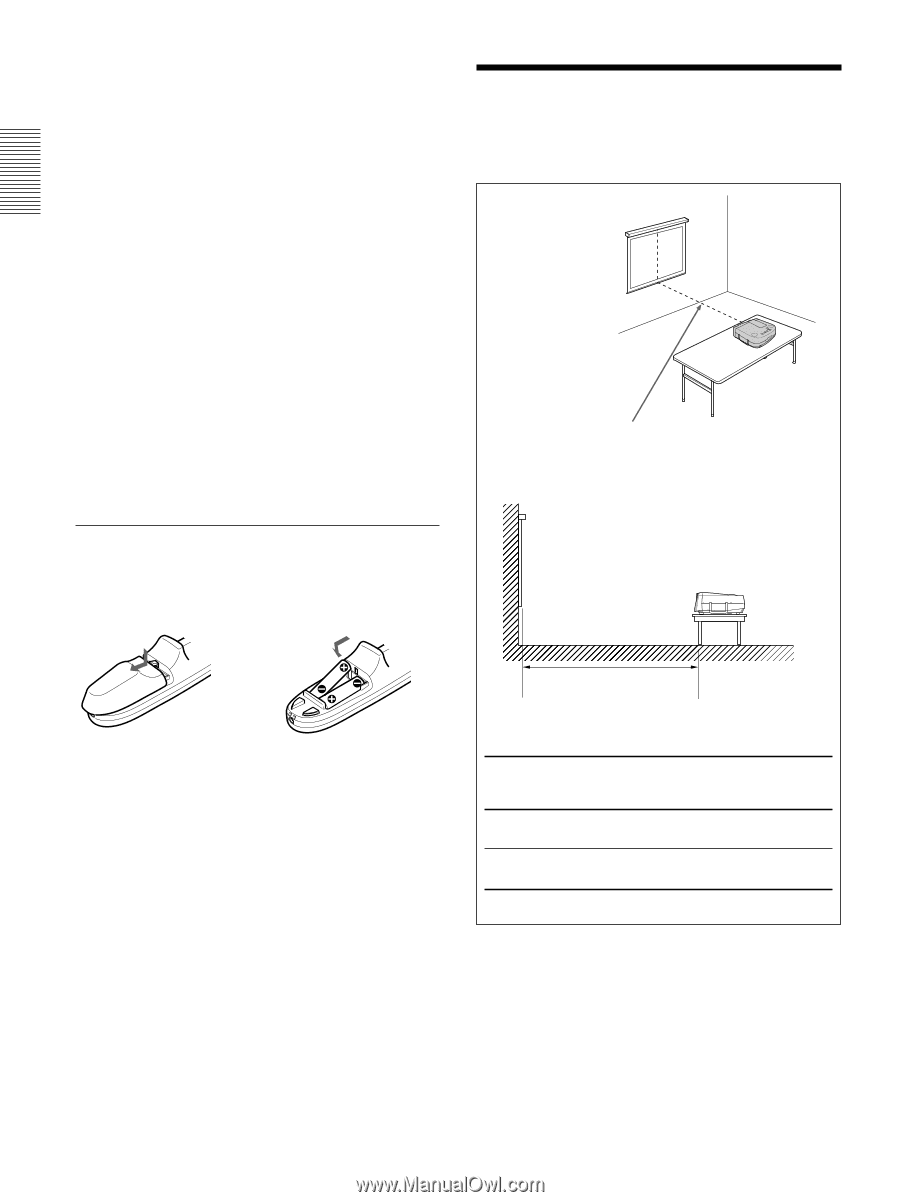
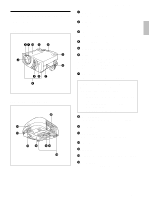
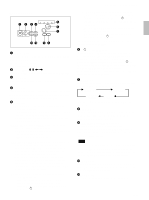
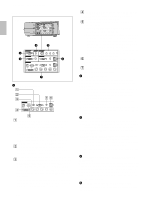
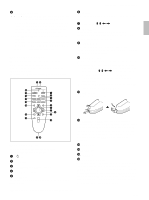
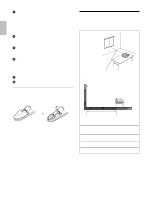
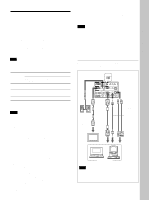
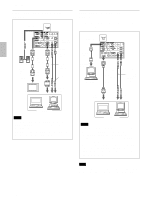
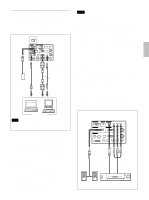
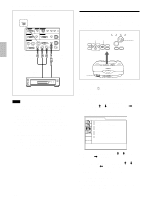
Location and Function of Controls / Installing the Projector qj MUTING keys Cut off the picture and sound. PIC: Cuts off the picture. Press again to restore the picture. AUDIO: Cuts off the sound from speakers and AUDIO jack. Press again or press the VOLUME + key to restore the sound. qk HELP key If you need help information during an operation, press this key to display help messages. ql COMMAND ON/OFF switch When this switch is set to OFF, no key on the Remote Commander function. This saves the battery power. w; Transmission indicator Lights up when you press a key on the Remote Commander. This indicator does not light up when you use the laser pointer. wa Infrared transmitter ws Laser transmitter Battery installation 1 Push and slide to open the lid, then install the two size AA (R6) batteries (supplied) with the correct polarity. Be sure to install the battery from the # side. 2 Replace the lid. Notes on batteries • Make sure that the battery orientation is correct when inserting batteries. • Do not mix an old battery with a new one, or different types of batteries. • If you will not use the Remote Commander for a long time, remove the batteries to avoid damage from battery leakage. If batteries have leaked, remove them, wipe the battery compartment dry and replace the batteries with new ones. Notes on Remote Commander operation • Make sure that there is nothing to obstruct the infrared beam between the Remote Commander and the remote control detector on the projector. • The operation range is limited. The shorter the distance between the Remote Commander and the projector is, the wider the angle within which the commander can control the projector. 14 (GB) Installing the Projector This section describes the installation arrangements for installing the projector. Horizontal center of the screen The distance between the lens and the screen varies depending on the size of the screen. Use the following table as a guide. Distance between the screen ;;;;; and the center of the lens Unit: m (feet) Screen size 40 60 80 100 120 150 200 300 (inches) Minimum 1.5 2.3 3.1 3.9 4.6 5.8 7.8 11.7 Distance (4.9) (7.5) (10.0) (12.6) (15.2) (19.1) (25.5) (38.4) Maximum 1.8 2.8 3.7 4.7 5.7 7.1 9.5 14.3 Distance (6.0) (9.1) (12.3) (15.4) (18.6) (23.3) (31.2) (46.9)
-
 1
1 -
2
-
3
-
4
-
5
-
6
-
7
-
8
-
 9
9 -
 10
10 -
 11
11 -
 12
12 -
 13
13 -
 14
14 -
 15
15 -
 16
16 -
 17
17 -
 18
18 -
 19
19 -
20
-
21
-
22
-
23
-
24
-
25
-
26
-
27
-
28
-
29
-
30
-
31
-
32
-
33
-
34
-
35
-
36
-
37
-
38
-
39
-
40
-
41
-
42
-
43
-
44
-
45
-
46
-
47
-
48
-
49
-
50
-
51
-
52
-
53
-
54
-
55
-
56
-
57
-
58
-
59
-
60
-
61
-
62
-
63
-
64
-
65
-
66
-
67
-
68
-
69
-
70
-
71
-
72
-
73
-
74
-
75
-
76
-
77
-
78
-
79
-
80
-
81
-
82
-
83
-
84
-
85
-
86
-
87
-
88
-
89
-
90
-
91
-
92
-
93
-
94
-
95
-
96
-
97
-
98
-
99
-
100
-
101
-
102
-
103
-
104
-
105
-
106
-
107
-
108
-
109
-
110
-
111
-
112
-
113
-
114
-
115
-
116
-
117
-
118
-
119
-
120
-
121
-
122
 |
 |