Sony VPL PX31 Operating Instructions - Page 18
Selecting the Menu Language - reset lamp
 |
UPC - 027242578814
View all Sony VPL PX31 manuals
Add to My Manuals
Save this manual to your list of manuals |
Page 18 highlights
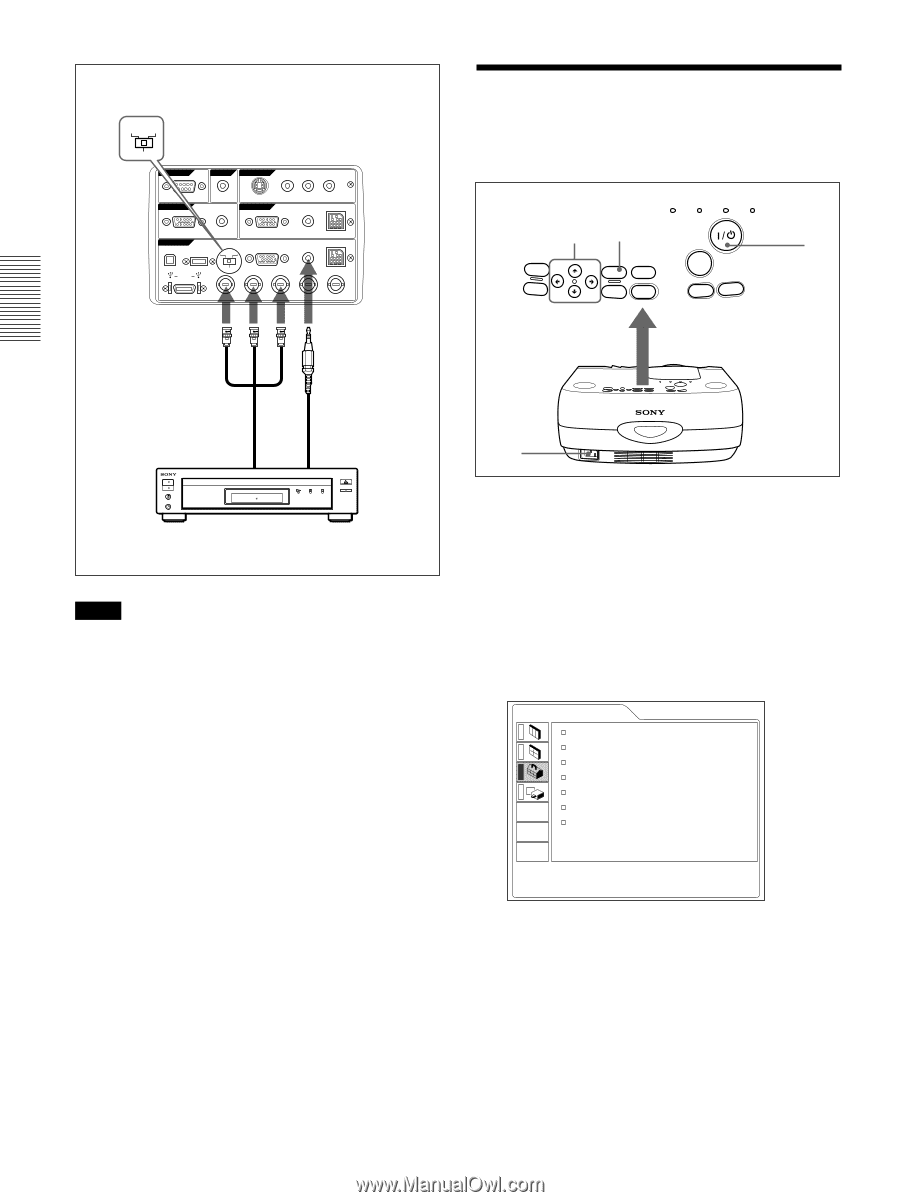
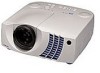
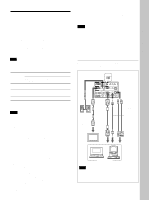
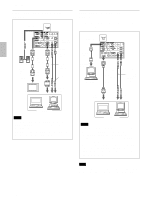
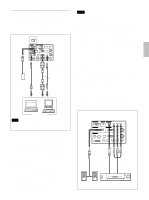
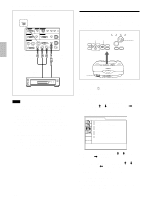
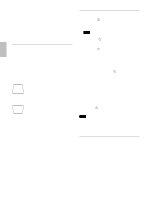
Connecting / Selecting the Menu Language Right side DIGITAL RGB RGB 5BNC REMOTE RS-232C OUTPUT CONTROL S VIDEO IN IN PLUG IN POWER S VIDEO VIDEO INPUT B L R (MONO) AUDIO MONITOR INPUT A USB AUDIO DIGITAL RGB RGB 5BNC RGB RGB AUDIO MOUSE AUDIO MOUSE DIGITAL RGB R/R-Y/PR G/Y B/B-Y/PB SYNC/HD VD BNC Cable (not supplied) Stereo audio connecting cable (not supplied) to RGB/ component output to audio output 15k RGB/Component equipment Notes • Set the aspect ratio using ASPECT in the INPUT SETTING menu according to the input signal. • To connect a 15k RGB/Component equipment, select the COMPUTER/COMPONENT/DTV YPBPR/DTV GBR in the INPUT-A in the SET SETTING menu according to the input signal. • Use the composite sync signal when you input the external sync signal from 15k RGB/component equipment. Connecting to a HDTV 1035/60i Since the screen ratio of a high definition image is 16:9 and 576 lines are displayed in the vertical direction, the image displayed is not a highdefinition image. 18 (GB) Selecting the Menu Language You can select the language for displaying in the menu and other on screen displays. The factory setting is ENGLISH. LAMP/ TEMP/ POWER ON/ COVER FAN SAVING STANDBY 4, 5, 6 3 2 VOL + MENU HELP INPUT VOL - ENTER RESET APA LIGHT 1 1 Plug the AC power cord into the wall outlet. 2 Press the I / 1 key to turn on the power. 3 Press the MENU key. The menu display appears. 4 Select the icon of SET SETTING Menu, the third one, with the M or m key, then press the , or ENTER key. The SET SETTING Menu appears. SET SETTING INPUT-A STATUS: ON INPUT-A: COMPUTER AUTO INPUT SEL: OFF LANGUAGE: ENGLISH SPEAKER: ON POWER SAVING: OFF SIRCS RECEIVER: FRONT&REAR 5 Select LANGUAGE with the M or m key, then press the , or ENTER key. 6 Select the language desired with the M or m key, then press the < or ENTER key. The menu changes into the selected language . To clear the menu display Press the MENU key. The menu display disappears automatically if no key is pressed for one minute.
-
 1
1 -
2
-
3
-
4
-
5
-
6
-
7
-
8
-
9
-
10
-
11
-
12
-
 13
13 -
 14
14 -
 15
15 -
 16
16 -
 17
17 -
 18
18 -
 19
19 -
 20
20 -
 21
21 -
 22
22 -
 23
23 -
24
-
25
-
26
-
27
-
28
-
29
-
30
-
31
-
32
-
33
-
34
-
35
-
36
-
37
-
38
-
39
-
40
-
41
-
42
-
43
-
44
-
45
-
46
-
47
-
48
-
49
-
50
-
51
-
52
-
53
-
54
-
55
-
56
-
57
-
58
-
59
-
60
-
61
-
62
-
63
-
64
-
65
-
66
-
67
-
68
-
69
-
70
-
71
-
72
-
73
-
74
-
75
-
76
-
77
-
78
-
79
-
80
-
81
-
82
-
83
-
84
-
85
-
86
-
87
-
88
-
89
-
90
-
91
-
92
-
93
-
94
-
95
-
96
-
97
-
98
-
99
-
100
-
101
-
102
-
103
-
104
-
105
-
106
-
107
-
108
-
109
-
110
-
111
-
112
-
113
-
114
-
115
-
116
-
117
-
118
-
119
-
120
-
121
-
122
 |
 |