TEAC AD-RW900 AD-RW900 - Page 32
TEAC AD-RW900 Manual
 |
View all TEAC AD-RW900 manuals
Add to My Manuals
Save this manual to your list of manuals |
Page 32 highlights
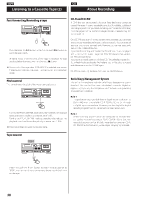
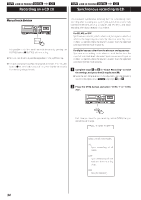
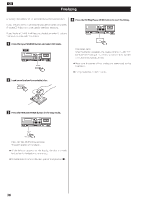
LINE IN PHONO Recording on a CD (2) 4 Select the mode of track number assignment using the AUTO button. < When you record a record or other sources with much interference, more track numbers than expected may be added unintentionally. < The AUTO button cannot be used during recording. If track numbers are not properly added When you record sources with interference via ANALOG, track numbers may not be added if the auto track level is lower than the interference level. In this case, set the auto track level higher than the interference level. When the AUTO button is pressed once, the current auto track level is displayed. Press the AUTO button repeatedly to select another setting. S-LEVEL -60 S-LEVEL -50 S-LEVEL -40 S-LEVEL -30 If there is little interference and the track starts with a small sound resulting in the beginning of the recorded track being truncated, set the auto track level lower. Noise Examples S-LEVEL Quiet CD, MD -60 -50 -40 Loud Record, cassette tape -30 MANUAL < After 2 seconds have passed, the display returns to the track/ time display. S-LEVEL-60/50/40/30 (The track numbers are automatically added) The auto track function activates and "AUTO TRACK" appears. The displayed number indicates the auto track level. The track numbers are automatically added during recording. If a track change is detected via DIGITAL, or if silence (lower than the auto track level) continues for three seconds or longer and then the next track starts (sound becomes louder than the auto track level) via ANALOG, the track numbers are automatically updated. 5 (When recording from a tape , LINE IN or PHONO) Adjust the recording level. Before recording, adjust the recording level. Failure to do so could cause the recorded sound to be distorted or noisy. 1. Play the source (cassette tape or external device) to be recorded. 2. Use the REC LEVEL knob to adjust the recording level so that the loudest sound never lights the "OVER" indicator on the peak level meter. MANUAL (The track numbers are not automatically added) In MANUAL mode, the track numbers are not automatically added. To add track numbers manually, press the RECORD button (K RECORD). < The setting can be configured for DIGITAL and ANALOG respectively. When the power is turned on, the setting is -60 dB for DIGITAL, -50 dB for LINE IN, -40 dB for TAPE and -30 dB for PHONO IN. < If the input source is changed, the S-LEVEL setting returns to the setting that had been set when the unit was turned on. < If a CD is recorded via DIGITAL ( ), the track numbers are added based on the CD's digital signals. There is usually no need to change the auto track level. < In digital recording, even if the auto track function is activated, track numbers may not be added depending on the digital source player. In such a case, add track numbers manually (see page 34). < When you record digital broadcasts or other sources without track numbers, track numbers are not added even if the auto track function is activated. To add a track number, press the RECORD button (K RECORD) while recording a track. < When you record classical music or other sources containing silent parts via ANALOG, track numbers may not be properly added even if the auto track function is activated. To add a track number in this case, deactivate the auto track function, and press the RECORD button (K RECORD) while recording a track. < Different sources to be recorded have different volumes. In order to record at the optimal volume for each source, it is necessary to adjust the recording level for each source. < You cannot adjust the recording level when recording from a DIGITAL source. 32
-
 1
1 -
2
-
3
-
4
-
5
-
6
-
7
-
8
-
9
-
10
-
11
-
12
-
13
-
14
-
15
-
16
-
17
-
18
-
19
-
20
-
21
-
22
-
23
-
24
-
25
-
26
-
 27
27 -
 28
28 -
 29
29 -
 30
30 -
 31
31 -
 32
32 -
 33
33 -
 34
34 -
 35
35 -
 36
36 -
 37
37 -
38
-
39
-
40
-
41
-
42
-
43
-
44
-
45
-
46
-
47
-
48
-
49
-
50
-
51
-
52
 |
 |
