TEAC AD-RW900 AD-RW900 - Page 34
TEAC AD-RW900 Manual
 |
View all TEAC AD-RW900 manuals
Add to My Manuals
Save this manual to your list of manuals |
Page 34 highlights
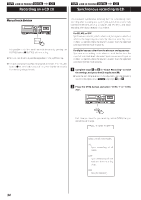
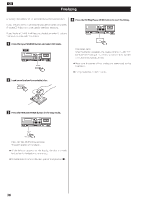
LINE IN PHONO LINE IN PHONO Recording on a CD (3) Manual track division Synchronous recording to CD The convenient synchronous recording function automatically starts recording when receiving analog or digital signals from an externally connected device such as a CD player and MD deck, and stops recording when signal reception is complete. For CD, MD, or DAT Synchronous recording starts when a digital signal is detected, which is the beginning of a track. Synchronous recording stops if there is a period where the sound is quieter than the specified auto track level lasting five seconds. It is possible to divide a track into multiple tracks by pressing the RECORD button (K RECORD) while recording. < Manual track division is possible regardless of the AUTO setting. < A track cannot be less than 10 seconds in length. The RECORD button (K RECORD) will not work if it is pressed within 10 seconds from the beginning of a track. For digital sources other than the above or analog sources Synchronous recording starts when a sound louder than the specified auto track level is detected. Synchronous recording stops if there is a period where the sound is quieter than the specified auto track level lasting 8 seconds. 1 Complete steps 1 to 5 in "About Recording" to make the settings, and press the CD stop button (H). < Since the recording level cannot be adjusted when the recording source is the digital input ( ), skip steps 4 and 5 2 Press the SYNC button and select "SYNC 1" or "SYNC ALL". Each time you press the sync recording button (SYNC), the sync recording will change. Y Y Select one of three modes. ALL Sync recording of all tracks. ONE Sync recording of one track and then recording stops. OFF No sync recording. 34
-
 1
1 -
2
-
3
-
4
-
5
-
6
-
7
-
8
-
9
-
10
-
11
-
12
-
13
-
14
-
15
-
16
-
17
-
18
-
19
-
20
-
21
-
22
-
23
-
24
-
25
-
26
-
27
-
28
-
 29
29 -
 30
30 -
 31
31 -
 32
32 -
 33
33 -
 34
34 -
 35
35 -
 36
36 -
 37
37 -
 38
38 -
 39
39 -
40
-
41
-
42
-
43
-
44
-
45
-
46
-
47
-
48
-
49
-
50
-
51
-
52
 |
 |
