TEAC AD-RW900 AD-RW900 - Page 38
TEAC AD-RW900 Manual
 |
View all TEAC AD-RW900 manuals
Add to My Manuals
Save this manual to your list of manuals |
Page 38 highlights
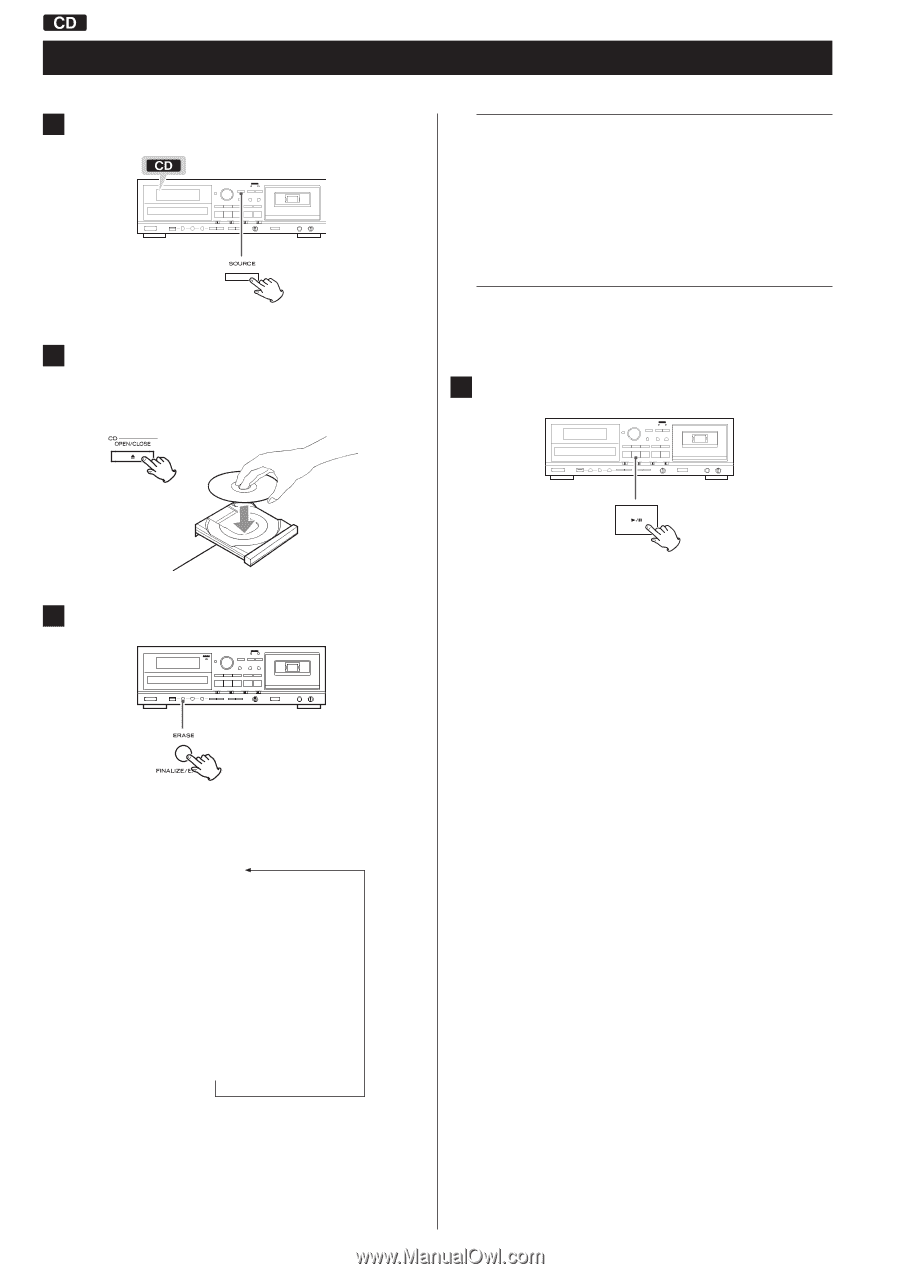
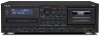
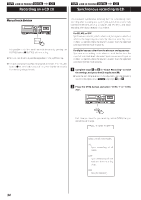
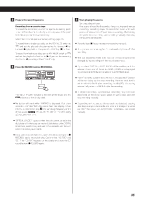
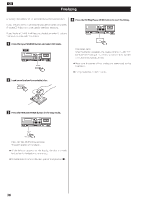
Erasing tracks from a disc (CD-RW only) 1 Press the input SOURCE button and select CD mode. Erasing the last track Press the FINALIZE/ERASE button until "ERASE" and the last track number appear on the display. < You can also erase all the tracks from the currently selected track number to the last track at once. To do this, use a skip (. or /) button to select the track from which you want to start erasing. (You cannot erase only certain tracks before the last track.) Erasing all tracks (ordinary mode) < Press the FINALIZE/ERASE button until "ERASE DISC" appears on the display. 2 Load a CD-RW that has not been finalized or has been unfinalized. < If you load a finalized disc, "UNFINALIZE" will appear. You must unfinalize the disc before you can erase tracks on it (page 37). 4 Press a CD Play/Pause (t/J) button to start erasing. 3 Press the FINALIZE/ERASE button in the stop mode. The track(s) will be erased. After erasure completes, the display will return to its ordinary appearance (total number of tracks and total playback time). < Do not turn off the power or disconnect the power cord during erasure. < During erasure, buttons will not function when pushed. < Erasure cannot be undone! Be sure that you want to erase the contents of a CD before starting. < Each time the ERASE button is pressed, the display changes as follows: FINALIZE Z ERASE # (# is the last track number) (Not shown if only 1 track recorded) Z ERSAE DISC Z Ordinary playback mode (total number of tracks and total playback time) < If a finalized disc is loaded, "UNFINALIZE" is displayed. Because a finalized disc cannot be erased, you need to unfinalize it first (page 36). 38
-
 1
1 -
2
-
3
-
4
-
5
-
6
-
7
-
8
-
9
-
10
-
11
-
12
-
13
-
14
-
15
-
16
-
17
-
18
-
19
-
20
-
21
-
22
-
23
-
24
-
25
-
26
-
27
-
28
-
29
-
30
-
31
-
32
-
 33
33 -
 34
34 -
 35
35 -
 36
36 -
 37
37 -
 38
38 -
 39
39 -
 40
40 -
 41
41 -
 42
42 -
 43
43 -
44
-
45
-
46
-
47
-
48
-
49
-
50
-
51
-
52
 |
 |