TP-Link AC3200 Archer C3200 V1 User Guide - Page 49
Set Up a Dynamic DNS Service Account, Enable this entry, Advanced, Network, Dynamic DNS. - range
 |
View all TP-Link AC3200 manuals
Add to My Manuals
Save this manual to your list of manuals |
Page 49 highlights
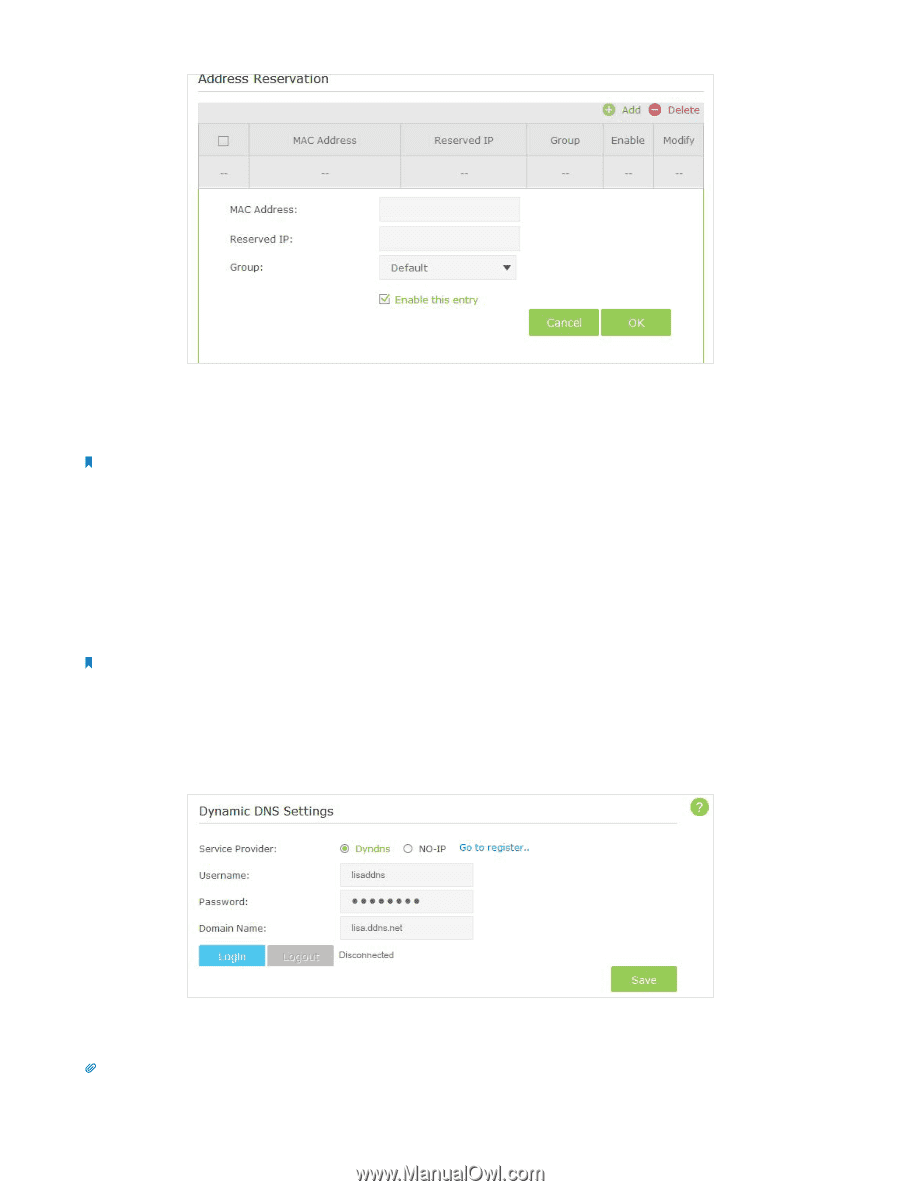
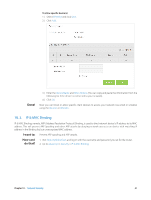
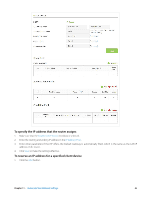
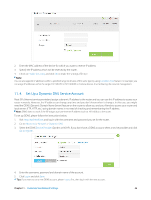
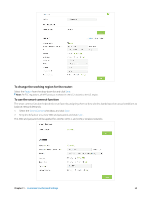
2. Enter the MAC address of the device for which you want to reserve IP address. 3. Specify the IP address which will be reserved by the router. 4. Check to Enable this entry and click OK to make the settings effective. Note: You can also appoint IP addresses within a specified range to devices of the same type by using Condition Pool feature. For example, you can assign IP addresses within the range (192.168.0.50 to192.168.0.80) to Camera devices, thus facilitating the network management. 11. 4. Set Up a Dynamic DNS Service Account Most ISPs (Internet service provieders) assign a dynamic IP address to the router and you can use this IP address to access your router remotely. However, the IP address can change any time and you don't know when it changes. In this case, you might need the DDNS (Dynamic Domain Name Server) feature on the router to allow you and your friends to access your router and local servers (FTP, HTTP, etc.) using domain name, in no need of checking and remembering the IP address. Note: DDNS does not work if the ISP assigns a private Internet IP address (such as 192.168.0.x) to the router. To set up DDNS, please follow the instructions below: 1. Visit http://tplinkwifi.net, and log in with the username and password you set for the router. 2. Go to Advanced > Network > Dynamic DNS. 3. Select the DDNS Service Provider (Dyndns or NO-IP). If you don't have a DDNS account, select a service provider and click Go to register. 4. Enter the username, password and domain name of the account. 5. Click Login and click Save. Tips: If you want to use a new DDNS account, please Logout first, then log in with the new account. Chapter 11 . Customize Your Network Settings 46
-
 1
1 -
2
-
3
-
4
-
5
-
6
-
7
-
8
-
9
-
10
-
11
-
12
-
13
-
14
-
15
-
16
-
17
-
18
-
19
-
20
-
21
-
22
-
23
-
24
-
25
-
26
-
27
-
28
-
29
-
30
-
31
-
32
-
33
-
34
-
35
-
36
-
37
-
38
-
39
-
40
-
41
-
42
-
43
-
 44
44 -
 45
45 -
 46
46 -
 47
47 -
 48
48 -
 49
49 -
 50
50 -
 51
51 -
 52
52 -
 53
53 -
 54
54 -
55
-
56
-
57
-
58
-
59
-
60
-
61
-
62
-
63
-
64
-
65
-
66
-
67
-
68
-
69
-
70
-
71
-
72
-
73
-
74
-
75
-
76
-
77
-
78
-
79
-
80
-
81
-
82
-
83
 |
 |