TP-Link TL-SG3109 User Guide - Page 25
Desktop or Shelf Installation, 3.2.2 Rack Installation
 |
UPC - 845973020484
View all TP-Link TL-SG3109 manuals
Add to My Manuals
Save this manual to your list of manuals |
Page 25 highlights
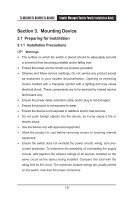
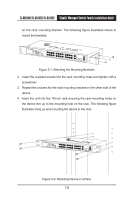
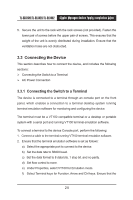
TL-SG3109/TL-SL3428/TL-SL3452 Gigabit Managed Switch Family Installation Guide 3.2.1 Desktop or Shelf Installation When installing the switch on a desktop or shelf, the rubber feet included with the device should first be attached. Attach these cushioning feet on the bottom at each corner of the device. Ensure the surface is be able to support the weight of the device and the device cables. To install the device on a surface, perform the following: 1. Attach the rubber feet on the bottom of the device. 2. Set device down on a flat surface, while leaving 2 inches on each side and 5 inches at the back. 3. Ensure that the device has proper ventilation by allowing adequate space for ventilation between the device and the objects around the device. 3.2.2 Rack Installation The device can be mounted in an EIA standard-sized, 19-inch rack, which can be placed in a wiring closet with other equipment. To install, the device the mounting brackets must first be attached on the devices's sides. Note Disconnect all cables from the unit before mounting the device in a rack or cabinet. When mounting multiple devices into a rack, mount the devices from the bottom up. To install the device in a rack, perform the following: 1. Place the supplied rack-mounting bracket on one side of the device ensuring the mounting holes on the device line up to the mounting holes 18
-
 1
1 -
2
-
3
-
4
-
5
-
6
-
7
-
8
-
9
-
10
-
11
-
12
-
13
-
14
-
15
-
16
-
17
-
18
-
19
-
 20
20 -
 21
21 -
 22
22 -
 23
23 -
 24
24 -
 25
25 -
 26
26 -
 27
27 -
 28
28 -
 29
29 -
 30
30 -
31
-
32
-
33
-
34
-
35
-
36
-
37
-
38
-
39
-
40
-
41
-
42
-
43
-
44
-
45
-
46
-
47
-
48
-
49
-
50
-
51
-
52
-
53
-
54
 |
 |
