TRENDnet THA-103AC User's Guide - Page 5
TRENDnet User's Guide, 103AC - setup
 |
View all TRENDnet THA-103AC manuals
Add to My Manuals
Save this manual to your list of manuals |
Page 5 highlights
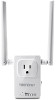
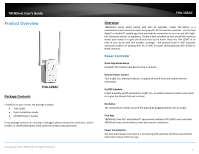
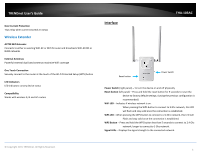
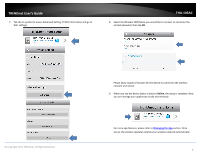
TRENDnet User's Guide Over Current Protection Trips relay when current exceeds 15 Amps Wireless Extender AC750 WiFi Extender Connects to either an existing WiFi AC or WiFi N router and broadcasts WiFi AC433 or N300 networks External Antennas Powerful external dual band antennas maximize WiFi coverage One Touch Connection Securely connect to the router at the touch of the Wi‐Fi Protected Setup (WPS) button LED Indicators LED indicators convey device status Compatibility Works with wireless G, N and AC routers Interface THA‐103AC Reset button Power Switch Power Switch (right panel) - To turn the device on and off physically Reset button (left panel) - Press and hold the reset button for 5 seconds to reset the device to factory default settings. (saving the previous configuration is recommended) WiFi LED - Indicates if wireless network is on. When pressing the WPS button to connect to 5 Ghz network, this LED will flash and stay solid once the connection is established. WPS LED - When pressing the WPS button to connect to 2.4 Ghz network, this LED will Flash and stay solid once the connection is established. WPS Button - Press and hold the WPS button less than 5 seconds to connect to 2.4 Ghz network, longer to connect to 5 Ghz network. Signal LEDs - Displays the signal strength to the connected network. © Copyright 2015 TRENDnet. All Rights Reserved. 3
-
 1
1 -
 2
2 -
 3
3 -
 4
4 -
 5
5 -
 6
6 -
 7
7 -
 8
8 -
 9
9 -
 10
10 -
 11
11 -
12
-
13
-
14
-
15
-
16
-
17
-
18
-
19
-
20
-
21
-
22
-
23
-
24
-
25
-
26
-
27
-
28
-
29
 |
 |
