Thermador CIT36YWBB Instructions for Use - Page 12
Operation
 |
View all Thermador CIT36YWBB manuals
Add to My Manuals
Save this manual to your list of manuals |
Page 12 highlights
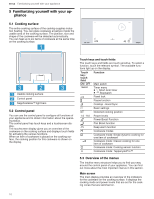
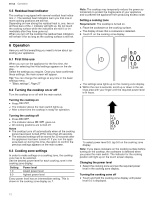
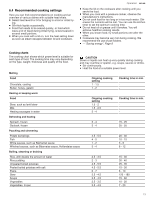
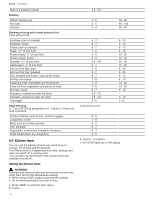
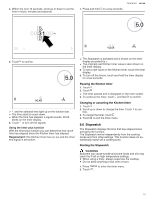
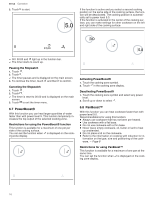
en-us Operation 5.5 Residual heat indicator The cooktop is equipped with several residual heat indicators . The residual heat indicators warn you that one or more cooking positions are still hot. Depending on how strong the residual heat is, one, two or all three bars of the indicator will light up. Do not touch the cooking surface while the indicators are still lit or immediately after they have gone out. When you turn off the cooktop the residual heat indicators will remain lit for as long as the cooking surface is still hot. Note: The cooktop may temporarily reduce the power automatically to protect the fragile parts of your appliance and to prevent the appliance from producing excess noise. Setting a cooking zone Requirement: The cooktop is turned on. 1. Place the cookware on the cooking surface. a The display shows that a cookware is detected. 2. Touch on the cooking zone display. Operation 6 Operation Operation Here you will find everything you need to know about operating your appliance. 6.1 First time use When you turn on the appliance for the first time, the menu for selecting the initial settings appears on the display. Select the settings you require. Once you have confirmed these settings, the main screen will appear. Tip: You can change the settings at any time in the basic settings menu. → "Basic settings", Page 27 6.2 Turning the cooktop on or off Turn the cooktop on or off with the main switch. Turning the cooktop on ▶ Press . a The indicator above the main switch lights up. a After a short time the cooktop is ready for operation. Turning the cooktop off ▶ Press . a The indicator above goes out. a All cooking positions are turned off. Notes ¡ The cooktop turns off automatically when all the cooking zones have been turned off for more than 20 seconds. ¡ The selected settings will be stored for 30 seconds after the appliance has been turned off. If you turn the appli- ance back on during this time, the option to confirm the previous settings appears on the main screen. 6.3 Cooking zone settings In order to make settings on a cooking zone, the cooking zone has to be selected. Set the desired power level for each cooking zone in the cooking zone display. Setting 1.0 9.0 Power level lowest power level highest power level Every power level has an intermediate setting. This is shown in the cooking zone display as . . a The settings area lights up on the cooking zone display. 3. Within the next 4 seconds, scroll up or down in the set- tings area with your finger until the required power level is in focus. To select power level 9.0, tap 9.0 on the cooking zone display. Note: If you place cookware on the cooking surface before turning on the cooktop, the cookware is detected when you press the main switch. The indicator for the cooking position will light up on the touch screen display. Changing the power level ▶ Select the cooking zone and set the required power level in the cooking zone display. Turning the cooking zone off ▶ Touch and hold the cooking zone display until power level 0.0 is displayed. 12
-
 1
1 -
2
-
3
-
4
-
5
-
6
-
 7
7 -
 8
8 -
 9
9 -
 10
10 -
 11
11 -
 12
12 -
 13
13 -
 14
14 -
 15
15 -
 16
16 -
 17
17 -
18
-
19
-
20
-
21
-
22
-
23
-
24
-
25
-
26
-
27
-
28
-
29
-
30
-
31
-
32
-
33
-
34
-
35
-
36
-
37
-
38
-
39
-
40
 |
 |
