Thermador HMWB36WS Installation Instructions - Page 13
Installation Instructions
 |
View all Thermador HMWB36WS manuals
Add to My Manuals
Save this manual to your list of manuals |
Page 13 highlights
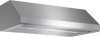
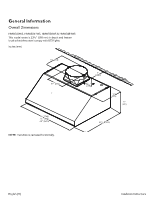
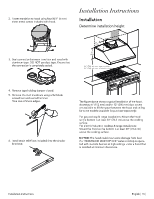
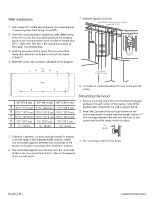
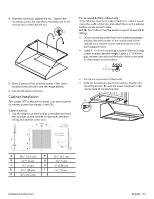
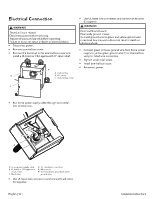
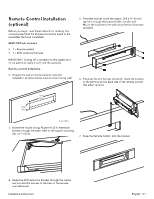
2. Fasten transition to hood using four (4)1⁄4'' (6 mm) sheet metal screws included with hood. Installation Instructions Installation Determine installation height 3. Seal connection between transition and hood with aluminum tape. DO NOT use duct tape. Ensure that the connection is completely sealed. 45/16" (110) 11" (280) 30" (762) min over a gas cooktop 30" (762) min over an electric cooktop 4. Remove tape holding damper closed. 5. Remove the duct knockouts using a lat blade screwdriver and a small hammer. Take care of sharp edges. 6. Install strain relief (not included) into the circular knockout. The igure above shows a typical installation of the hood. Accessory 6'' (152 mm) and/or 12'' (305 mm) duct covers are available to ill the space between the hood and ceiling for some models (available for purchase separately). For gas cooktop & range installations: Mount the hood so the bottom is at least 30" (76.2 cm) above the cooking surface. For electric/induction cooktop & range installations: Mount the hood so the bottom is at least 30" (76.2 cm) above the cooking surface. NOTICE: The hood could incur some damage from heat if a THERMADOR MASTERPIECE® series cooktop is operated with multiple burners at high settings under a hood that is installed at minimum clearances. Installation Instructions English | 13 |
-
 1
1 -
2
-
3
-
4
-
5
-
6
-
7
-
 8
8 -
 9
9 -
 10
10 -
 11
11 -
 12
12 -
 13
13 -
 14
14 -
 15
15 -
 16
16 -
 17
17 -
 18
18 -
19
-
20
-
21
-
22
-
23
-
24
-
25
-
26
-
27
-
28
-
29
-
30
-
31
-
32
-
33
-
34
-
35
-
36
-
37
-
38
-
39
-
40
-
41
-
42
-
43
-
44
-
45
-
46
-
47
-
48
-
49
-
50
-
51
-
52
-
53
-
54
-
55
-
56
-
57
-
58
-
59
-
60
 |
 |
