Thermador HMWB36WS Installation Instructions - Page 19
mounting bracket with the supplied stainless screws.
 |
View all Thermador HMWB36WS manuals
Add to My Manuals
Save this manual to your list of manuals |
Page 19 highlights
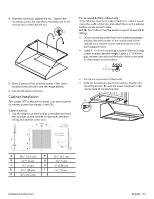
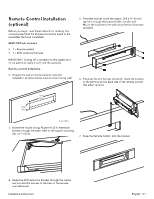
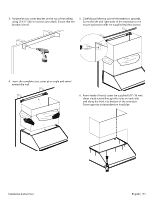
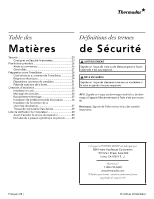
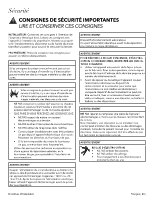
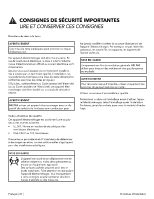
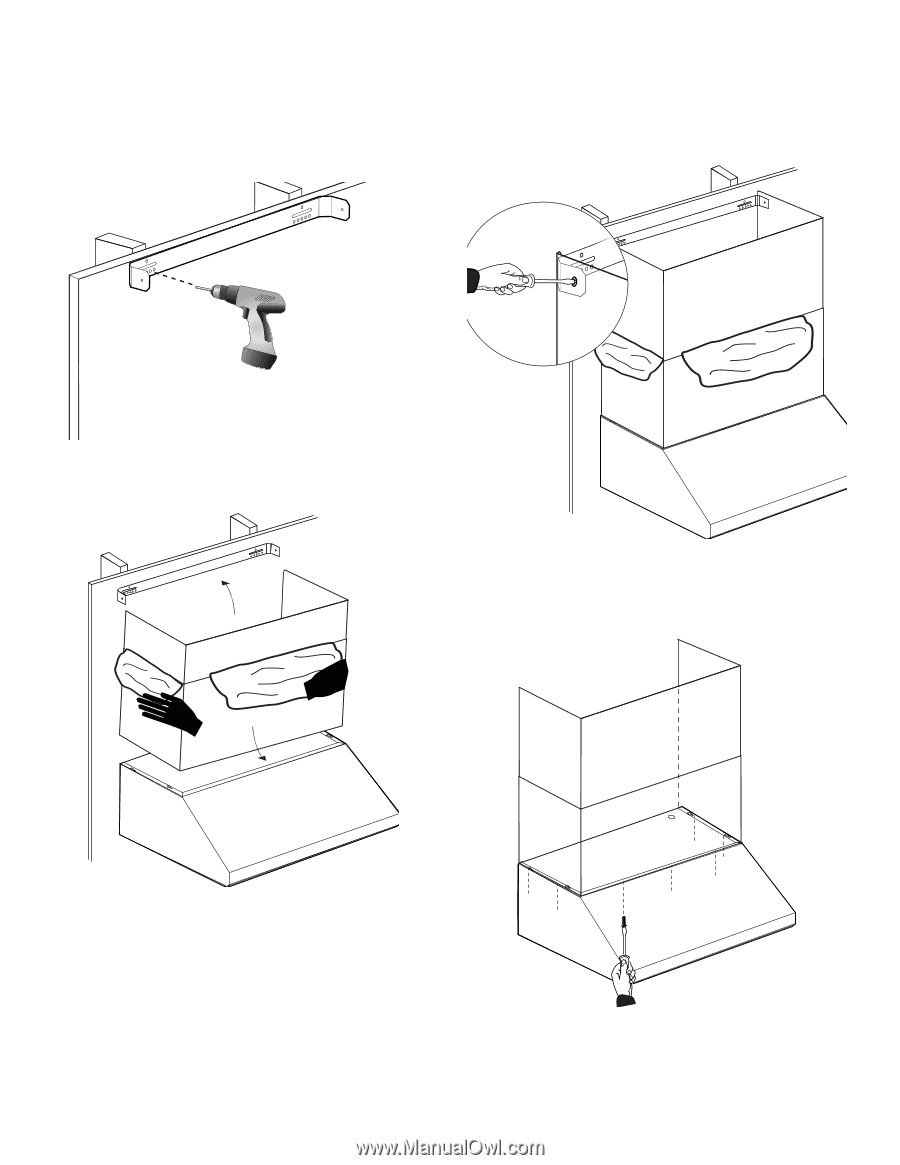
3. Mount the duct cover bracket on the top of the ceiling using (2) 1½'' (38 mm) screws (provided). Ensure that the bracket is level. 5. Carefully pull the top part of the extension upwards. Screw the left and right sides of the extension to the mounting bracket with the supplied stainless screws. 4. Insert the complete duct cover at an angle and swivel toward the wall. 6. From inside of hood, screw the supplied 5/8'' (16 mm) sheet metal screws through the holes on each side and along the front into bottom of the extension. Screw quantity is dependent on hood size. Installation Instructions English | 19 |
-
 1
1 -
2
-
3
-
4
-
5
-
6
-
7
-
8
-
9
-
10
-
11
-
12
-
13
-
 14
14 -
 15
15 -
 16
16 -
 17
17 -
 18
18 -
 19
19 -
 20
20 -
 21
21 -
 22
22 -
 23
23 -
 24
24 -
25
-
26
-
27
-
28
-
29
-
30
-
31
-
32
-
33
-
34
-
35
-
36
-
37
-
38
-
39
-
40
-
41
-
42
-
43
-
44
-
45
-
46
-
47
-
48
-
49
-
50
-
51
-
52
-
53
-
54
-
55
-
56
-
57
-
58
-
59
-
60
 |
 |
Installation Instructions
English | 19 |
3.
Mount the duct cover bracket on the top of the ceiling
using (2) 1½’’ (38 mm) screws (provided). Ensure that the
bracket is level.
4.
Insert the complete duct cover at an angle and swivel
toward the wall.
5.
Carefully pull the top part of the extension upwards.
Screw the left and right sides of the extension to the
mounting bracket with the supplied stainless screws.
6.
From inside of hood, screw the supplied 5/8’’ (16 mm)
sheet metal screws through the holes on each side
and along the front into bottom of the extension.
Screw quantity is dependent on hood size.