Thermador HMWB36WS Installation Instructions - Page 7
Advance Planning
 |
View all Thermador HMWB36WS manuals
Add to My Manuals
Save this manual to your list of manuals |
Page 7 highlights
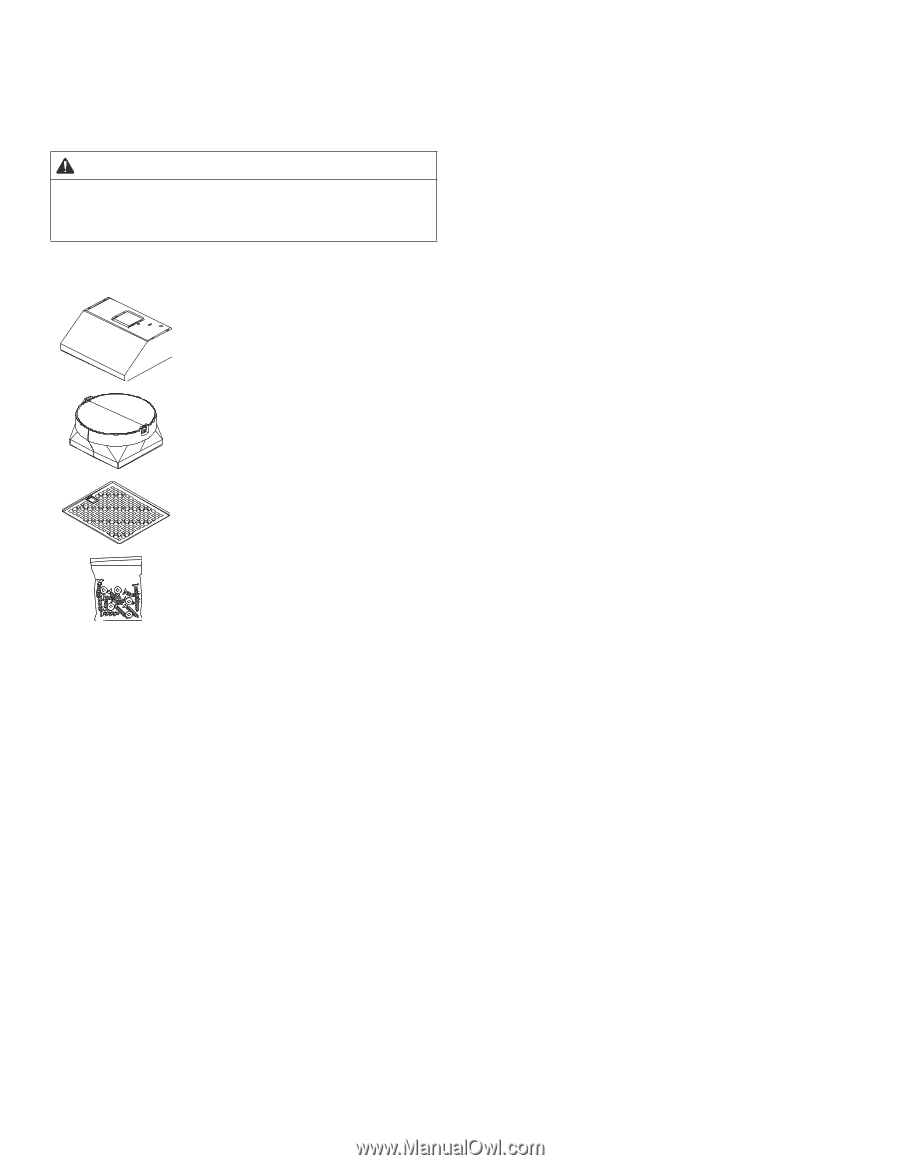
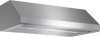
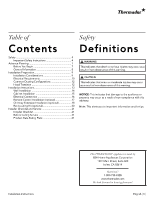
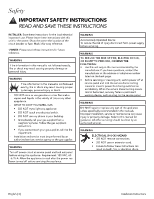
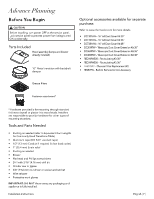
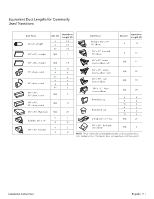
Advance Planning Before You Begin CAUTION Before installing, turn power OFF at the service panel. Lock service panel to prevent power from being turned ON accidentally. Parts Included Hood assembly (lamps and blower already installed) 10" Metal transition with backdraft damper Optional accessories available for separate purchase. Refer to www.thermador.com for more details. • DCT3016W- 16"tall Duct Cover Kit 30" • DCT3616W- 16"tall Duct Cover Kit 36" • DCT4816W- 16"tall Duct Cover Kit 48" • DC30MTW- Telescopic Duct Cover Extension Kit 30" • DC36MTW- Telescopic Duct Cover Extension Kit 36" • DC48MTW- Telescopic Duct Cover Extension Kit 48" • RECHMWB30 - Recirculating Kit 30" • RECHMWB36 - Recirculating Kit 36" • 00674939 - Charcoal Filter Replacement Kit • REMCPW- Built-In Remote Control Accessory Grease ilters Fastener assortment* * Hardware provided is for mounting through standard thickness drywall or plaster into wood studs. Installers are responsible to provide hardware for other types of mounting situations. Tools and Parts Needed • Ducting as needed (refer to Equivalent Duct Lengths for Commonly Used Transitions Table) • Aluminum tape (DO NOT use duct tape) • 1/2'' (13 mm) Conduit if required (follow local codes) • 1'' (25.4 mm) Strain relief • Ducting as needed • Blower • Flat head and Phillips screwdrivers • Drill with 3/16'' (4.76 mm) drill bit • Circular saw or jigsaw • 3/8'' (9.52 mm) nut driver or socket and ratchet • Wire stripper • Protective work gloves IMPORTANT: DO NOT throw away any packaging until appliance is fully installed. Installation Instructions English | 7 |
-
 1
1 -
 2
2 -
 3
3 -
 4
4 -
 5
5 -
 6
6 -
 7
7 -
 8
8 -
 9
9 -
 10
10 -
 11
11 -
 12
12 -
13
-
14
-
15
-
16
-
17
-
18
-
19
-
20
-
21
-
22
-
23
-
24
-
25
-
26
-
27
-
28
-
29
-
30
-
31
-
32
-
33
-
34
-
35
-
36
-
37
-
38
-
39
-
40
-
41
-
42
-
43
-
44
-
45
-
46
-
47
-
48
-
49
-
50
-
51
-
52
-
53
-
54
-
55
-
56
-
57
-
58
-
59
-
60
 |
 |