Toshiba Qosmio G50 PQG55C-01R039 Users Manual Canada; English - Page 182
Battery Charger, USB, USB FDD Kit
 |
View all Toshiba Qosmio G50 PQG55C-01R039 manuals
Add to My Manuals
Save this manual to your list of manuals |
Page 182 highlights
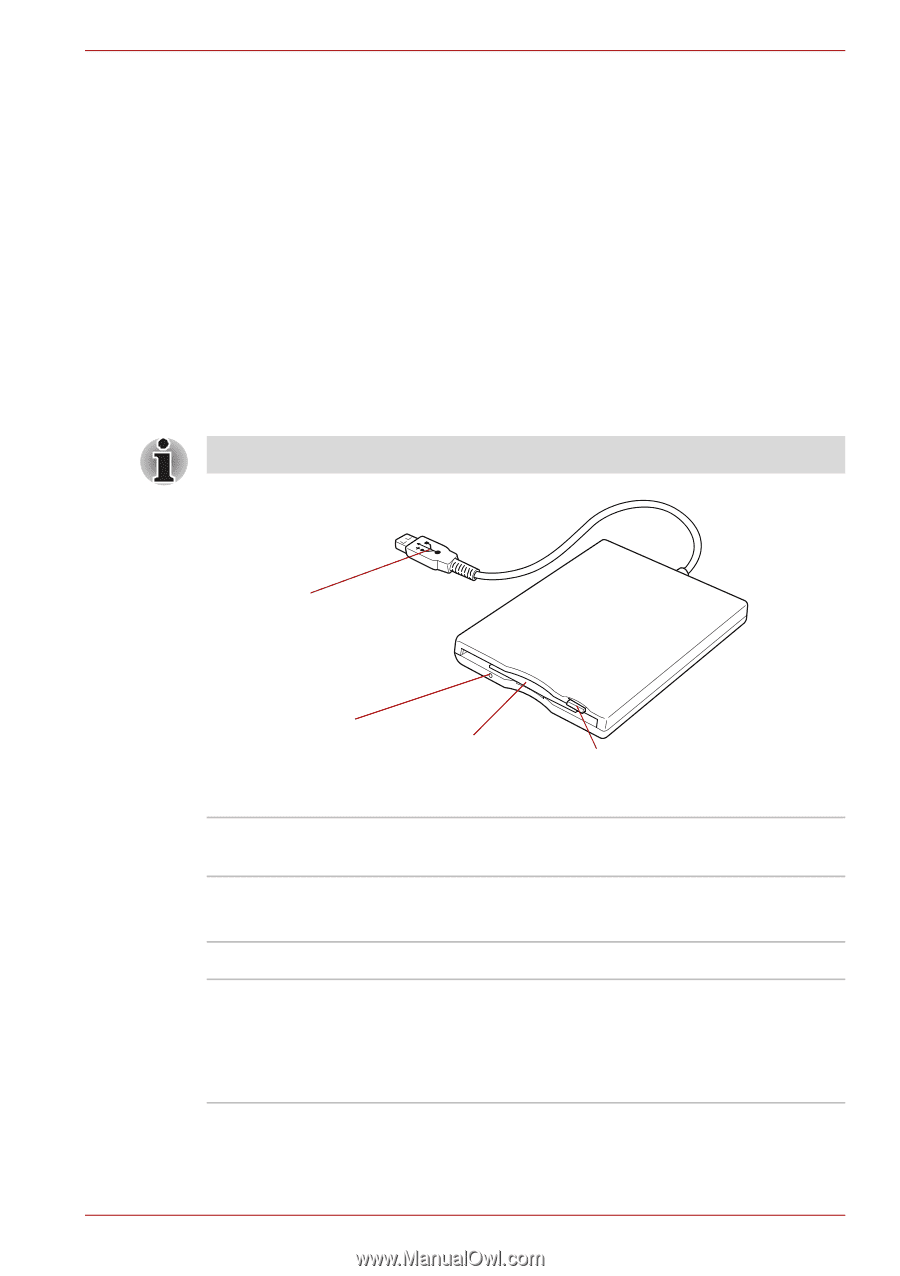
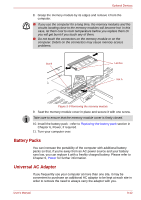
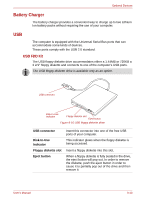
Optional Devices Battery Charger The battery charger provides a convenient way to charge up to two Lithium Ion battery packs without requiring the use of your computer. USB The computer is equipped with the Universal Serial Bus ports that can accommodate some kinds of devices. These ports comply with the USB 2.0 standard. USB FDD Kit The USB floppy diskette drive accommodates either a 1.44MB or 720KB a 3 2/1" floppy diskette and connects to one of the computer's USB ports. The USB floppy diskette drive is available only as an option. USB connector Disk-In-Use Indicator Floppy diskette slot Eject button Figure 9-10 USB floppy diskette drive USB connector Disk-In-Use Indicator Floppy diskette slot Eject button Insert this connector into one of the free USB ports of your computer. This indicator glows when the floppy diskette is being accessed. Insert a floppy diskette into this slot. When a floppy diskette is fully seated in the drive, the eject button will pop out. In order to remove the diskette, push the eject button in order to cause it to partially pop out of the drive and then remove it. User's Manual 9-13
-
 1
1 -
2
-
3
-
4
-
5
-
6
-
7
-
8
-
9
-
10
-
11
-
12
-
13
-
14
-
15
-
16
-
17
-
18
-
19
-
20
-
21
-
22
-
23
-
24
-
25
-
26
-
27
-
28
-
29
-
30
-
31
-
32
-
33
-
34
-
35
-
36
-
37
-
38
-
39
-
40
-
41
-
42
-
43
-
44
-
45
-
46
-
47
-
48
-
49
-
50
-
51
-
52
-
53
-
54
-
55
-
56
-
57
-
58
-
59
-
60
-
61
-
62
-
63
-
64
-
65
-
66
-
67
-
68
-
69
-
70
-
71
-
72
-
73
-
74
-
75
-
76
-
77
-
78
-
79
-
80
-
81
-
82
-
83
-
84
-
85
-
86
-
87
-
88
-
89
-
90
-
91
-
92
-
93
-
94
-
95
-
96
-
97
-
98
-
99
-
100
-
101
-
102
-
103
-
104
-
105
-
106
-
107
-
108
-
109
-
110
-
111
-
112
-
113
-
114
-
115
-
116
-
117
-
118
-
119
-
120
-
121
-
122
-
123
-
124
-
125
-
126
-
127
-
128
-
129
-
130
-
131
-
132
-
133
-
134
-
135
-
136
-
137
-
138
-
139
-
140
-
141
-
142
-
143
-
144
-
145
-
146
-
147
-
148
-
149
-
150
-
151
-
152
-
153
-
154
-
155
-
156
-
157
-
158
-
159
-
160
-
161
-
162
-
163
-
164
-
165
-
166
-
167
-
168
-
169
-
170
-
171
-
172
-
173
-
174
-
175
-
176
-
 177
177 -
 178
178 -
 179
179 -
 180
180 -
 181
181 -
 182
182 -
 183
183 -
 184
184 -
 185
185 -
 186
186 -
 187
187 -
188
-
189
-
190
-
191
-
192
-
193
-
194
-
195
-
196
-
197
-
198
-
199
-
200
-
201
-
202
-
203
-
204
-
205
-
206
-
207
-
208
-
209
-
210
-
211
-
212
-
213
-
214
-
215
-
216
-
217
-
218
-
219
-
220
-
221
-
222
-
223
-
224
-
225
-
226
-
227
-
228
-
229
-
230
-
231
-
232
-
233
-
234
-
235
-
236
-
237
-
238
-
239
-
240
-
241
-
242
-
243
-
244
-
245
-
246
-
247
-
248
-
249
-
250
-
251
-
252
-
253
-
254
-
255
-
256
-
257
 |
 |