Toshiba Qosmio G50 PQG55C-01R039 Users Manual Canada; English - Page 58
System, indicators, Display, Controller and Video mode, AV functions, Using the Touch Pad
 |
View all Toshiba Qosmio G50 PQG55C-01R039 manuals
Add to My Manuals
Save this manual to your list of manuals |
Page 58 highlights
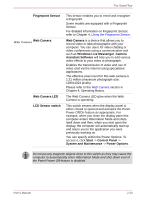
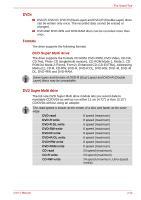
The Grand Tour System indicators Display hinge Stereo speakers These LED indicators allow you to monitor the status of various computer functions and are described in more detail within the System indicators section. The display hinge allows the display panel to be position at a variety of easy-to-view angles. The speakers emit sound generated by your software as well as audio alarms, such as low battery condition, generated by the system. Keep foreign objects out of the speakers. Never allow metal objects, such as screws, staples and paper clips, to enter the computer or keyboard. Foreign metal objects can create a short circuit, which can cause computer damage and fire, possibly resulting in serious injury. Display screen Front operation panel (nine panels) Power button Please be aware that, when the computer is operating on the AC adaptor, the image displayed on the internal screen will be somewhat brighter than when it operates on battery power. This difference in brightness levels is intended to save power when operating on batteries. For more information on the computer's display, please refer to the Display Controller and Video mode section in Appendix B. Nine panels are available for use: CD/DVD, Play/Pause, Stop, Previous, Next, Mute, Illumination On/Off, Camera, DOLBY. These panels allow you to manage Audio/Video, run applications and access utilities. Refer to Chapter 8, AV functions for details. Press this button to turn the computer's power on and off. Touch Pad Touch Pad control buttons The Touch Pad located in the center of the palm rest is used to control the movement of the onscreen pointer. For more information, please refer to the Using the Touch Pad section in Chapter 4, Operating Basics. The control buttons located below the Touch Pad allow you to select menu items or manipulate text and graphics as designated by the on-screen pointer. User's Manual 2-9
-
 1
1 -
2
-
3
-
4
-
5
-
6
-
7
-
8
-
9
-
10
-
11
-
12
-
13
-
14
-
15
-
16
-
17
-
18
-
19
-
20
-
21
-
22
-
23
-
24
-
25
-
26
-
27
-
28
-
29
-
30
-
31
-
32
-
33
-
34
-
35
-
36
-
37
-
38
-
39
-
40
-
41
-
42
-
43
-
44
-
45
-
46
-
47
-
48
-
49
-
50
-
51
-
52
-
 53
53 -
 54
54 -
 55
55 -
 56
56 -
 57
57 -
 58
58 -
 59
59 -
 60
60 -
 61
61 -
 62
62 -
 63
63 -
64
-
65
-
66
-
67
-
68
-
69
-
70
-
71
-
72
-
73
-
74
-
75
-
76
-
77
-
78
-
79
-
80
-
81
-
82
-
83
-
84
-
85
-
86
-
87
-
88
-
89
-
90
-
91
-
92
-
93
-
94
-
95
-
96
-
97
-
98
-
99
-
100
-
101
-
102
-
103
-
104
-
105
-
106
-
107
-
108
-
109
-
110
-
111
-
112
-
113
-
114
-
115
-
116
-
117
-
118
-
119
-
120
-
121
-
122
-
123
-
124
-
125
-
126
-
127
-
128
-
129
-
130
-
131
-
132
-
133
-
134
-
135
-
136
-
137
-
138
-
139
-
140
-
141
-
142
-
143
-
144
-
145
-
146
-
147
-
148
-
149
-
150
-
151
-
152
-
153
-
154
-
155
-
156
-
157
-
158
-
159
-
160
-
161
-
162
-
163
-
164
-
165
-
166
-
167
-
168
-
169
-
170
-
171
-
172
-
173
-
174
-
175
-
176
-
177
-
178
-
179
-
180
-
181
-
182
-
183
-
184
-
185
-
186
-
187
-
188
-
189
-
190
-
191
-
192
-
193
-
194
-
195
-
196
-
197
-
198
-
199
-
200
-
201
-
202
-
203
-
204
-
205
-
206
-
207
-
208
-
209
-
210
-
211
-
212
-
213
-
214
-
215
-
216
-
217
-
218
-
219
-
220
-
221
-
222
-
223
-
224
-
225
-
226
-
227
-
228
-
229
-
230
-
231
-
232
-
233
-
234
-
235
-
236
-
237
-
238
-
239
-
240
-
241
-
242
-
243
-
244
-
245
-
246
-
247
-
248
-
249
-
250
-
251
-
252
-
253
-
254
-
255
-
256
-
257
 |
 |