Vtech VS112-17 User Manual - Page 17
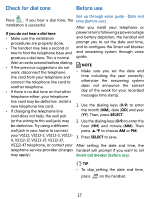
Check for dial tone, Before use
 |
View all Vtech VS112-17 manuals
Add to My Manuals
Save this manual to your list of manuals |
Page 17 highlights
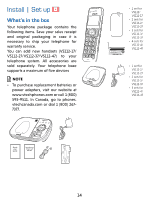
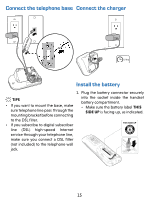
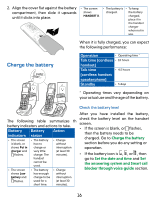
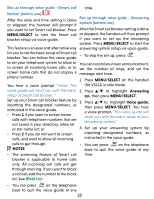
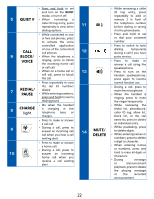
Check for dial tone Before use Set up through voice guide - Date and Press . If you hear a dial tone, the time (before use) installation is successful. After you install your telephone or If you do not hear a dial tone • Make sure the installation procedures are properly done. • The handset may take a second or two to find the telephone base and produce a dial tone. This is normal. power returns following a power outage and battery depletion, the handset will prompt you to set the date and time, and to configure the Smart call blocker and answering system through voice guide. Wait an extra second before dialing. • If the previous suggestions do not NOTE work, disconnect the telephone • Make sure you set the date and line cord from your telephone and time including the year correctly; connect the telephone line cord to otherwise the answering system another telephone. does not announce the correct • If there is no dial tone on that other day of the week for your recorded telephone either, your telephone messages time stamp. line cord may be defective. Install a new telephone line cord. • If changing the telephone line cord does not help, the wall jack 1. Use the dialing keys (0-9) to enter the month (MM), date (DD) and year (YY). Then, press SELECT. (or the wiring to this wall jack) may 2. Use the dialing keys (0-9) to enter the be defective. Try using a different hour (HH) and minute (MM). Then wall jack in your home to connect press p/q to choose AM or PM. your VS112, VS112-2, VS112-3, VS112- 3. Press SELECT to save. 4, VS112-17, VS112-27, VS112-37, VS112-47 telephone, or contact your After setting the date and time, the telephone service provider (charges handset will prompt if you want to set may apply). Smart call blocker (before use). TIP • To skip setting the date and time, press on the handset. 17
-
 1
1 -
2
-
3
-
4
-
5
-
6
-
7
-
8
-
9
-
10
-
11
-
 12
12 -
 13
13 -
 14
14 -
 15
15 -
 16
16 -
 17
17 -
 18
18 -
 19
19 -
 20
20 -
 21
21 -
 22
22 -
23
-
24
-
25
-
26
-
27
-
28
-
29
-
30
-
31
-
32
-
33
-
34
-
35
-
36
-
37
-
38
-
39
-
40
-
41
-
42
-
43
-
44
-
45
-
46
-
47
-
48
-
49
-
50
-
51
-
52
-
53
-
54
-
55
-
56
-
57
-
58
-
59
-
60
-
61
-
62
-
63
-
64
-
65
-
66
-
67
-
68
-
69
-
70
-
71
-
72
-
73
-
74
-
75
-
76
-
77
-
78
-
79
-
80
-
81
-
82
-
83
-
84
 |
 |