Yamaha DVD-S1800 Owner's Manual - Page 19
GETTING STARTED, Step 1: Inserting batteries into the remote control, Step 2: Turning on the power
 |
View all Yamaha DVD-S1800 manuals
Add to My Manuals
Save this manual to your list of manuals |
Page 19 highlights
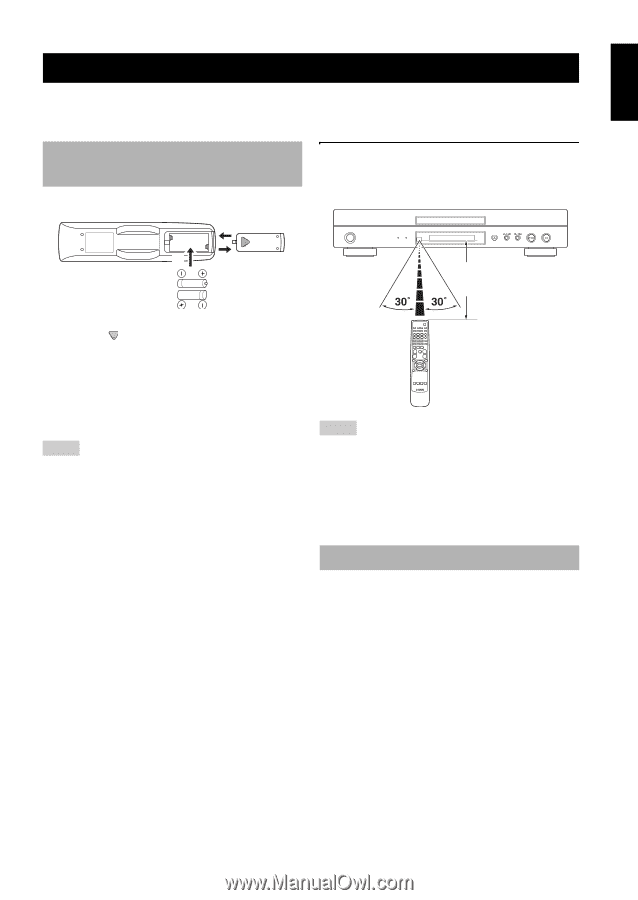
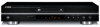
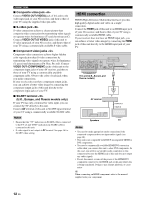
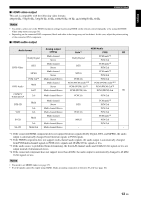
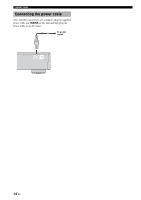
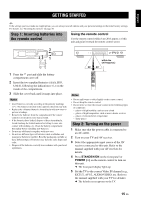
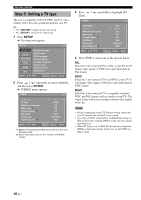
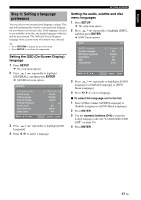
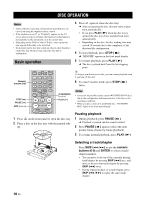
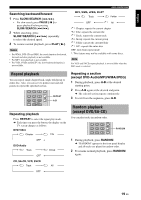
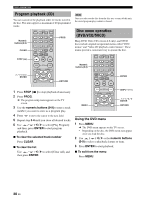
English GETTING STARTED GETTING STARTED y If the settings you have made are inappropriate, you can always reset all options and your personal settings to the initial factory settings. For details, see "Resetting the system" on page 30. Step 1: Inserting batteries into the remote control Using the remote control Use the remote control within 6 m (20 ft approx.) of this unit and point it toward the remote control sensor. 3 2 1 within 6m (20 ft approx.) 1 Press the part and slide the battery compartment cover off. 2 Insert the two supplied batteries (AAA, R03, UM-4), following the indications (+/-) on the inside of the compartment. 3 Slide the cover back until it snaps into place. Notes • Insert batteries correctly according to the polarity markings (+/-). The batteries inserted in the opposite direction may leak. • Replace the exhausted batteries immediately with new ones to prevent a leakage. • Remove the batteries from the compartment if the remote control is not used for more than a month. • If the batteries have leaked, dispose of them immediately. Avoid touching the leaked material or letting it come into contact with clothing, etc. Clean the battery compartment thoroughly before installing new batteries. • Do not use old batteries together with new ones. • Do not use different types of batteries (such as alkaline and manganese batteries) together. Read the packaging carefully as these different types of batteries may have the same shape and color. • Dispose of the batteries correctly in accordance with your local regulations. Notes • Do not spill water or other liquids on the remote control. • Do not drop the remote control. • Do not leave or store the remote control in the following types of conditions: - places of high humidity, such as near a bath - places of high temperature, such as near a heater or stove - places of extremely low temperature - dusty places Step 2: Turning on the power 1 Make sure that the power cable is connected to an AC outlet. 2 Turn on your TV and AV receiver. 3 Select the appropriate input source of the AV receiver connected to this unit. Refer to the manual supplied with your AV receiver for details. 4 Press STANDBY/ON on the front panel or POWER ( l ) on the remote control to turn on this unit. ➜ The front panel display lights up. 5 Set the TV to the correct Video IN channel (e.g., EXT1/2, AV1/2, AUDIO/VIDEO, etc. Refer to the manual supplied with your TV for details). ➜ The default screen appears on the TV. 15 En
-
 1
1 -
2
-
3
-
4
-
5
-
6
-
7
-
8
-
9
-
10
-
11
-
12
-
13
-
 14
14 -
 15
15 -
 16
16 -
 17
17 -
 18
18 -
 19
19 -
 20
20 -
 21
21 -
 22
22 -
 23
23 -
 24
24 -
25
-
26
-
27
-
28
-
29
-
30
-
31
-
32
-
33
-
34
-
35
-
36
-
37
-
38
-
39
-
40
-
41
-
42
-
43
-
44
-
45
-
46
-
47
-
48
-
49
 |
 |