Yamaha DVD-S1800 Owner's Manual - Page 44
TROUBLESHOOTING, Problem, Solution
 |
View all Yamaha DVD-S1800 manuals
Add to My Manuals
Save this manual to your list of manuals |
Page 44 highlights
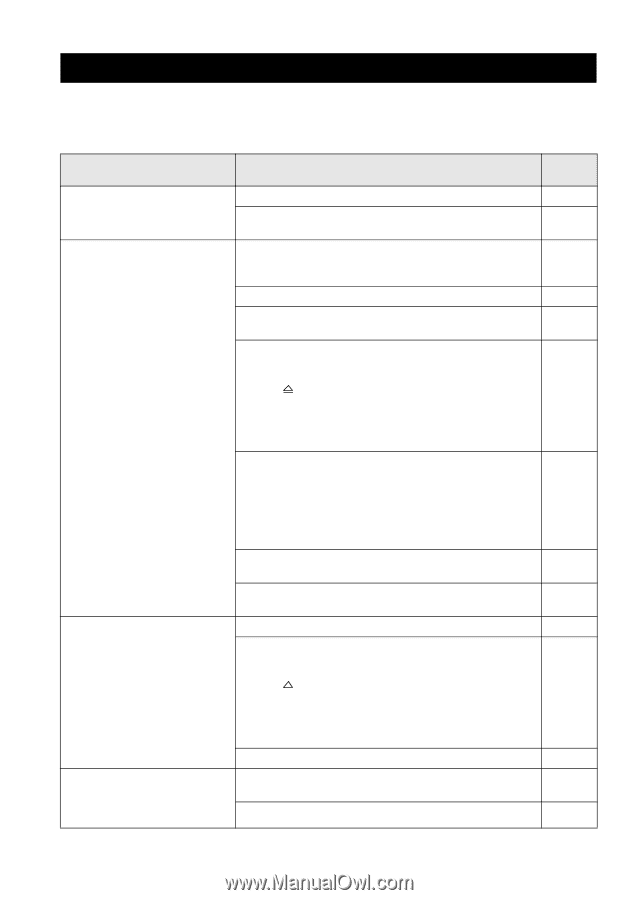
TROUBLESHOOTING TROUBLESHOOTING Refer to the table below when this unit does not function properly. If the problem you are experiencing is not listed below or if the instruction below does not help, turn off this unit, disconnect the power cable, and contact the nearest authorized Yamaha dealer or service center. Problem Solution No power Connect the AC power cable properly. Press STANDBY/ON on the front panel of this unit to turn on the power. No picture Refer to the manual supplied with your TV for correct Video In channel selection. Change the TV channel until you see the DVD screen. Turn on your TV. Make sure that all connections on this unit and on all other components are secure. If [Component] is set to [Progressive], check that you have connected this unit to a progressive scan TV through the component video jacks. Otherwise, follow the steps below to turn off the progressive scan; 1. Press on the front panel to open the disc tray. 2. Press CLEAR on the remote control. 3. Press "2580" using the numeric buttons (0-9) on the remote control. 4. Press AUDIO on the remote control. If [HDMI Video] is set to other than [Auto], check that the resolution is supported by the HDMI-compatible monitor you have connected. Otherwise, follow the steps below to change the setting to [Auto]; 1. Press s twice on the front panel or STOP ( 7 ) twice on the remote control to stop playback. 2. Press and hold s and p/e on the front panel at the same time for three seconds. If the HDMI indicator flashes orange, check that you have connected this unit to an HDCP-compatible component. Check that the video signal output setting matches the video connection. Completely distorted picture or black/white picture Check that the disc is compatible with this unit. Check that the TV type of this unit is set to match that of the disc and your TV. If you set the TV type improperly, follow the steps below to restore the TV Type setting to the default setting; 1. Press on the front panel to open the disc tray. 2. Press CLEAR on the remote control. 3. Press "2580" using the numeric buttons (0-9) on the remote control. 4. Press AUDIO on the remote control. Check the video connection. The screen size looks unnatural, or the caption is displayed only partially on the TV monitor or is not displayed at all Check that the TV setting of this unit matches the screen aspect ratio of your TV. Change the screen size and the aspect ratio of your TV. See page 14 15 - - 10 35 36 12 36 3 16 11 34 - 40 En
-
 1
1 -
2
-
3
-
4
-
5
-
6
-
7
-
8
-
9
-
10
-
11
-
12
-
13
-
14
-
15
-
16
-
17
-
18
-
19
-
20
-
21
-
22
-
23
-
24
-
25
-
26
-
27
-
28
-
29
-
30
-
31
-
32
-
33
-
34
-
35
-
36
-
37
-
38
-
 39
39 -
 40
40 -
 41
41 -
 42
42 -
 43
43 -
 44
44 -
 45
45 -
 46
46 -
 47
47 -
 48
48 -
 49
49
 |
 |