Yamaha EL-500 Owner's Manual - Page 90
To record each part separately
 |
View all Yamaha EL-500 manuals
Add to My Manuals
Save this manual to your list of manuals |
Page 90 highlights
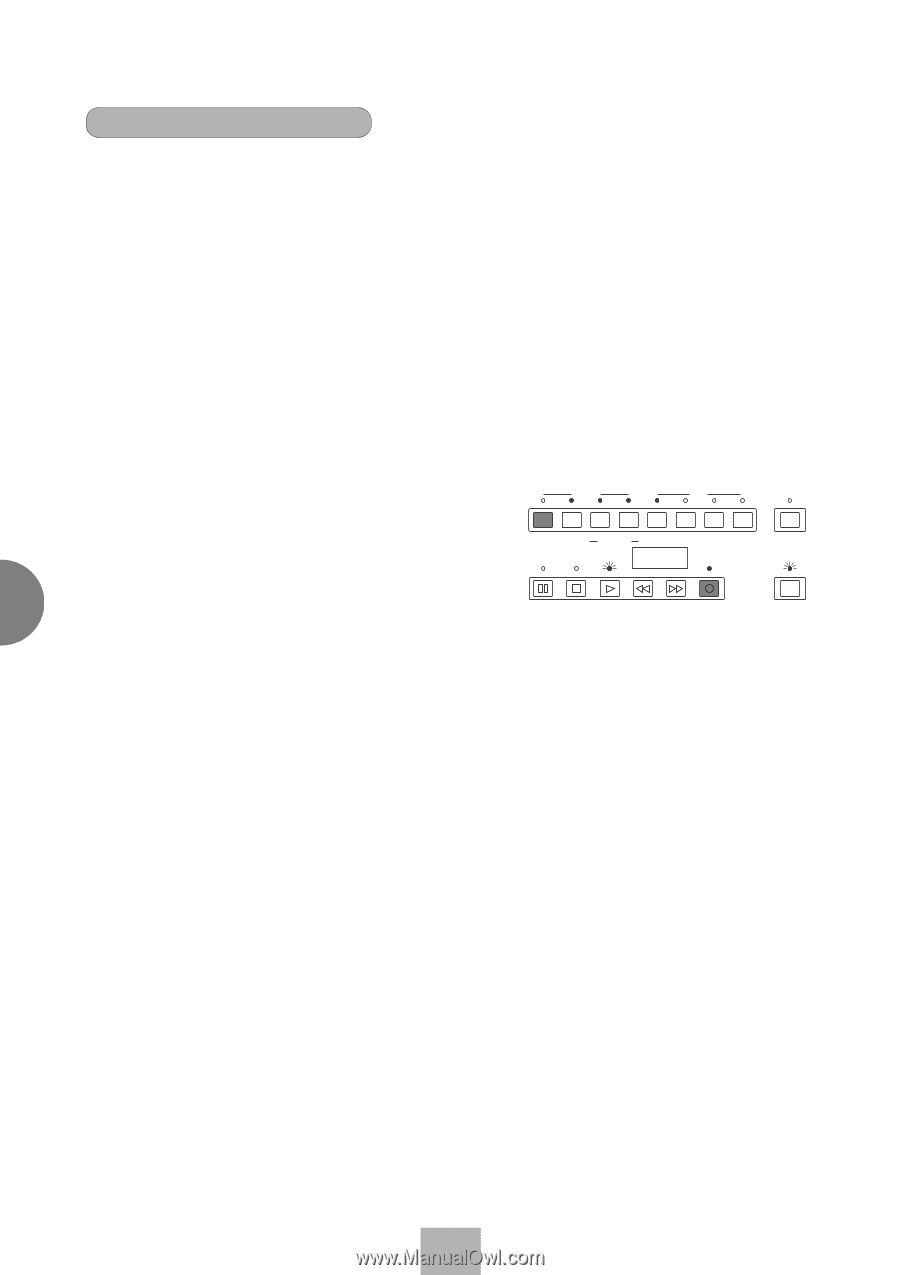
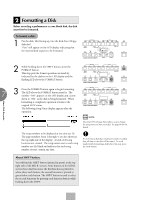
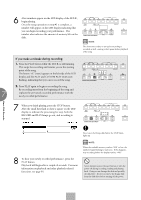
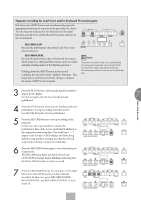
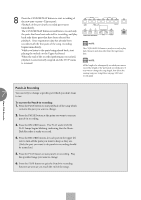
2) To record each part separately: You can also record the parts of your performance independently; for example, first recording the chords and bass to the song (using the Lower and Pedalboard), and after that recording the melody (using the Upper Keyboard). This function also lets you record the lead voice, keyboard percussion and performance control data, such as registration changes and expression pedal operation, separately from the other parts of the song. 7 1 Set up the M.D.R. for recording, as you did in the section above. The first steps in recording parts separately are the same as for normal recording on page 87: 1. Memorize all the registrations needed for your performance to the Registration Memory numbered buttons, and set the registration that will be used at the beginning of the song. 2. Insert a formatted disk. 3. Select the song number to which you will record your performance. 4. Press the RECORD button to make the Music Disk Recorder ready to record. UPPER RECORD LOWER PEDAL CONTROL UPPER PLAY LOWER PEDAL CONTROL SHIFT SONG REPEAT PAUSE FROM TO SONG COPY 01 STOP PLAY SONG SELECT SONG DEL. RECORD CUSTOM PLAY MUSIC DISK RECORDER - TEMPO + FORMAT Music Disk Recorder 2 Select the parts for recording. Pressing the RECORD in the procedure 1-4. above turns on the all parts' LEDs in the upper left row indicating that each part is ready to record. Press the RECORD buttons for each part in the upper left row to turn off the parts you don't want to record. For this example, press RECORD/UPPER. The PLAY/ UPPER lamp in the upper right row lights up. s RECORD/UPPER Records the performance data of the Upper keyboard when turned on. s RECORD/LOWER Records the performance data of the Lower keyboard when turned on. s RECORD/PEDAL Records the performance data of the Pedalboard when turned on. s RECORD/CONTROL Records the Control data (see Outline of M.D.R. Operation in the previous page) when turned on. The LED lamps above the buttons indicate the record status of the parts. This example operation disables recording of the Upper part. 90
-
 1
1 -
2
-
3
-
4
-
5
-
6
-
7
-
8
-
9
-
10
-
11
-
12
-
13
-
14
-
15
-
16
-
17
-
18
-
19
-
20
-
21
-
22
-
23
-
24
-
25
-
26
-
27
-
28
-
29
-
30
-
31
-
32
-
33
-
34
-
35
-
36
-
37
-
38
-
39
-
40
-
41
-
42
-
43
-
44
-
45
-
46
-
47
-
48
-
49
-
50
-
51
-
52
-
53
-
54
-
55
-
56
-
57
-
58
-
59
-
60
-
61
-
62
-
63
-
64
-
65
-
66
-
67
-
68
-
69
-
70
-
71
-
72
-
73
-
74
-
75
-
76
-
77
-
78
-
79
-
80
-
81
-
82
-
83
-
84
-
 85
85 -
 86
86 -
 87
87 -
 88
88 -
 89
89 -
 90
90 -
 91
91 -
 92
92 -
 93
93 -
 94
94 -
 95
95 -
96
-
97
-
98
-
99
-
100
-
101
-
102
-
103
-
104
-
105
-
106
-
107
-
108
-
109
-
110
-
111
-
112
-
113
-
114
-
115
-
116
-
117
-
118
-
119
-
120
-
121
-
122
-
123
-
124
-
125
-
126
-
127
-
128
-
129
-
130
-
131
-
132
-
133
-
134
-
135
-
136
-
137
-
138
-
139
-
140
-
141
-
142
-
143
-
144
-
145
-
146
-
147
-
148
-
149
-
150
-
151
-
152
-
153
-
154
-
155
-
156
-
157
-
158
-
159
-
160
-
161
-
162
-
163
-
164
-
165
-
166
-
167
-
168
-
169
-
170
-
171
-
172
-
173
-
174
-
175
-
176
-
177
-
178
-
179
-
180
-
181
-
182
-
183
-
184
 |
 |