Yamaha MG166CX-USB Owner's Manual - Page 12
Preparing to Record, Recording and Playback, Mixer Basics - owners manual
 |
View all Yamaha MG166CX-USB manuals
Add to My Manuals
Save this manual to your list of manuals |
Page 12 highlights
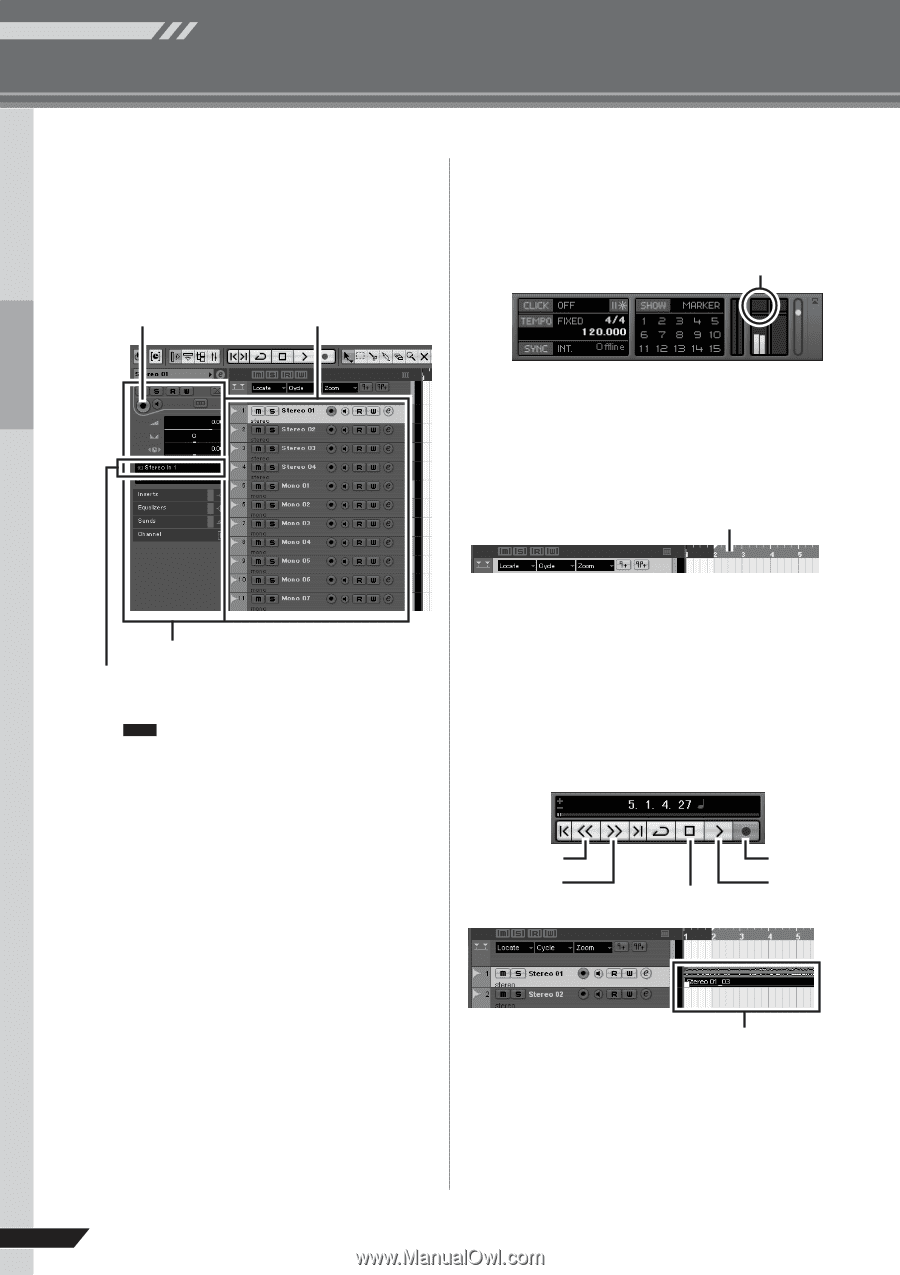
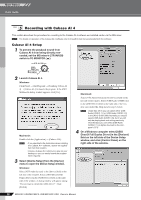
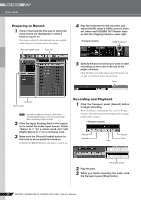
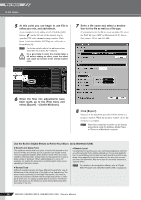
Mixer Basics Quick Guide Preparing to Record 1 Click in the track list (the area in which the track names are displayed) to select a track to record on. The various settings for the selected track are available in the Inspector on the left side of the display. [Record Enable] button Track list 4 Play the instrument to be recorded, and adjust the MG mixer's GAIN controls, channel faders and STEREO OUT Master fader so that the Clipping indicator never light. Clipping indicator 5 Specify the point at which you want to start recording via the ruler at the top of the project window. Click the black area of the ruler to move the project cursor (the vertical black line) to that position. Ruler Inspector Input routing NOTE You will normally use a stereo track when recording synthesizers, and a monaural track when recording vocals or guitar. 2 Click the Input Routing field in the Inspector to select the audio input source. Select "Stereo In 1" for a stereo track and "Left (Right)-Stereo In 1" for a monaural track. 3 Make sure the [Record Enable] button for the track to be recorded is turned on. If the [Record Enable] button is off, click it to turn it on. Recording and Playback 1 Click the Transport panel [Record] button to begin recording. When recording is started the project cursor will begin moving to the right and a box that displays the recording results will be created. Rewind Forward Stop Record Start Recording results 2 Play the part. 3 When you finish recording the track, click the Transport panel [Stop] button. 12 MG206C-USB/MG166CX-USB/MG166C-USB Owner's Manual
-
 1
1 -
2
-
3
-
4
-
5
-
6
-
 7
7 -
 8
8 -
 9
9 -
 10
10 -
 11
11 -
 12
12 -
 13
13 -
 14
14 -
 15
15 -
 16
16 -
 17
17 -
18
-
19
-
20
-
21
-
22
-
23
-
24
-
25
-
26
-
27
-
28
-
29
-
30
-
31
-
32
-
33
-
34
-
35
-
36
-
37
 |
 |