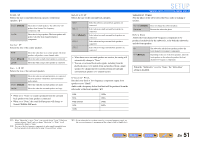
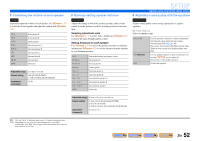
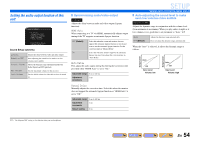
Yamaha RX-V567 Owners Manual - Page 53
Generating test tones, When EQ Type Select is displayed, use
 |
UPC - 027108935980
View all Yamaha RX-V567 manuals
Add to My Manuals
Save this manual to your list of manuals |
Page 53 highlights
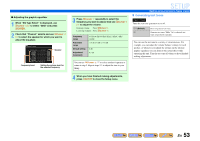
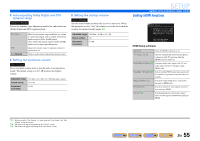
■ Adjusting the graphic equalizer 1 When "EQ Type Select" is displayed, use jCursor D / E to select "GEQ" and press jENTER. 2 Check that "Channel" selects and use jCursor D / E to select the speaker for which you want to adjust the equalizer. ;Equalizer . Channel;;;;Front L 63Hz 0dB 160Hz 0dB 400Hz 0dB 1kHz 0dB 2.5kHz 0dB 6.3kHz 0dB 16kHz 0dB [p]/[[]:Select Speaker Frequency band Setting the volume level for the selected frequency 3 Press jCursor C repeatedly to select the frequency you want to adjust, then use jCursor D / E to adjust the volume. Raising volume: Press jCursor E. Lowering volume: Press jCursor D. Frequency range Adjustable range Default setting Adjustment increments 63 Hz/160 Hz/400 Hz/1 kHz/2.5 kHz/6.3 kHz/ 16 kHz -6.0 dB to 0 dB to +6.0 dB 0 dB 0.5 dB You can use jCursor B / C to select another frequency or return to step 2. Repeat steps 2-3 to adjust the tone to your liking. SETUP Setting various functions (Setup menu) ■ Generating test tones Test Tone Turns the test tone generator on or off. Off (Default) On Does not generate test tones. Generates test tones. While "On" is selected, test tones are produced constantly. You can use the test tone in a variety of circumstances. For example, you can adjust the volume balance settings for each speaker, or whenever you adjust the settings on the internal graphic equalizer, you can listen to the actual effect while operating this unit. Turn the test tone off when you have finished making adjustments. 4 When you have finished making adjustments, press iSETUP to close the Setup menu. En 53
-
 1
1 -
2
-
3
-
4
-
5
-
6
-
7
-
8
-
9
-
10
-
11
-
12
-
13
-
14
-
15
-
16
-
17
-
18
-
19
-
20
-
21
-
22
-
23
-
24
-
25
-
26
-
27
-
28
-
29
-
30
-
31
-
32
-
33
-
34
-
35
-
36
-
37
-
38
-
39
-
40
-
41
-
42
-
43
-
44
-
45
-
46
-
47
-
 48
48 -
 49
49 -
 50
50 -
 51
51 -
 52
52 -
 53
53 -
 54
54 -
 55
55 -
 56
56 -
 57
57 -
 58
58 -
59
-
60
-
61
-
62
-
63
-
64
-
65
-
66
-
67
-
68
-
69
-
70
-
71
-
72
-
73
-
74
-
75
-
76
-
77
-
78
-
79
-
80
-
81
-
82
-
83
-
84
-
85
-
86
-
87
-
88
-
89
-
90
-
91
-
92
 |
 |
