Yamaha V665 Owners Manual
Yamaha V665 - RX AV Receiver Manual
 |
UPC - 027108933061
View all Yamaha V665 manuals
Add to My Manuals
Save this manual to your list of manuals |
Yamaha V665 manual content summary:
- Yamaha V665 | Owners Manual - Page 1
- Yamaha V665 | Owners Manual - Page 2
- Yamaha V665 | Owners Manual - Page 3
- Yamaha V665 | Owners Manual - Page 4
- Yamaha V665 | Owners Manual - Page 5
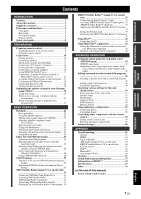
16 Using REMOTE IN/OUT jacks 17 Connecting a Yamaha iPod universal dock or Bluetooth™ wireless audio receiver 17 Using the VIDEO AUX jacks on the front panel .... 17 Connecting the FM and AM antennas 18 Connecting the power cable 18 Turning this unit on and off 18 Optimizing the speaker setting - Yamaha V665 | Owners Manual - Page 6
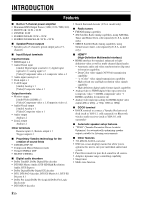
1 Other terminals Remote input x 1, Remote output x 1 Trigger output x 1 ■ Proprietary Yamaha technology for the creation of sound fields • CINEMA DSP 3D • Compressed Music Enhancer mode • Virtual CINEMA DSP • SILENT CINEMA ■ Digital audio decoders • Dolby TrueHD, Dolby Digital Plus decoder • DTS-HD - Yamaha V665 | Owners Manual - Page 7
key name on the remote control is given in parentheses. • This manual is printed prior to production. Design and specifications are subject to change in part as a result of improvements, etc. In case of differences between the manual and product, the product has priority. • "AMAIN ZONE ON/OFF" or - Yamaha V665 | Owners Manual - Page 8
OFF Switches the zone function on and off (see page 58). D ZONE2 CONTROL Enables operation of a receiver set in Zone2, including input source switching, volume control and tuner operation, with the main amplifier or remote control after this key is pressed. E INFO Changes information display screens - Yamaha V665 | Owners Manual - Page 9
inputs 1-2 (see page 16). no p l MONITOR OUT Outputs visual signals from this unit to a video monitor, such as a TV (see page 14). m MULTI CH INPUT terminals For connecting a player that supports a multi-channel output (see page 16). n AUDIO OUT Outputs audio signals from a selected analog input - Yamaha V665 | Owners Manual - Page 10
3D indicator Lights up when CINEMA DSP 3D is activated. f Tuner indicator Lights up during receiving radio zone functions is turned on. i VOLUME indicator Displays volume levels. j MUTE indicator Flashes when audio is muted. k Cursor indicators Light up if corresponding cursors on the remote control - Yamaha V665 | Owners Manual - Page 11
MULTI TUN./CH MOVIE ENHANCER SUR. DECODE MUSIC STEREO STRAIGHT PURE DIRECT BD DVD SETUP SCENE TV CD RADIO OPTION ENTER VOLUME RETURN DISPLAY TOP MENU REC MENU MUTE c d g f n p q r t u 1 2 3 4 5 6 7 8 9 INPUT MUTE 0 10 TV TV VOL TV CH ENT POWER a Remote control signal - Yamaha V665 | Owners Manual - Page 12
• Connecting a Yamaha iPod universal dock or Bluetooth wireless audio receiver ☞P. 17 • Connecting the FM and AM antennas ☞P. 18 • Connecting an XM Mini-Tuner Home Dock ☞P. 31 • Connecting a SiriusConnect tuner ☞P. 35 Step 4: Turn on the power Connect the power cable and turn on this unit - Yamaha V665 | Owners Manual - Page 13
PREPARATION Preparing remote control Installing batteries in the remote control 13 Using the remote control The remote control transmits a directional infrared ray. Be sure to aim the remote control directly at the remote control sensor on this unit during operation. Remote control sensor window - Yamaha V665 | Owners Manual - Page 14
Connections Placing speakers This unit supports up to 7.1-channel surround. We recommended the following speaker layout in order to obtain the optimum surround effect. 7.1-channel speaker layout Speaker channels FL SW C 30˚ FR SW ■ Front left and right speakers (FL and FR) The front speakers - Yamaha V665 | Owners Manual - Page 15
6.1-channel (When using the Multi-zone function) Speakers a Front speaker L b Front speaker R c Center speaker d Surround speaker L e Surround speaker R f Surround back speaker h Subwoofer 1 i Subwoofer 2 (optional) j Zone2 speaker L (optional) k Zone2 speaker R (optional) Jacks on this unit FRONT - Yamaha V665 | Owners Manual - Page 16
plug into the end of the terminal. Banana plug 12 En This unit FRONT SURROUND BACK/ BI-AMP Caution Before making bi-amplification connections, remove any or cables that connect a woofer with a tweeter. Refer to the instruction manuals of speakers for details. When not making bi-amplification - Yamaha V665 | Owners Manual - Page 17
HDMI HDMI To transmit digital video and digital audio signals. Use HDMI cables. y • We recommend that you use a commercially available 19-pin HDMI cable no longer than 5 meters (16 feet) with the HDMI logo printed on it. • You can check the potential problem about the HDMI connection (see page 74 - Yamaha V665 | Owners Manual - Page 18
projector Outputting sound of a TV from this unit a c b To output sound of a TV from this unit, make connection between the AV input 1-6 and an audio output terminal. If the TV supports an optical digital output, we recommend that you use the AV input 1. Connecting to the AV input 1 allows you - Yamaha V665 | Owners Manual - Page 19
OPERATION Connections Connecting other components This unit has input and output terminals for respective input and output sources. You can reproduce sound and movies from input sources selected with the front panel display or remote control. Audio / video input (AV 1-6) Audio / video output (AV - Yamaha V665 | Owners Manual - Page 20
MULTI CH INPUT LR LR LR Center out Subwoofer out Surround back out Surround out Front out Multi-format player/External decoder (7.1-channel output) Connecting an external amplifier This unit has more than enough power for any home use. However, if you want to add more power to the speaker - Yamaha V665 | Owners Manual - Page 21
turn down the volume of this unit and other components before making connections. BD/DVD) HDMI 1 COMPONENT VIDEO PR HDMI 2 HDMI 3 REMOTE IN OUT PB VIDEO Y 12V HDMI 4 Remote control out Remote control in VOLUME EMORY BD/DVD l PRESET h SCENE TV CD FM AM l CATEGORY h l TUNING/CH - Yamaha V665 | Owners Manual - Page 22
no polarity. You can connect either wire to the AM terminal and the other to the GND terminal. To the AC wall outlet Power cable Turning this unit on and off 1 Press AMAIN ZONE ON/OFF on the front panel (or gPOWER on the remote control) to turn on this unit. 2 Press AMAIN ZONE ON/OFF (or gPOWER - Yamaha V665 | Owners Manual - Page 23
points. Before starting the automatic setup, check the following. • All speakers and subwoofer are connected properly. • Headphones are disconnected from this unit. • The video monitor is connected properly. • This unit and the video monitor are turned on. • This unit is selected as the video input - Yamaha V665 | Owners Manual - Page 24
. Do not leave it in a place where it will be subjected to high temperatures such on an AV component. y • If you do not want to apply the measurement results, select "Cancel." • Perform "Auto Setup" again if you change the number or positions of speakers. • If you press oENTER before removing the - Yamaha V665 | Owners Manual - Page 25
OF PHASE Reverse channel FL --- CENTER SL --- SBL --- [p]/[[]:Select [ENTER]:Return y • See page 70 for details on warning messages. • Optimization will not be performed while a warning message is displayed. We recommend that you solve the problem and perform "Auto Setup" again. 1 Check if - Yamaha V665 | Owners Manual - Page 26
the initial factory settings. BD/DVD TV CD RADIO Input source HDMI 1 AV 1 AV 3 TUNER Sound field program Straight Straight Straight 7ch Enhancer y • When this unit is on standby, you can turn on this unit by pressing the SCENE key. • When connecting a Yamaha DVD/CD player that has the REMOTE OUT - Yamaha V665 | Owners Manual - Page 27
control this unit (such as volume control). The front panel display turns on again once you set the Pure Direct mode to off. The following features are disabled in Pure Direct mode. - sound field program, tone control - display and operation of the option menu and setup menu - mulit-zone function - Yamaha V665 | Owners Manual - Page 28
Audio Decoder MULTI CH: V-AUX: Input Input, DSP Program, Audio Decoder FM/AM: Frequency, DSP Program, Audio Decoder XM: Channel, Category, Song, Antenna, SIRIUS: DSP Program, Audio Decoder Channel, Category, Artist / Song, Composer, Antenna, DSP Program, Audio Decoder iPod (Simple remote - Yamaha V665 | Owners Manual - Page 29
Enjoy the sound field programs This unit is also equipped with a Yamaha digital sound field processing (DSP) chip. You can enjoy multi-channel sounds for almost all input sources using various sound field programs stored on the chip and a variety of surround decoders. Selecting sound field programs - Yamaha V665 | Owners Manual - Page 30
movie theater. The the depth and 3D feeling of the realistic, live sound field features powerful sound as if the listener channel sources to 2 channels. y • When multi-channel signals (Dolby Digital and DTS) are input, they are downmixed to 2 channels and output from the front left and right speakers - Yamaha V665 | Owners Manual - Page 31
If your listening environment is as follows, you cannot select the Dolby Pro Logic IIx decoder. • When the surround back speakers are not connected • When headphones are connected Dolby Pro Logic IIx (or Dolby Pro Logic II) decoder suitable for music. If your listening environment is as follows, you - Yamaha V665 | Owners Manual - Page 32
Pure Direct mode or straight decoding mode is selected. Using CINEMA DSP 3D mode CINEMA DSP 3D mode creates the intensive and accurate stereoscopic sound field in the listening room. To use this unit in CINEMA DSP 3D mode, presence speakers are required. Connect the presence speakers to the EXTRA SP - Yamaha V665 | Owners Manual - Page 33
antennas connected to this unit changes in the following manner according to how you press ITUNING/CH l / h (or iTUN./ CH receive strong signals and stations manual station preset. 1 Press OINPUT l / h repeatedly (or press hTUNER) to switch the input source to "TUNER." 2 Press nOPTION on the remote control - Yamaha V665 | Owners Manual - Page 34
changes as follows: READY → SEARCH → MEMORY each time a station is registered. When registration is complete, "FINISH" appears and the option menu screen automatically reappears. When you press nOPTION on the remote control, the screen returns to the original state. Registering stations by manual - Yamaha V665 | Owners Manual - Page 35
or XM Satellite Radio Systems. Service not available in Alaska and Hawaii. Connecting XM Mini-Tuner Home Dock Connect XM Mini-Tuner and XM Mini-Tuner Home Dock (sold separately) to the XM jack on the rear panel of this unit. For details, see the operating instructions provided with the XM Mini - Yamaha V665 | Owners Manual - Page 36
• To enter a one-digit or two-digit channel number, press the tNumeric keys on the remote control and then press tENT to confirm the input number. • Instead of pressing tENT to tune into the channel immediately, you can wait a few seconds until this unit confirms the entered channel number. • If no - Yamaha V665 | Owners Manual - Page 37
repeatedly to change the preset channel number (1 to 40). y • You can directly select a preset number by pressing a tNumeric keys while calling a preset channel. Clearing preset channels You can clear the assignments of preset XM Satellite Radio channels. 1 Press nOPTION on the remote control. The - Yamaha V665 | Owners Manual - Page 38
field program (see page 25) Audio Decoder Current Audio Decoder (see page 27) Back to "Channel" Front Panel Display (example) XM Antenna y • If the XM Satellite Radio information contains a character that cannot be recognized by this unit, the character will be displayed with a space. • When an - Yamaha V665 | Owners Manual - Page 39
the instruction manuals supplied connection of the SiriusConnect tuner and the antenna. • If "NOT SUPPORTED" appears on the front panel display, this unit does not support the connected 12-digit number SIRIUS Satellite Radio channel "0" (see below is finished, "SUB UPDATED" appears. SIRIUS Satellite - Yamaha V665 | Owners Manual - Page 40
• To enter a one-digit or two-digit channel number, press the tNumeric keys on the remote control and then press tENT to confirm the input number. • Instead of pressing tENT to tune into the channel immediately, you can wait a few seconds until this unit confirms the entered channel number. • If no - Yamaha V665 | Owners Manual - Page 41
SIRIUS 001 Hits 1 Press GPRESET l / h (or iPRESET k / n) repeatedly to change the preset channel number (1 to 40). Clearing preset channels You can clear the assignments of preset SIRIUS Satellite Radio channels. 1 Press nOPTION on the remote control. The option menu is displayed on the front panel - Yamaha V665 | Owners Manual - Page 42
mode and you search a channel by pressing ITUNING/CH l / h (or iTUN./CH k / n). Setting the code number and the locking channels Use this feature to set the Parental Lock code number (PIN) and select the channels to be locked. 1 Press nOPTION on the remote control. The option menu is displayed - Yamaha V665 | Owners Manual - Page 43
qDISPLAY on the remote control to turn on or off the information display. The following information is displayed on the OSD. SIRIUS ANT: d a All CH Search 001:SIRIUS Hits 1 e b :Pop :Sanumemo f c :Road to India C:Frankie Zipper g Category Channel category, channel number Artist/Song - Yamaha V665 | Owners Manual - Page 44
Yamaha iPod universal dock (such as the YDS-11, sold separately) connected to the DOCK terminal on the rear panel of this unit (see page 17), you can enjoy playback of your iPod using the supplied remote control " will not be displayed when your iPod or Yamaha iPod universal dock do not support the - Yamaha V665 | Owners Manual - Page 45
d Song title e Progress bar f Elapsed time g Shuffle and repeat icons h (playback), (pausing), (search backward) i Remaining time (search forward) and y • You can change information screens on the front panel display using EINFO (or jINFO) (see page 24). Items displayed on the front panel display - Yamaha V665 | Owners Manual - Page 46
on the front panel display. y • When you press oENTER on the remote control, the connected Bluetooth wireless audio receiver searches and connects to the last connected Bluetooth component. If the Bluetooth wireless audio receiver cannot find the Bluetooth component, "Not found" appears on the front - Yamaha V665 | Owners Manual - Page 47
l / h (or hInput selection keys). 2 Press nOPTION on the remote control. The OPTION menu appears. The displayed OPTION menu items differ depending on the input source. For details, see the following section. HDMI1 OPTION . Volume Trim Decoder Mode Extended Surround Signal Info [ ]/[ ]:Up/Down [ENTER - Yamaha V665 | Owners Manual - Page 48
Always reproduces signals in 6.1- or 7.1channel using the PLIIxMusic decoder whether or not surround back channel signals are contained. You can select this parameter when one or two speakers are connected. Automatically selects the most suitable decoder for input signals whether or not the flag for - Yamaha V665 | Owners Manual - Page 49
that does not support a multi-channel digital audio output, the video signal can be output to the video monitor while reproducing a multichannel analog audio signal. 1 Press OINPUT l / h (or hMULTI) to change the input source to "MULTI CH." 2 Press nOPTION on the remote control. The OPTION menu - Yamaha V665 | Owners Manual - Page 50
1 Turn on the video monitor connected to this unit. 2 Press mSETUP on the remote control. The setup menu appears on the monitor. 3 Press oCursor k / n to select "DSP Parameter" and press oENTER. The screen changes as follows. Sound field program Cursor MOVIE 1/2 . Sci-Fi SUR.;;;;PLII Movie 3D - Yamaha V665 | Owners Manual - Page 51
Lift." Editing surround decoders/sound field programs 3D 3D DSP Choices: On* / Off When CINEMA DSP 3D is enabled, sets whether to use sound field programs in 3D mode. Note • When the presence speakers are not used, the 3D sound expansion can be created by changing the duration. 1.0 is the original - Yamaha V665 | Owners Manual - Page 52
Editing surround decoders/sound field programs Source sound Early Level Level Time Sound source Time Rev.Time parameter adjusts the attenuation time of the rear reverberant sound based - Yamaha V665 | Owners Manual - Page 53
DSP circuit and tone control circuit when an analog channels in the 7ch Stereo program. The available parameters differ depending on the setting of the speakers decoders/sound field programs Decoder parameters You can customize decoder effects by setting the following parameters. For kinds of decoders - Yamaha V665 | Owners Manual - Page 54
this unit (Setup menu) You can call the setup menu using the remote control and change the settings of various menus. You can change the following settings in the setup menu. For details, read "Basic operation of the setup menu" first, and see the respective pages. Menu/Submenu Speaker Setup Sets - Yamaha V665 | Owners Manual - Page 55
using oCursor k / n, and change the setting of the item using oCursor l / h. Some items in the Manual Setup menu of Speaker Setup take up a full screen. To display other items in the Manual Setup menu, press oCursor k / n. Operating various settings for this unit (Setup menu) "A)Config" display - Yamaha V665 | Owners Manual - Page 56
. Low-frequency components of the front left and right channels are output from a subwoofer. Select this when large speakers are connected. Note • When "LFE/Bass Out" is set to "Front," you can only select "Large." If "LFE/Bass Out" is changed to "Front," "Front SP" automatically switches to "Large - Yamaha V665 | Owners Manual - Page 57
surround back speaker is connected, "Sur.B" appears instead of "Sur.B L" and "Sur.B R." Operating various settings for this unit (Setup menu) ■ tones. To turn on the oscillator, select "On" using oCursor l / h. When "On" is selected, you can adjust the settings of "2 Manual Setup" while listening - Yamaha V665 | Owners Manual - Page 58
to 3W of power even on standby. ■ Audio Output Choices: Amp*/TV/Amp+TV Selects this unit or a component connected to this unit via the HDMI OUT jack of this unit for reproducing sound signals input from the HDMI IN jack. Amp TV Amp+TV Outputs HDMI sound signals form the speakers connected to this - Yamaha V665 | Owners Manual - Page 59
Setup menu) ■ Max Volume Adjustable range: -30.0dB to +15.0dB/+16.5dB* (5.0 dB step) Sets the maximum volume level so that the volume will unit is turned on. 4 Input Rename Changes change the name, and select a name from the following templates using Cursor. - Blu-ray - DVD - SetTopBox - Game - TV - Yamaha V665 | Owners Manual - Page 60
will not be accidentally increased. For example, you can adjust the volume between -80.0 dB and -5.0 dB when you set this parameter to "-5.0dB." ■ Init. Volume Choices: Off*/Mute/-30.0dB to +16.5dB (0.5 dB step) Use this feature to set the volume level of Zone2 when the power of Zone2 unit is turned - Yamaha V665 | Owners Manual - Page 61
ZONE2 OUT jacks Main zone DVD player (etc.) This unit Infrared signal emitter Amplifier Second zone (Zone2) Remote control Infrared signal receiver EXTRA SP ZONE2/PRESENCE Second zone (Zone2) This unit Main zone y • You can use the speakers connected to EXTRA SP speaker terminals as the front - Yamaha V665 | Owners Manual - Page 62
Zone2 You can select and control Zone2 by using the control keys on the front panel or on the remote control. The available operations are as follows: • Selecting the input source (AV5-6, AUDIO1-2, V-AUX) of Zone2. • Adjusting the volume of Zone2 (when a Zone2 speaker is connected to the EXTRA SP - Yamaha V665 | Owners Manual - Page 63
TV TV VOL +/- Controls the volume of TV TV CH +/- Switches channels of TV POWER Turns on and off TV y • You can use uTV control keys only for controls of TV regardless of selected input sources. • You need to set the remote control code first to control external components. • The remote control - Yamaha V665 | Owners Manual - Page 64
of this unit according to connected speakers. REMOTE ID -XXX Choices: ID1*/ID2 Sets a remote control ID. When using multiple Yamaha AV receivers, you can operate them with a single remote control by setting the receiver IDs to the same setting. SR PIN -XXX Choices: RESET/CANCEL Resets Parental lock - Yamaha V665 | Owners Manual - Page 65
the problem persists, the cables may be defective. Select an appropriate input source with OINPUT l / h or the hInput selector keys on the remote control. Speaker connections are not secure. Secure the connections. The volume is turned down or muted. Turn up the volume. Signals this unit cannot - Yamaha V665 | Owners Manual - Page 66
corresponding indicator lights up, connect another speaker and check if sound is output. If sound is not output, this unit may be malfunction. Press MSTRAIGHT or the kSTRAIGHT on the remote control to turn off the "STRAIGHT" mode. Sound may not be output from certain channels depending on the input - Yamaha V665 | Owners Manual - Page 67
on the remote control to turn off the "STRAIGHT" mode. Sound may not be output from certain channels depending on input sources or sound field programs. Try another sound field program. "LFE/Bass Out" of "A)Config" in "Speaker Setup" of the setup menu (Speaker Setup→Manual Setup→A)Config) is - Yamaha V665 | Owners Manual - Page 68
Troubleshooting Problem Cause Remedy "CHECK SP WIRES!" appears on the front panel display. Speaker cables are short-circuited. There is noise interference from digital or radio frequency equipment. This unit is too close to other digital or radio frequency equipment. The picture is disturbed - Yamaha V665 | Owners Manual - Page 69
SIGNAL CH OFF AIR CH UNAUTH Cause Remedy The XM Mini-Tuner is not installed in the XM Mini-Tuner Home Dock or the XM Mini-Tuner Home Dock is not connected to this unit. Confirm the XM Mini-Tuner is fully seated in the dock and check the XM Mini-Tuner Home Dock cable is connected to this unit - Yamaha V665 | Owners Manual - Page 70
the AC wall outlet. This unit does not support the connected SIRIUS Satellite Radio tuner. The signal is too weak. The SiriusConnect tuner is updating the channel list. The period of the subscription is end. The SiriusConnect tuner is updating the firmware. Check the connection of the antenna and - Yamaha V665 | Owners Manual - Page 71
service. The operation you made is not available. Contact SIRIUS Satellite Radio to subscribe the selected channel. URL: https://activate.siriusradio.com/ Phone: 1-888-539-SIRIUS (1-888-539-7474) Select another channel. Select another channel. See page 35 35 35 Remote control Problem The remote - Yamaha V665 | Owners Manual - Page 72
acquiring song lists from your iPod. Connect error There is a problem with the signal path Turn off this unit and reconnect the Yamaha iPod 17 from your iPod to this unit. universal dock to the DOCK terminal of this unit. Remove your iPod in the Yamaha iPod universal dock 17 and then place - Yamaha V665 | Owners Manual - Page 73
speaker connections are correct. • If error message "E-10" occurs repeatedly, contact a qualified Yamaha service center. Before Auto Setup Error message Connect MIC! Unplug HP! Memory Guard! Cause Remedy Optimizer microphone is not connected. Headphones are connected. The parameters of this unit - Yamaha V665 | Owners Manual - Page 74
Troubleshooting After Auto Setup Error message Cause Remedy W-1:OUT OF PHASE Speaker polarity is not correct. This message may appear depending on the speakers even when the speakers are connected correctly. Check the polarities (+, -) of the displayed speaker. If they are correct, the - Yamaha V665 | Owners Manual - Page 75
sound with discrete channel output. Supporting bitrates up to 6.0 Mbps, Dolby Digital Plus can carry up to 7.1 discreet audio channels simultaneously. Supported by HDMI version 1.3 and designed for the optical disc players and AV receivers/amplifiers of the future, Dolby Digital Plus also remains - Yamaha V665 | Owners Manual - Page 76
a set-top box or AV receiver) and an audio/video monitor (such as a digital television), HDMI supports standard, enhanced or high-definition video as well as multichannel digital audio using a single cable. HDMI transmits all ATSC HDTV standards and supports 8-channel digital audio, with bandwidth - Yamaha V665 | Owners Manual - Page 77
CINEMA DSP provides the audiovisual experience of a movie theater in the listening room of your own home by using the Yamaha original sound field technology combined with various digital audio systems. ■ CINEMA DSP 3D The actually measured sound field data contain the information of the height - Yamaha V665 | Owners Manual - Page 78
decode the bitstream audio signals of audio commentaries, you can play back the audio sources with the audio commentaries mixed down by using the following connections: - multi-channel analog audio input (see page 16) - DIGITAL INPUT OPTICAL (or COAXIAL) • Refer to the supplied instruction manuals - Yamaha V665 | Owners Manual - Page 79
dB or more • Residual Noise (IHF-A Network) Front Speakers 150 µV or less • Channel Separation (1 kHz/10 kHz) PHONO (Input Shorted) [Russia, Australia, General and Asia models 60 dB/55 dB or more AV5, etc. (5.1 kΩ shortened 60 dB/45 dB or more • Volume Control MUTE / -80 dB to +16.5 dB • Tone - Yamaha V665 | Owners Manual - Page 80
Connecting set-top box 15 Connecting speaker 11 Connecting speaker cable 12 Connecting the SiriusConnect 35 Connecting the SiriusConnect tuner 35 Connecting TV monitor 14 Connecting XM Mini-Tuner Home Dock ......31 Connecting Zone2 57 Connection 10 Controlling other component, remote control - Yamaha V665 | Owners Manual - Page 81
, front panel display 6 Tuner key, remote control 7 Tuner, troubleshooting 64 Tuning, AM 29 Tuning, FM 29 TUNING/CH l / h, front panel 4 Turning off 18 Turning on 18 TV control key, remote control 7 TV monitor connection 14 ■U Using the remote control 9 ■V VIDEO jack 13 Video jack - Yamaha V665 | Owners Manual - Page 82
List of remote control codes TV A.R. Systems Acme Acura ADC Admiral Advent Adventura Adyson Agashi Agazi Aiko Aim Aiwa Akai Akiba Akura Alaron Alba Albatron Alcyon Alleron Allorgan Allstar America Action - Yamaha V665 | Owners Manual - Page 83
Fujitsu Siemens Funai Futuretech Galaxi Galaxis Gateway GBC GE Geant Casino GEC Geloso General Technic Genexxa GFM Giant Gibralter GoldHand Goldline GoldStar Goodmans Gorenje GPM GPX Gradiente Graetz Granada Grandin Gronic Grundig Grunpy Haier Halifax Hallmark Hampton Hanseatic Hantarex Hantor - Yamaha V665 | Owners Manual - Page 84
Neckermann NEI Net-TV Neufunk New Tech New World NewTech Nicamagic Nikkai Nikko Nobliko Nokia Norcent Nordic Nordmende Nordvision Novatronic Oceanic Okano Olevia ONCEAS Onwa Opera Oppo Optimus Optoma - Yamaha V665 | Owners Manual - Page 85
, 0268, 0274 Ultravox 0257, 0260, 0263, 0274, 0327 Unic Line 0274 United 0271 Universum 0243, 0249, 0259, 0268, 0269, 0271, 0274, 0328 Univox , 0119, 0260, 0263, 0271, 0274, 0327 Wincom 0055, 0056 Xrypton 0274 Yamaha 0000, 0001, 0002, 0003, 0004, 0005, 0072, 0090, 0096, 0103 - Yamaha V665 | Owners Manual - Page 86
1090 TVA 1076 Uher 1077 UltimateTV 1065 Ultravox 1091 Unitech 1020 United Quick Star 1075, 1091 Universum 1072, 1077, 1078 Vector 1066 Wards 1020, 1021, 1022, 1023 Weltblick 1077 XR-1000 1022, 1023 Yamaha 1018, 1019 Yamishi 1079, 1090 Yokan 1079, 1090 Yoko 1076, 1077, - Yamaha V665 | Owners Manual - Page 87
2308, 2310, 2314 Denzel 2302 Desay 2159 Diamond 2304, 2305 DiamondVision 2179, 2186 Disney 2078, 2088 DK Digital 2257 Dmtech 2226 Dual 2302 Durabrand 2218 DVX 2305 Easy Home 2309 Eclipse 2304 E-Dem 2318 Electrohome 2312 Elin 2312 Elta 2263, 2312, 2315 Emerson 2196, 2211 - Yamaha V665 | Owners Manual - Page 88
2307 Tensai 2312 Tevion 2228, 2305, 2311 Theta Digital 2207 Thomson 2229, 2238, 2284, 2294 Tokai Philips Pioneer Pye Samsung Sansui Sanyo Sony Sylvania Toshiba Yamaha 2140 2162 2192 2135 2108 2080 2103 2054, TV86 3031 Unika 3019, 3020 United Cable 3037, 3064 Universal 3019, 3020 - Yamaha V665 | Owners Manual - Page 89
Cambridge 4136 Canal Satellite 4135 Canal+ 4135 CaptiveWorks 4049 Channel Master 4060, 4085 Chaparral 4025 CHEROKEE 4138 Chess 4134 4107, 4139 DDC 4085 Delega 4085 Dew 4096 Diamond 4097 Digiality 4137 Digital Stream 4059 DIRECTV 4017, 4018, 4020, 4021, 4022, 4024, 4037 - Yamaha V665 | Owners Manual - Page 90
UEC Uher UltimateTV Uniden Unisat Unitor Universum US Digital Variosat Vega Ventana Viewsat Visiosat Voom Vortec 4131, 4133 4052, 4057, 4145 4086 CD Yamaha 5000, 5013 CD Recoder Yamaha 5001 MD Yamaha 5002, 5003, 5004 Tape Yamaha 5005, 5006 Tuner Yamaha 5007, 5008, 5009, 5010, 5014, 5015 - Yamaha V665 | Owners Manual - Page 91
- Yamaha V665 | Owners Manual - Page 92
© 2009 Yamaha Corporation All rights reserved. Printed in China WQ95310 - Yamaha V665 | Owners Manual - Page 93
to those in the Owner's Manual. ■ Front panel V U DEF G H I U RX-V665 Q MAIN ZONE ON/OFF PHONES SILENT CINEMA HDMI THROUGH ZONE2 ON/OFF ZONE2 CONTROL INFO MEMORY BD/DVD l PRESET h SCENE TV CD FM AM l CATEGORY h l TUNING/CH h RADIO TONE CONTROL PROGRAM l h STRAIGHT EFFECT - Yamaha V665 | Owners Manual - Page 94
■ Remote control a b e h i j k l m o s t u MAIN ZONE2 TRANSMIT CODE SET POWER SOURCE 1 1 5 SLEEP POWER HDMI 2 3 4 AV 2 3 4 AUDIO 6 1 2 V-AUX [ A ] [ B ] DOCK TUNER SIRIUS CATEGORY FM AM INFO MEMORY XM PRESET MULTI TUN./CH MOVIE ENHANCER SUR. DECODE MUSIC STEREO - Yamaha V665 | Owners Manual - Page 95
, do the following referring to the operating instructions of the TV. • Turn on the HDMI control function on the TV. • Connect the TV to this unit following the instructions for connecting the TV to an AV amplifier. y • The HDMI control-compatible components include Panasonic VIERA Link compatible - Yamaha V665 | Owners Manual - Page 96
VID Y MONITOR OU L OPTICAL ( TV ) AV 1 COAXIAL AV 2 COAXIAL (CD) AV 3 OPTICAL AV 4 AV 5 AV 6 R AV OUT AUDIO1 AUDIO2 (RX-V665 U.S.A.model) Part 2: Assigning the video input jacks to the audio input 1 Turn on this unit. 2 Press AUDIO1 or AUDIO2 on the remote control to select the input
-
 1
1 -
 2
2 -
 3
3 -
 4
4 -
 5
5 -
 6
6 -
 7
7 -
8
-
9
-
10
-
11
-
12
-
13
-
14
-
15
-
16
-
17
-
18
-
19
-
20
-
21
-
22
-
23
-
24
-
25
-
26
-
27
-
28
-
29
-
30
-
31
-
32
-
33
-
34
-
35
-
36
-
37
-
38
-
39
-
40
-
41
-
42
-
43
-
44
-
45
-
46
-
47
-
48
-
49
-
50
-
51
-
52
-
53
-
54
-
55
-
56
-
57
-
58
-
59
-
60
-
61
-
62
-
63
-
64
-
65
-
66
-
67
-
68
-
69
-
70
-
71
-
72
-
73
-
74
-
75
-
76
-
77
-
78
-
79
-
80
-
81
-
82
-
83
-
84
-
85
-
86
-
87
-
88
-
89
-
90
-
91
-
92
-
93
-
94
-
95
-
96
 |
 |
