Yamaha V665 Owners Manual - Page 28
°Straight
 |
UPC - 027108933061
View all Yamaha V665 manuals
Add to My Manuals
Save this manual to your list of manuals |
Page 28 highlights
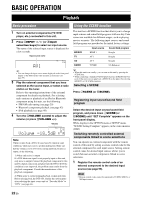
Playback Displaying input signal information When HDMI1-4 or AV1-4 is selected as the input source, you can display audio/video signal information. y • Input signal information is displayed on both a video monitor and the front panel display. • Information on the input signal is also displayed on the front panel display. You can select the desired item using oCursor k / n. 1 Select the desired input source, and press nOPTION. The option menu for the selected input source is displayed (see page 43). 2 Press oCursor k / n to select "Signal Info," and press oENTER. Information on input signals is displayed. See page 44 on messages displayed on the screen. Note • If an HDMI related error occurs, error information is displayed at the bottom of the screen. • Information on the input signal is also displayed on the front panel display. You can select the desired item using oCursor k / n. 3 To end the information display, press nOPTION. Changing information on the front panel display Information displayed on the front panel display can be changed by pressing EINFO (or jINFO). The following information can be displayed according to the input source. For example, if you select HDMI1 input and display "DSP Program," the following screen appears on the front panel display. Input source Straight Sound field program (DSP program) HDMI1-4: AV1-6: Input, DSP Program, Audio Decoder Input, DSP Program, Audio Decoder AUDIO1-2: Input, DSP Program, Audio Decoder MULTI CH: V-AUX: Input Input, DSP Program, Audio Decoder FM/AM: Frequency, DSP Program, Audio Decoder XM: Channel, Category, Song, Antenna, SIRIUS: DSP Program, Audio Decoder Channel, Category, Artist / Song, Composer, Antenna, DSP Program, Audio Decoder iPod (Simple remote mode): Input, DSP Program, Audio Decoder iPod (Menu browse mode): (in PlayInfo displayed) Artist, Album, Song, DSP Program, Audio Decoder (in Play menu displayed) List Bluetooth: Input, DSP Program, Audio Decoder Using the sleep timer The sleep timer is useful if you want to go to sleep while this unit is playing or recording a source. Press fSLEEP repeatedly to set the amount of time. Each time you press fSLEEP, the front panel display changes as shown below. Sleep 120min. Sleep 90min. Sleep Off Sleep 30min. Sleep 60min. When the sleep timer is set, the SLEEP indicator on the front panel display lights up. Press fSLEEP on the remote control repeatedly until "Sleep Off" appears on the front panel display. 24 En
-
 1
1 -
2
-
3
-
4
-
5
-
6
-
7
-
8
-
9
-
10
-
11
-
12
-
13
-
14
-
15
-
16
-
17
-
18
-
19
-
20
-
21
-
22
-
 23
23 -
 24
24 -
 25
25 -
 26
26 -
 27
27 -
 28
28 -
 29
29 -
 30
30 -
 31
31 -
 32
32 -
 33
33 -
34
-
35
-
36
-
37
-
38
-
39
-
40
-
41
-
42
-
43
-
44
-
45
-
46
-
47
-
48
-
49
-
50
-
51
-
52
-
53
-
54
-
55
-
56
-
57
-
58
-
59
-
60
-
61
-
62
-
63
-
64
-
65
-
66
-
67
-
68
-
69
-
70
-
71
-
72
-
73
-
74
-
75
-
76
-
77
-
78
-
79
-
80
-
81
-
82
-
83
-
84
-
85
-
86
-
87
-
88
-
89
-
90
-
91
-
92
-
93
-
94
-
95
-
96
 |
 |
