Yamaha V665 Owners Manual - Page 64
Advanced setup - av receiver
 |
UPC - 027108933061
View all Yamaha V665 manuals
Add to My Manuals
Save this manual to your list of manuals |
Page 64 highlights
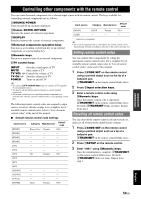
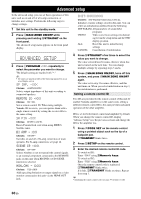
Advanced setup In the advanced setup, you can set basic operations of this unit, such as on and off of a bi-amp connection, or initialize user settings. Perform the following steps to change settings. 1 Set this unit to the standby mode. 2 Press AMAIN ZONE ON/OFF while pressing and holding MSTRAIGHT on the front panel. The advanced setup menu appears on the front panel display. ADVANCED SETUP 3 Press LPROGRAM l / h repeatedly to select the parameter you want to change. The default setting are marked with "*." y • Set values are placed in XXX of the following parameters on an actual display screen. SP IMP. -XXX Choices: 6ΩMIN/8ΩMIN* Selects output impedance of this unit according to connected speakers. REMOTE ID -XXX Choices: ID1*/ID2 Sets a remote control ID. When using multiple Yamaha AV receivers, you can operate them with a single remote control by setting the receiver IDs to the same setting. SR PIN -XXX Choices: RESET/CANCEL Resets Parental lock cord when using SIRIUS Satellite tuner. BI AMP - XXX Choices: ON/OFF* Switches on and off of bi-amp connection of main speakers. For bi-amp connection, see page 12. SCENE IR -XXX Choices: ON*/OFF Selects whether or not to transmit the control signals to an external component connected to the REMOTE jacks on this unit when BD/DVD or CD SCENE function is selected. MON.CHK - XXXX Choices: YES*/SKIP Adds upscaling limitation on output signals to a video monitor connected to this unit via the HDMI OUT jack. INIT-XXXXXXXXX Choices: DSP PARAM/VIDEO/ALL/CANCEL Initializes various settings stored in this unit. You can select an initialization method from the following. DSP PARAM: All parameters of sound field programs VIDEO: Video conversion settings (resolution/ aspect) in the setup menu and the OSD display position ALL: CANCEL: Reset this unit to initial factory settings Cancellation of initialization 4 Press MSTRAIGHT a few times to select the value you want to change. The value selected here becomes effective when this unit is turned on the next time. You can change multiple settings by repeating steps 3 and 4. 5 Press AMAIN ZONE ON/OFF, turns off this system, and press AMAIN ZONE ON/OFF again. The value set in step 3 becomes effective, and this unit turns on. When you select initialization in step 3, the initialization is performed. Setting a remote control ID Two IDs are provided for the remote control of this unit. If another Yamaha amplifier is in the same room, setting a different remote control ID to this unit prevents unwanted operation of the other amplifier. ID1 is set for both remote control and amplifier by default. When you change the remote control ID, display "Advance Setup" (see the previous section) and change the ID for the amplifier too. 1 Press dCODE SET on the remote control using a pointed object such as the tip of a ballpoint pen. cTRANSMIT blinks twice. 2 Press mSETUP on the remote control. 3 Enter the desired remote control ID code. To switch to ID1: Enter "5019" using tNumeric keys. To switch to ID2: Enter "5020" using tNumeric keys. Once the remote control code is registered, cTRANSMIT blinks twice. If it fails, cTRANSMIT blinks six times. Repeat from step 1. y • Initializing the remote control code (see page 59) returns it to ID1. 60 En
-
 1
1 -
2
-
3
-
4
-
5
-
6
-
7
-
8
-
9
-
10
-
11
-
12
-
13
-
14
-
15
-
16
-
17
-
18
-
19
-
20
-
21
-
22
-
23
-
24
-
25
-
26
-
27
-
28
-
29
-
30
-
31
-
32
-
33
-
34
-
35
-
36
-
37
-
38
-
39
-
40
-
41
-
42
-
43
-
44
-
45
-
46
-
47
-
48
-
49
-
50
-
51
-
52
-
53
-
54
-
55
-
56
-
57
-
58
-
 59
59 -
 60
60 -
 61
61 -
 62
62 -
 63
63 -
 64
64 -
 65
65 -
 66
66 -
 67
67 -
 68
68 -
 69
69 -
70
-
71
-
72
-
73
-
74
-
75
-
76
-
77
-
78
-
79
-
80
-
81
-
82
-
83
-
84
-
85
-
86
-
87
-
88
-
89
-
90
-
91
-
92
-
93
-
94
-
95
-
96
 |
 |