2007 Suzuki XL7 Owner's Manual - Page 206
2007 Suzuki XL7 Manual
Page 206 highlights
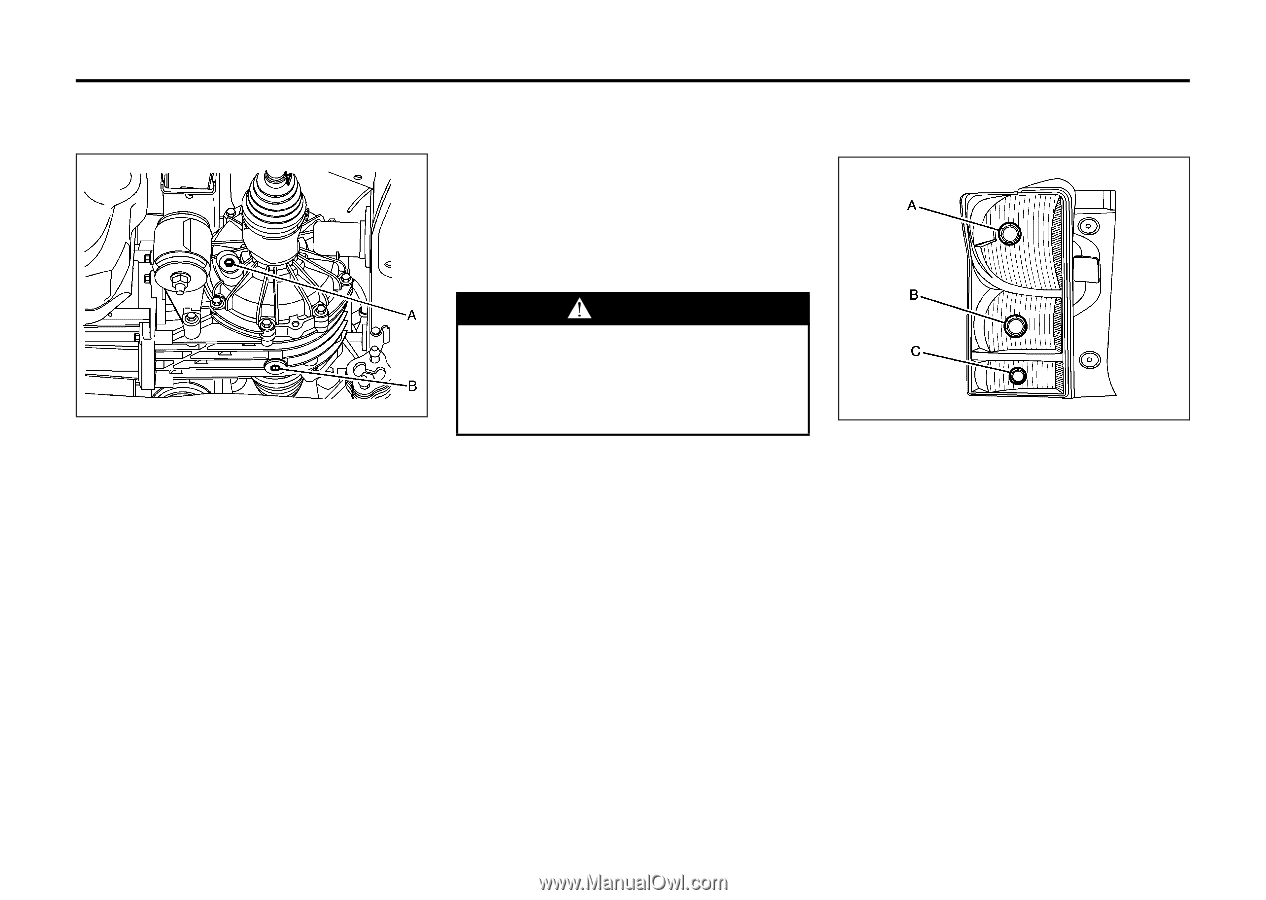
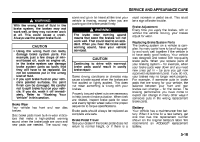
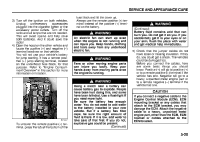
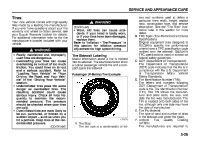
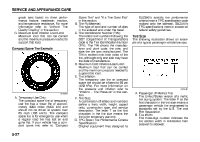
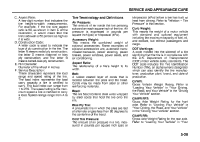
SERVICE AND APPEARANCE CARE How to Check Lubricant AWD Differential Case Bulb Replacement For the proper type of replacement bulbs, refer to "Replacement Bulbs" in this section. For any bulb changing procedure not listed in this section, contact your dealer. Taillamps, Turn Signal, Stoplamps and Back-up Lamps Halogen Bulbs WARNING Halogen bulbs have pressurized gas inside and can burst if you drop or scratch the bulb. You or others could be injured. Be sure to read and follow the instructions on the bulb package. 1716440 1802291 A. Fill Plug B. Drain Plug To get an accurate reading, the vehicle should be on a level surface. If the level is below the bottom of the filler plug hole, you'll need to add some lubricant. Add enough lubricant to raise the level to the bottom of the filler plug hole. A fluid loss could indicate a problem; check and have it repaired, if needed. What to Use Refer to the Maintenance Schedule to determine what kind of lubricant to use. Refer to "Recommended Fluids and Lubricants" in "Maintenance Schedule" in the "Maintenance Schedule" section. A. Stoplamp/Taillamp/Sidemarker Lamp B. Turn Signal Lamp/Taillamp C. Backup Lamp To replace one of these bulbs, do the following: 1) Open the liftgate. Refer to "Liftgate" in "Doors and Locks" in the "Features and Controls" section for more information. 5-23
-
 1
1 -
2
-
3
-
4
-
5
-
6
-
7
-
8
-
9
-
10
-
11
-
12
-
13
-
14
-
15
-
16
-
17
-
18
-
19
-
20
-
21
-
22
-
23
-
24
-
25
-
26
-
27
-
28
-
29
-
30
-
31
-
32
-
33
-
34
-
35
-
36
-
37
-
38
-
39
-
40
-
41
-
42
-
43
-
44
-
45
-
46
-
47
-
48
-
49
-
50
-
51
-
52
-
53
-
54
-
55
-
56
-
57
-
58
-
59
-
60
-
61
-
62
-
63
-
64
-
65
-
66
-
67
-
68
-
69
-
70
-
71
-
72
-
73
-
74
-
75
-
76
-
77
-
78
-
79
-
80
-
81
-
82
-
83
-
84
-
85
-
86
-
87
-
88
-
89
-
90
-
91
-
92
-
93
-
94
-
95
-
96
-
97
-
98
-
99
-
100
-
101
-
102
-
103
-
104
-
105
-
106
-
107
-
108
-
109
-
110
-
111
-
112
-
113
-
114
-
115
-
116
-
117
-
118
-
119
-
120
-
121
-
122
-
123
-
124
-
125
-
126
-
127
-
128
-
129
-
130
-
131
-
132
-
133
-
134
-
135
-
136
-
137
-
138
-
139
-
140
-
141
-
142
-
143
-
144
-
145
-
146
-
147
-
148
-
149
-
150
-
151
-
152
-
153
-
154
-
155
-
156
-
157
-
158
-
159
-
160
-
161
-
162
-
163
-
164
-
165
-
166
-
167
-
168
-
169
-
170
-
171
-
172
-
173
-
174
-
175
-
176
-
177
-
178
-
179
-
180
-
181
-
182
-
183
-
184
-
185
-
186
-
187
-
188
-
189
-
190
-
191
-
192
-
193
-
194
-
195
-
196
-
197
-
198
-
199
-
200
-
 201
201 -
 202
202 -
 203
203 -
 204
204 -
 205
205 -
 206
206 -
 207
207 -
 208
208 -
 209
209 -
 210
210 -
 211
211 -
212
-
213
-
214
-
215
-
216
-
217
-
218
-
219
-
220
-
221
-
222
-
223
-
224
-
225
-
226
-
227
-
228
-
229
-
230
-
231
-
232
-
233
-
234
-
235
-
236
-
237
-
238
-
239
-
240
-
241
-
242
-
243
-
244
-
245
-
246
-
247
-
248
-
249
-
250
-
251
-
252
-
253
-
254
-
255
-
256
-
257
-
258
-
259
-
260
-
261
-
262
-
263
-
264
-
265
-
266
-
267
-
268
-
269
-
270
-
271
-
272
-
273
 |
 |