ASRock X79 Extreme11 LSI SAS2 Integrated RAID Solution User Guide - Page 16
To create a second Integrated Mirroring Enhanced or Integrated Mirroring
 |
View all ASRock X79 Extreme11 manuals
Add to My Manuals
Save this manual to your list of manuals |
Page 16 highlights
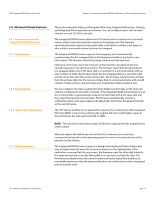
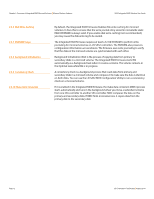
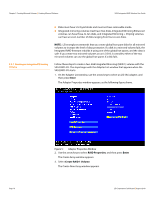
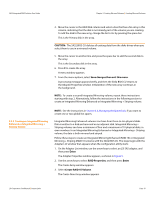
Chapter 3: Creating Mirrored Volumes | Creating Mirrored Volumes SAS2 Integrated RAID Solution User Guide 3.2.3 Expanding an Integrated Mirroring Volume with OCE Page 16 4. Move the cursor to the RAID Disk column and select a line that has a No entry in this column, which indicates that the disk is not already part of the volume you are creating. To add the disk to the new array, change the No to Yes by pressing the space bar. CAUTION: The SAS2 BIOS CU deletes all existing data from the disks drives when you select them to use for a mirrored volume. 5. Move the cursor to another line and press the space bar to add another disk to the array. If you select an odd number of disks, the SAS2 BIOS CU creates an Integrated Mirroring Enhanced array. If you select an even number of disks, it creates an Integrated Mirroring + Striping array. As you add disks, the Array Size field changes to reflect the size of the new array. 6. Press C to create the array. A menu window appears. 7. From the menu options, select Save changes then exit this menu. A processing message appears briefly, and then the SAS2 BIOS CU returns to the Adapter Properties window. Initialization of the new array continues in the background. NOTE: To create a second Integrated Mirroring Enhanced or Integrated Mirroring + Striping volume, repeat the instructions above. NOTE: See the instructions in Section 3.3, Managing Hot Spare Disks, if you want to create one or two global hot spares. You can use the online capacity expansion (OCE) feature to expand the capacity of a two-disk Integrated Mirroring (RAID 1) volume by replacing the original disks with two higher-capacity disk drives while the volume remains online. This process maintains data integrity at all times, even if one of the disks fails during the replacement process. The new disks must have at least 50 GB more capacity than the disks they are replacing, and they must use the same protocol (SAS or SATA) as the disks they are replacing. Follow these steps to expand an existing RAID1 volume with OCE: 1. Physically replace one of the two volume disk drives with a drive that has at least 50 GB more capacity. If necessary, you can identify the disks in the volume by following the instructions in Section 3.4.5, Locating Disk Drives in a Volume. 2. Wait until synchronization completes on the new disk and the volume returns to the Optimal state, as indicated in the Adapter Properties window of the SAS2 BIOS CU. 3. Physically replace the other volume disk drive with a drive that has at least 50 GB more capacity. LSI Corporation Confidential | August 2010
-
 1
1 -
2
-
3
-
4
-
5
-
6
-
7
-
8
-
9
-
10
-
 11
11 -
 12
12 -
 13
13 -
 14
14 -
 15
15 -
 16
16 -
 17
17 -
 18
18 -
 19
19 -
 20
20 -
 21
21 -
22
-
23
-
24
-
25
-
26
-
27
-
28
-
29
-
30
-
31
-
32
-
33
-
34
-
35
-
36
-
37
-
38
-
39
-
40
-
41
-
42
 |
 |