Beretta Tikka T3 Lite Tikka T3 Righthanded User Manual - Page 16
Single-set Trigger Mechanism, Cleaning After Use, Cleaning The Barrel, Maintenance Of The Stock - stainless
 |
View all Beretta Tikka T3 Lite manuals
Add to My Manuals
Save this manual to your list of manuals |
Page 16 highlights
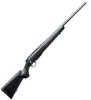
SINGLE-SET TRIGGER MECHANISM For use as a normal single-stage trigger, squeeze rearwards in the normal fashion. The trigger mechanism can also be "SET" by pushing the trigger forward until it stops. The rifle can now be fired with only a light touch. WARNING! WHEN THE TRIGGER IS IN THE "SET" POSITION, THE RIFLE MUST BE HANDLED WITH EXTREME CARE, AS ANY SHOCK OR VIBRATION CAN DISCHARGE THE RIFLE. If the rifle is cocked, with SAFETY ON, the trigger CANNOT be put into the "SET" position. To return trigger to the "UNSET" position, the safest method is to put "SAFETY ON" or open the bolt. NOTE! When the safety is in the "ON" position it locks the trigger mechanism and the bolt. The rifle can be cocked only when the safety is in the "OFF" position. TRIGGER ADJUSTMENT (FIG. 10) The trigger mechanism is constructed for 10 - 20 N (2-4 lbs) trigger weight in single-stage position. The trigger weight is adjusted to 13 - 15 N (3 lbs) at the factory. To be sure that the single-set trigger operates correctly in all circumstances, the trigger weight should not be increased. The trigger weight can be adjusted by the means of screw (1). Turning the screw clockwise will increase the trigger weight. NOTE! Screw (1) is self-locking and can only be turned with a proper tool. SET-TRIGGER ADJUSTMENT (FIG. 10) When the trigger is in the "SET" position, the trigger weight is 2 - 2.5 N (7 - 9 oz.) and cannot be adjusted. The screw (2) adjusts the gap between the trigger and the plunger of the trigger weight spring. This gap affects the creep in unset stage and should be as small as possible, preferably the screw should lightly touch the plunger. On the other hand if the pressure between the screw (2) and the plunger is too heavy, it may prevent the set-trigger from working. NOTE! Screw (2) is self-locking and unnecessary adjustments should be avoided to keep the self-locking in good condition. SAFETY ADJUSTMENT The safety is permanently adjusted at the factory. However, if the trigger, trigger sear or safety lever has to be changed, the safety must be readjusted. For this operation the trigger mechanism must be returned to the factory in Finland. CLEANING AFTER USE Before commencing cleaning check that all cartridges have been removed both from the magazine and chamber. Remove the bolt and push an oily cleaning cloth through the bore after which the rifle can be stored in this condition for a period of time. After thorough cleaning the barrel should be lightly oiled. Clean the bolt as well as the other external metal parts lightly with an oily cloth. Maintenance should not be neglected even in case of the "all-weather" model made of stainless steel. 16 CLEANING THE BARREL When cleaning the barrel always do as follows: - Always push the cleaning/oiling patch from the breech end. - Do not scrub the barrel, simply push the patch through the barrel and out through the muzzle. Repeat as necessary. - Use only absolutely straight and sturdy cleaning rods. MAINTENANCE OF THE STOCK 1. Wood-stocked models. Your Tikka stock is resistant to warping and moisture because of its oil or lacquered finish. Normally, it is only necessary to wipe the stock dry after use and to ensure that the stock's inner sections are lightly oiled. If your Tikka has an oil finish, you should occasionally wipe its stock with a good quality stock oil. If your Tikka's lacquered finish becomes damaged, we recommend that you consult a qualified gunsmith. 2. Synthetic-stocked models. The synthetic stock of your Tikka is resistant to the elements and does not need any special maintenance. BOLT DISASSEMBLY AND REASSEMBLY Generally, disassembling the bolt is not necessary. But if you have reason to believe that oil may have penetrated the bolt, you should clean it in order to retain its smooth operation. This is particularly important if you use the rifle in cold or harsh weather. In order to disassemble the bolt, please follow these steps: 1. Carefully check that the rifle is unloaded and remove the bolt from the rifle by pressing the bolt-release lever on the left side of the receiver. 2. Remove the bolt shroud by turning it clockwise until it stops and pulling it away from the bolt. 3. Insert the tip of a screwdriver (approx. 3mm wide) into the gap between the cocking piece and the bolt handle retainer bushing. IMPORTANT! Do not remove the screwdriver tip from this location until you are ready to reassemble the bolt shroud. 4. Disengage the firing pin assembly by turning the screwdriver counterclockwise (see fig. 11). Push the firing pin assembly forward until the locking cam (E) of the handle retainer bushing touches the bolt's rear surface. 5. Release the bolt handle from the bolt body. If the bolt handle feels stiff and does not immediately pull out, you can tap it with a plastic mallet at the receiver end (arrow G). 6. Remove the firing pin assembly from the bolt. The bolt should not require any further disassembly for cleaning purposes. In order to reassemble the bolt after cleaning, reverse the order: 1. Push the firing pin assembly into place. Make sure that the bolt handle retainer bushing is in the correct position, so that you can ease the bolt handle back into place without obstruction. 2. Reassemble the bolt handle to the bolt body. 3. Re-engage the firing pin assembly by turning the screwdriver clockwise as far as it will go. Make sure that the retainer bushing locks the handle. 4. Replace the bolt shroud by turning it counterclockwise until the cocking piece cam stops in the notch (D) before the cocking slope (see fig. 2).
-
 1
1 -
2
-
3
-
4
-
5
-
6
-
7
-
8
-
9
-
10
-
 11
11 -
 12
12 -
 13
13 -
 14
14 -
 15
15 -
 16
16 -
 17
17 -
 18
18 -
 19
19 -
 20
20 -
 21
21 -
22
-
23
-
24
-
25
-
26
-
27
-
28
-
29
-
30
-
31
-
32
-
33
-
34
-
35
-
36
-
37
-
38
-
39
-
40
-
41
-
42
-
43
-
44
-
45
-
46
-
47
-
48
-
49
-
50
 |
 |
