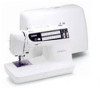
Brother International CS-8072 Users Manual - English
Brother International CS-8072 Manual
 |
View all Brother International CS-8072 manuals
Add to My Manuals
Save this manual to your list of manuals |
Brother International CS-8072 manual content summary:
- Brother International CS-8072 | Users Manual - English - Page 1
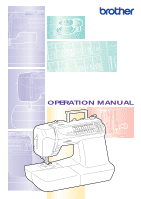
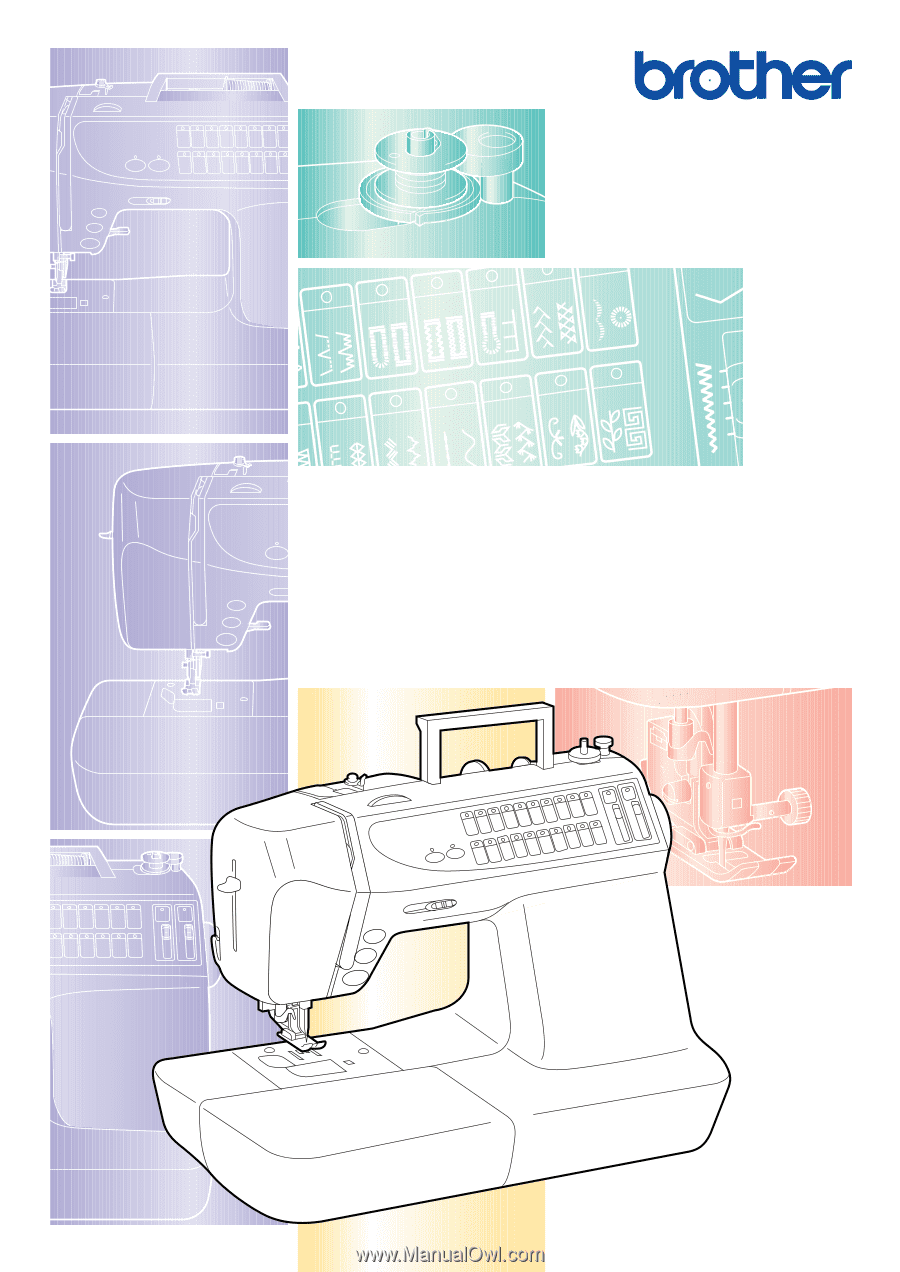
® 9 10 11 12 13 14 15 16 17 18 19 20 28 29 30 31 32 33 34 35 36 37 38 39 40 SewMinagchine OPERATION MANUAL - Brother International CS-8072 | Users Manual - English - Page 2
, changing needle, threading bobbin, or changing presser foot, and the like. 15.Always unplug the machine from the electrical outlet when removing covers, lubricating, or when making any other user servicing adjustments mentioned in the instruction manual. 16.This sewing machine is not intended for - Brother International CS-8072 | Users Manual - English - Page 3
ONLY If this machine is fitted with with bared flexible cords is hazardous if engaged in a live socket outlet. In the event of replacing the plug fuse, use a fuse approved marked on plug. Always replace the fuse cover, never use plugs with the fuse cover omitted. WARNING DO NOT CONNECT EITHER WIRE - Brother International CS-8072 | Users Manual - English - Page 4
installation. For repair or adjustment In the event a malfunction occurs or adjustment is required, first follow the troubleshooting table in the back of the operation manual to inspect and adjust the machine yourself. If the problem persists, please consult your local authorized Brother dealer. For - Brother International CS-8072 | Users Manual - English - Page 5
USE SEWING UTILITY STITCHES CONTENTS CHAPTER 1 BEFORE USE 4 PART NAMES 4 STANDARD ACCESSORIES 6 OPTIONAL ACCESSORIES 6 OPERATION PANEL 7 OPERATION BUTTONS 8 Using the operation buttons 8 POWER SUPPLY 9 BOBBIN WINDING / BOBBIN THREAD SETTING 10 Winding the bobbin and setting the bobbin - Brother International CS-8072 | Users Manual - English - Page 6
USE SEWING UTILITY STITCHES MAINTENANCE 67 CLEANING THE MACHINE 67 Cleaning the operation panel 67 Cleaning the machine casing 67 Cleaning the race and shuttle 67 CHANGING THE LIGHT BULB 69 TROUBLE SHOOTING 70 Trouble with threads and stitches 70 Mechanical trouble 71 Alarm 71 SEWING - Brother International CS-8072 | Users Manual - English - Page 7
guide for bobbin winding 4- Needle threader lever 5- Thread cutter 6- Buttonhole lever 7- Needle threader 8- Presser foot 9- Feed dog 10- Bobbin cover 11- Feed dog position switch 12- Upper tension control dial 13- Bobbin winder 14- Balance wheel 15- Sewing speed controller A- Main power switch - Brother International CS-8072 | Users Manual - English - Page 8
connect the foot controller. 3 Power cord Use to connect the machine to the power supply. CAUTION - When leaving the machine unattended, the main switch of the machine should be switched off or the plug must be removed from the socket-outlet. - When servicing the machine, or when removing covers or - Brother International CS-8072 | Users Manual - English - Page 9
spool before sewing. * The extra spool pin, which is provided as an accessory, should be attached to the end of the bobbin winder shaft during use. Note (For U.S.A. only) Foot controller: Model N5V This foot controller can be used on this machine model PC-2800. 1- Walking foot* Parts code: SA140 - Brother International CS-8072 | Users Manual - English - Page 10
the LED lamp is lit, you can make adjustments. When the LED lamp is turned off, the stitch length will return to the default value. 7 Stitch length adjustment lever Use this lever when you want to adjust stitch length. UTILITY STITCHES MAINTENANCE SEWING CHART PATTERNS (PROGRAMMED IN MACHINE) 7 - Brother International CS-8072 | Users Manual - English - Page 11
start or while it is sewing. If the machine cannot be started, this button changes to red. In addition, this button lights up in orange while the bobbin thread is winding onto the bobbin (the bobbin winder shaft is moved to the right). * Sewing continues at a slow speed while this button is pressed - Brother International CS-8072 | Users Manual - English - Page 12
dealer for repairs before continuing use. • Unplug the power cord if the machine is not to be used for a long period of time. Otherwise a fire may result. 1. Insert the plug into a wall outlet. 1 Main power switch 2. Set the main power switch to " I ". 3. To turn off the sewing machine, set the - Brother International CS-8072 | Users Manual - English - Page 13
CONTENTS BEFORE USE BOBBIN WINDING / BOBBIN THREAD SETTING Winding the bobbin and setting the bobbin thread CAUTION Use only bobbins recommended by the manufacturer of this machine (see page 5). Using other bobbins may result in damage or injury. 3 2 4,9 5 6 7,8 1 SEWING UTILITY STITCHES - Brother International CS-8072 | Users Manual - English - Page 14
, press the "START/STOP" button to stop the machine. 9. Cut the thread, slide the bobbin winder shaft to the left and remove the bobbin. Note Immediately after winding the bobbin, it is normal to hear the sound of the clutch engaging when beginning to sew or manually turning the balance wheel. 11 - Brother International CS-8072 | Users Manual - English - Page 15
BEFORE USE SEWING UTILITY STITCHES Setting the bobbin CAUTION Setting the bobbin improperly may cause the thread tension to loosen, breaking the needle and resulting in injury. 1 Wound evenly 2 Wound poorly 1 2 1 1. Slide open the bobbin cover. 1 Bobbin cover 2 Bobbin cover release - Brother International CS-8072 | Users Manual - English - Page 16
break the needle, leading to injury. Note When threading the sewing machine, be sure that one of the presser feet mentioned in this Operation Manual is installed. 3 4 6 1 5 2 1. Raise the presser foot lever. (If the presser foot is not raised, 1 the upper thread cannot be threaded.) Note - Brother International CS-8072 | Users Manual - English - Page 17
thread guide 7. When using the auto-threading device, gently pull the thread towards you. 1 Needle threader lever 2 Guide (Large hook) * Lowering the presser foot will engage the automatic tension and will allow you to grip the thread as you proceed. UTILITY STITCHES MAINTENANCE SEWING CHART - Brother International CS-8072 | Users Manual - English - Page 18
about 50 mm(2"). * You do not need to pull the bobbin thread up before you start sewing. Note Always raise the presser foot before removing the upper thread from the machine or damage may occur to the tension unit. CAUTION The needle threader lever can not be used to thread the needle when you are - Brother International CS-8072 | Users Manual - English - Page 19
spool pin into the end of the bobbin winder shaft 2 Spool felt 3 Thread spool * When setting the thread spool, set it so that the thread winds off from the front of the spool. * If using metallic thread, we recommend that you use a 90/14 home sewing machine needle or contact your dealer for special - Brother International CS-8072 | Users Manual - English - Page 20
press the "START/STOP" button. The sewing machine starts sewing. * Slide the sewing speed controller to adjust the sewing speed. * Hold down the "START/STOP" button to sew at a slow speed. 2. Press the "START/STOP" button to stop the sewing machine. Foot controller 1 2 CAUTION Do not allow fabric - Brother International CS-8072 | Users Manual - English - Page 21
USE SELECTING A STITCH PATTERN 3 1 12 34 56 78 21 22 23 24 25 26 27 28 2 This sewing machine is equipped with 40 built-in utility and decorative stitches. Press the stitch selection key that shows the stitch you want to sew. The LED lamp will light up. If the stitch you want to sew main power - Brother International CS-8072 | Users Manual - English - Page 22
CONTENTS Quick adjustment reference chart for stitch width and stitch length BEFORE USE SEWING UTILITY STITCHES STITCH Straight stitch 1 (Left) Straight stitch 2 (Middle) 3 Zigzag stitch 3 step elastic 4 zigzag Triple stretch 5 stitch 6 Overcasting 7 stitch 8 Blind hem 9 stitch Blind hem 10 - Brother International CS-8072 | Users Manual - English - Page 23
dial can be used to adjust the tension of the upper thread in the following cases. * when using specialty threads or sewing on special fabric * when sewing gathers, shirring or shell tucks * when these settings do not give the desired re- sult The upper thread and the bobbin thread should cross - Brother International CS-8072 | Users Manual - English - Page 24
BEFORE USE Tightening the upper thread tension Turn the thread tension dial to the right to tighten the upper thread tension. 543 6 2 4 3 1 Upper thread 2 Bobbin thread 3 Wrong side 4 If the upper thread tension is too weak, locks appear on the wrong side of the fabric. 1 2 SEWING UTILITY - Brother International CS-8072 | Users Manual - English - Page 25
CONTENTS BEFORE USE PRESSER FOOT Changing the presser foot CAUTION • Always turn off the power before changing the presser foot. If the power is on and the "Start/ Stop" button or another button is pressed, the machine will start and may cause injury. • Always use the correct presser foot for the - Brother International CS-8072 | Users Manual - English - Page 26
can not be sewn with the walking foot. Note You can not use this foot for sewing other patterns. 5 1. Push the "NEEDLE POSITION" button to raise the needle, and then turn off the power. 2. Raise the presser foot lever and remove the presser foot. 3. Use the included disc-shaped screwdriver to - Brother International CS-8072 | Users Manual - English - Page 27
CONTENTS FEED DOG With the accessory compartment off of the machine, the feed dog position switch can be seen on the base of the sewing machine. Sliding the switch to the right will lower the feed dog, for example during button sewing. If you wish to continue sewing normally, slide the lever to - Brother International CS-8072 | Users Manual - English - Page 28
surface (bobbin cover, glass, etc.) 1 2 * Place a level surface under the needle SEWING UTILITY STITCHES MAINTENANCE SEWING CHART Installing the needle securely 1. Push the "NEEDLE POSITION" button to raise the needle, and then turn off the power. 2. Lower the presser foot. 6 3. Loosen - Brother International CS-8072 | Users Manual - English - Page 29
CONTENTS BEFORE USE SEWING FABRIC/THREAD/NEEDLE COMBINATION CHART About the Needle The sewing machine needle is probably the most important part of the sewing machine. Choosing the proper needle for your sewing project will result in a beautiful finish and fewer problems. Below are some things - Brother International CS-8072 | Users Manual - English - Page 30
, the needle may break and cause injury. BEFORE USE SEWING UTILITY STITCHES MAINTENANCE 1 2 3 4 5 2 1 1. Turn on the sewing machine. The straight stitch (left) is selected. 2. Install the correct presser foot. Place the fabric under the presser foot, then pull out about 5 cm (2") of the - Brother International CS-8072 | Users Manual - English - Page 31
position. 6 1 Thread * You can begin sewing without drawing up the bobbin thread. 5 6 5 6 4. Lower the presser foot. Press the "REVERSE STITCH" button to sew a few reverse stitches, and then press the "START/ STOP" button. The machine will start sewing at a slow speed. * Reverse stitches are sewn - Brother International CS-8072 | Users Manual - English - Page 32
USE SETTING THE NEEDLE STOP DOWN POSITION If you set the needle stop position to the down position when you select a stitch, the needle stops in the down position when sewing starting and stopping sewing. Touch the needle when the main power switch is When the main power switch is turned - Brother International CS-8072 | Users Manual - English - Page 33
USE SEWING UTILITY STITCHES STITCH WIDTH AND LENGTH Generally suitable stitch width and length values are set automatically when a stitch is selected. If you prefer to use other values, follow the instructions below to change the values. Adjusting the stitch width Press the stitch width manual - Brother International CS-8072 | Users Manual - English - Page 34
BEFORE USE USEFUL SKILLS Sewing corners 6 Stop the sewing machine with the needle in the fabric at the corner, then raise the presser foot and turn the fabric. When sewing seams which are less than 5.0 mm (13/64" in width), baste the corner, then continue sewing while slowly changing the sewing - Brother International CS-8072 | Users Manual - English - Page 35
material under the fabric before sewing. * Use a straight stitch foot to eliminate any puckering. Remember to select the middle needle position. Additional adjustment of stitch length and tension may be necessary. UTILITY STITCHES MAINTENANCE SEWING CHART PATTERNS (PROGRAMMED IN MACHINE) 32 - Brother International CS-8072 | Users Manual - English - Page 36
USE Using the needle plate 15 25 35 Align the edge of the fabric with a line on the needle plate to sew even seam allowances. 1 15 mm (9/16") 1 Free-arm sewing Free-arm sewing is convenient for sewing tubular areas such as pant hems and cuffs. SEWING UTILITY STITCHES MAINTENANCE SEWING - Brother International CS-8072 | Users Manual - English - Page 37
tangle or the needle could break, causing injury. 3. Sew at a slow speed as you approach the end of the sewing 5 area, then press the "REVERSE STITCH" button to sew sev- eral reverse stitches and stop the machine. 6 4. Raise the presser foot, remove the fabric and cut the thread. 1 Thread - Brother International CS-8072 | Users Manual - English - Page 38
pulling the fabric. * Do not pull the fabric while sewing. 1 Basting Changing the stitch length 1 1 2 2 Press the stitch length manual change key to light up the LED lamp. Move the stitch length adjustment lever up or down to adjust the stitch length. 1 Up: Longer 2 Down: Shorter * For thin - Brother International CS-8072 | Users Manual - English - Page 39
bridges both pieces of fabric. 6 Sewing curves (using a zigzag stitch) 5 Shorten the stitch length setting to obtain a fine stitch. Sew slowly, keeping the seams parallel with the fabric edge as you guide the fabric around the curve. 6 36 SEWING CHART PATTERNS (PROGRAMMED IN MACHINE) - Brother International CS-8072 | Users Manual - English - Page 40
fabrics 6: For sewing stretch fabrics 7: For sewing light and medium weight fabrics 8: For sewing heavyweight fabrics Sewing using stitch 7 or 8 G 5 Sew the fabric with the fabric edge against the guide of presser foot "G". 6 1 Guide CAUTION 1 After the stitch width is adjusted, turn the - Brother International CS-8072 | Users Manual - English - Page 41
USE OVERCASTING (WHEN USING THE OPTIONAL SIDE CUTTER) 1 7 8 1: Normal sewing 7: Overcasting stitch for light and medium weight fabrics 8: Overcasting stitch for heavyweight fabrics 1. Push the "NEEDLE POSITION" button to raise the needle, then turn off the power. 2. Raise the presser foot - Brother International CS-8072 | Users Manual - English - Page 42
BEFORE USE SEWING UTILITY STITCHES 7. Make a cut of about 20 mm (3/4'') in the fabric. 1 20 mm (3/4'') 1 2 A 13 5 6 B 5 6 1 8. Place the fabric on foot as shown in figure B. - Right side of cut: on top of the guide plate - Left side of cut: underneath the presser foot 1 Guide plate - Brother International CS-8072 | Users Manual - English - Page 43
CONTENTS BEFORE USE SEWING UTILITY STITCHES BLIND HEM STITCHING 9 10 1 stitch foot "R", and lower the presser foot. Position the fabric so the folded edge touches the guide of the presser foot. 1 Guide 2 Fold 3. Sew the problem. MAINTENANCE SEWING CHART PATTERNS (PROGRAMMED IN MACHINE) 40 - Brother International CS-8072 | Users Manual - English - Page 44
USE SEWING Adjusting the needle drop point 12 1 2 A B Press the stitch width manual change key to light up the LED lamp. Use the stitch width adjustment lever to adjust does not catch enough of the hem fold, move the stitch width adjustment lever up. This makes the stitch wider to move the needle - Brother International CS-8072 | Users Manual - English - Page 45
sure that there is no gap behind the part of the foot marked "A". If the button- hole foot is not slid back as far as possible, the A buttonhole will not be sewn with the correct size. • Pass the thread underneath the presser foot. MAINTENANCE SEWING CHART PATTERNS (PROGRAMMED IN MACHINE) 42 - Brother International CS-8072 | Users Manual - English - Page 46
on the buttonhole foot. 1 Metal bracket BEFORE USE SEWING UTILITY STITCHES MAINTENANCE 1 5 6 5. Gently hold the end of the upper thread, and then start sewing. Feed the fabric carefully by hand while the buttonhole is sewn. Once sewing is completed, the machine automatically sews reinforcement - Brother International CS-8072 | Users Manual - English - Page 47
USE SEWING UTILITY STITCHES Buttonhole sewing order 12 11 15 13 14 1 1 1 1 Reinforcement stitch Sewing stretch fabrics (" 13 " and " 14 ") 13 14 When sewing on stretch fabric with , sew the buttonhole stitches 5 over a gimp thread. 1. Hook the gimp thread onto the back of presser foot - Brother International CS-8072 | Users Manual - English - Page 48
the button holder plate 2 1 3 4 Use the markings on the presser foot scale to set the size of the buttonhole. One mark on the presser foot scale equals 5 mm (3/ 16''). Add 1 1 10 mm (3/8'') 2 15 mm (9/16'') 2 UTILITY STITCHES MAINTENANCE SEWING CHART PATTERNS (PROGRAMMED IN MACHINE) 45 - Brother International CS-8072 | Users Manual - English - Page 49
CONTENTS BEFORE USE SEWING Changing the stitch length 1 1 Press the stitch length manual change key to light up the LED lamp. Move the stitch length adjustment lever up or down to adjust the stitch length. 1 Up: Longer 2 Down: Shorter * If the fabric does not feed (for example, because the - Brother International CS-8072 | Users Manual - English - Page 50
can not be adjusted. 3. Attach monogramming foot "N", then turn the balance wheel to check the needle drop position. Lower the presser foot lever and start sewing. When sewing is finished, the machine sews reinforcement stitches and stops automatically. 1 Needle drop position 4. Use the eyelet - Brother International CS-8072 | Users Manual - English - Page 51
you sew using the middle needle position. 1. Attach presser foot "J" and sew straight stitches up to the zipper opening. Change to a basting stitch and sew to zipper dur- ing sewing. If the needle strikes the zipper, the nee- dle may break, leading to injury. 48 PATTERNS (PROGRAMMED IN MACHINE) - Brother International CS-8072 | Users Manual - English - Page 52
UTILITY STITCHES Inserting a side zipper CAUTION Make sure you sew using the middle needle position. 3 2 1. Attach presser foot "J" and sew straight stitches up to the zip- per opening. Change to a basting stitch and sew to the top of the fabric. 4 1 1 Reverse stitches 2 Wrong side of - Brother International CS-8072 | Users Manual - English - Page 53
CONTENTS BEFORE USE SEWING 5. Close the zipper, turn the fabric over, and sew a basting stitch. 1 Front of the skirt (wrong side of fabric) 2 Basting stitches 3 Front of the skirt (right side of fabric) 4 Back of the skirt (right side of fabric) 1 4 23 3 1 6. Remove the presser foot, and - Brother International CS-8072 | Users Manual - English - Page 54
CONTENTS BEFORE USE SEWING DART SEAM 1 1 J 1. Attach presser foot "J", then sew a reverse stitch at the beginning of the dart and sew from the wide end to the narrow end without stretching the fabric. 1 Basting 2. Do not sew a reinforcement stitch at the end. Cut the thread at the end leaving - Brother International CS-8072 | Users Manual - English - Page 55
stitch length adjustment lever up to increase the stitch length (about 4 mm (1/16")) as shown left figure, and select a weak thread tension. 3. Attach presser foot "J", then pull out about 50 mm (2") of both the bobbin and upper threads. 1 Upper thread 2 Bobbin thread 3 About 50 mm (2") 4. Sew two - Brother International CS-8072 | Users Manual - English - Page 56
1 1 Shuttle * The bobbin cover should still be removed. 6 2. While holding the upper thread, press the "NEEDLE POSI- TION" button twice, and then pull out the bobbin thread. 3. Replace the bobbin cover. SEWING UTILITY STITCHES MAINTENANCE SEWING CHART PATTERNS (PROGRAMMED IN MACHINE) 53 - Brother International CS-8072 | Users Manual - English - Page 57
BEFORE USE SEWING PINTUCK 2 I For decorating blouses, etc. 1. Mark along the folds on the wrong side of the fabric. 1 Wrong side of fabric 2. Fold the fabric so that the right side faces upward and iron only the folded parts. 1 Right side of fabric 3. Attach the right pin of presser foot "I" to - Brother International CS-8072 | Users Manual - English - Page 58
CONTENTS BEFORE USE SEWING FLAT FELL SEAM 2 J For reinforcing seams and neatly finishing edges 1. Attach presser foot "J". Sew the seam line, Wrong side of fabric 4. Fold the longer seam allowance around the shorter one, and sew the edge of the fold. 1 Wrong side of fabric * Flat-fell seam can - Brother International CS-8072 | Users Manual - English - Page 59
Finished flat fell seam 1 Right side of fabric CONTENTS BEFORE USE SEWING UTILITY STITCHES MAINTENANCE SEWING CHART PATTERNS (PROGRAMMED IN MACHINE) 56 - Brother International CS-8072 | Users Manual - English - Page 60
off the edge of the appliqué, then begin sewing. 6 1 Appliqué material 2 Needle drop position SEWING UTILITY STITCHES MAINTENANCE SEWING CHART Sewing sharp curves 6 Stop the machine with the needle in the fabric outside the appliqué. Raise the presser foot and turn the fabric a little bit at - Brother International CS-8072 | Users Manual - English - Page 61
CONTENTS BEFORE USE SCALLOP STITCH 19 5 6 N For decorating the collars of blouses, the edges of tablecloths, etc. 1. Attach presser foot "N", then sew the edge of the will give a more finished appearance. SEWING UTILITY STITCHES MAINTENANCE SEWING CHART PATTERNS (PROGRAMMED IN MACHINE) 58 - Brother International CS-8072 | Users Manual - English - Page 62
manual change key to turn on the LED lamp. Move the stitch length adjustment lever up to increase the stitch length (about 4 mm (3/16")) as shown left figure, and select a weak thread tension. 2. Sew the seams, leaving about 10 mm (3/8'') between the seams. 1 About 10 mm (3/8'') 3. Pull the bobbin - Brother International CS-8072 | Users Manual - English - Page 63
foot "J". Align the center of the presser foot with the middle of the space between the fabrics and begin sewing. Use a thick thread. 1 Basting stitches 3. When sewing is finished, gently tear the paper away. SEWING UTILITY STITCHES MAINTENANCE SEWING CHART PATTERNS (PROGRAMMED IN MACHINE - Brother International CS-8072 | Users Manual - English - Page 64
or to decorate the seams of crazy quilts. Use a contrasting thread color or decorative embroidery thread. SEWING UTILITY STITCHES MAINTENANCE SEWING CHART Changing the size of a decorative stitch Use the stitch width or stitch length keys to adjust the zigzag stitch width and the stitch length - Brother International CS-8072 | Users Manual - English - Page 65
. A more attractive finish can be obtained if you use the "130/705H Wing" needle when sewing these patterns. If using a wing needle and the stitch width has been set to manual, check that the needle will not touch the presser foot before starting sewing. Hemstitching 1 1 2 27 28 29 30 31 32 29 - Brother International CS-8072 | Users Manual - English - Page 66
'') or less.) 1 Approx. 4 mm (3/16'') or less 2 Four threads (pull out) 3 Five threads (leave) 3. Sew the decorative stitch on the center of the five threads created above. * Using a wing needle is an option. 4. Illustration of finished product. 63 SEWING CHART PATTERNS (PROGRAMMED IN MACHINE) - Brother International CS-8072 | Users Manual - English - Page 67
can be changed manually.. CAUTION • Use only twin needles made for this machine (part code X59296-001). Other needles could break, resulting in damage. • Do not sew with bent needles. The needle could break and cause injury. • When using the twin needle, use the presser foot "J" regardless of what - Brother International CS-8072 | Users Manual - English - Page 68
CONTENTS BEFORE USE SEWING UTILITY STITCHES 4. Set the extra spool pin into the hole on the end of the bobbin winder shaft on the top of the machine. Follow the instructions 1 for single-needle threading. 1 Extra spool pin for right needle threading. 2 Push the spool pin securely into place. - Brother International CS-8072 | Users Manual - English - Page 69
may occur when using different fabric thicknesses or types of stabilizers. Be sure to carry out a test sewing beforehand to check. FABRIC THREAD NEEDLE When sewing lightweight or stretch fabrics, fabrics with coarse weaves, or decorative stitches stored in the machine; attach interfacing to - Brother International CS-8072 | Users Manual - English - Page 70
Do not use organic solvents or detergents. Cleaning the machine casing If the surface of the machine is dirty machine will not run well. Keep the machine clean for best results. 5 6 1. Turn off the power. Remove the presser foot holder and the needle. SEWING UTILITY STITCHES MAINTENANCE SEWING - Brother International CS-8072 | Users Manual - English - Page 71
BEFORE USE SEWING UTILITY STITCHES 5 6 5 6 1 1 2 1 2 12 4. Remove the race. * While pushing the race towards the back of the machine, lift cause a poor finish, or the needle may break. You can get the proper parts from your authorized dealer. • Be sure to insert the race in the correct - Brother International CS-8072 | Users Manual - English - Page 72
new light bulb. CAUTION Use only light bulbs intended for use with this machine (12V/ 5W: part no. XA2037001). You can get the proper light bulb at your authorized dealer. 4. Replace light cover and tighten the screw on the back of the machine. 69 MAINTENANCE SEWING CHART PATTERNS (PROGRAMMED IN - Brother International CS-8072 | Users Manual - English - Page 73
CONTENTS BEFORE USE SEWING TROUBLE SHOOTING Trouble with threads and stitches Before calling for service, check the following items. If the problem still persists, contact your nearest authorized Brother dealer. Symptom 1. Upper thread breaks 2. Bobbin thread breaks 3. Skipped stitches 4. - Brother International CS-8072 | Users Manual - English - Page 74
the off position. 2. Turn the power on. 3. Presser foot is not lowered. 3. Lower the presser foot. Note - If the power goes out while the sewing machine is being operated: Turn off the sewing machine and unplug its power cord. When the sewing machine is restarted, operate it correctly according - Brother International CS-8072 | Users Manual - English - Page 75
CONTENTS CATEGORY NAME OF PATTERN PATTERN TYPE OF PRESSER FOOT USE REINFORCEMENT STITCHING STITCH ADJUSTMENT BY STITCH WIDTH KEYS STITCH ADJUSTMENT BY STITCH LENGTH KEYS TWIN NEEDLE POSSIBILITY BEFORE USE SEWING UTILITY STITCHES UTILITY STITCH MAINTENANCE STRAIGHT 1 STITCH (LEFT) STRAIGHT - Brother International CS-8072 | Users Manual - English - Page 76
PATTERN PATTERN TYPE OF PRESSER FOOT SCALLOP STITCH 19 EYELET USE REINFORCEMENT STITCHING STITCH ADJUSTMENT BY STITCH WIDTH KEYS STITCH ADJUSTMENT BY STITCH LENGTH KEYS TWIN NEEDLE POSSIBILITY OK (J) NO NO NO NO NO NO NO NO NO NO NO NO NO NO NO NO NO 73 PATTERNS (PROGRAMMED IN MACHINE) SEWING - Brother International CS-8072 | Users Manual - English - Page 77
the "REVERSE STITCH" button is pushed. : The machine sews three reinforcement stitches and stops when the "REVERSE STITCH" button is pushed. : Adjustments can be made. - : Adjustments cannot be made. CAUTION Make sure to use the correct presser foot for each stitch pattern. Otherwise, the needle - Brother International CS-8072 | Users Manual - English - Page 78
CONTENTS BEFORE USE PATTERNS (PROGRAMMED IN MACHINE) Utility stitches 1 2 3 4 5 6 7 8 9 10 11 12 13 14 15 16 17 18 19 20 Decorative stitches Satin stitches 21 22 23 24 Cross stitches 25 26 SEWING UTILITY STITCHES MAINTENANCE SEWING CHART Heirloom 27 28 29 30 - Brother International CS-8072 | Users Manual - English - Page 79
76 - Brother International CS-8072 | Users Manual - English - Page 80
77 - Brother International CS-8072 | Users Manual - English - Page 81
78 - Brother International CS-8072 | Users Manual - English - Page 82
ENGLISH 194953-011 0012 Printed in Taiwan
-
 1
1 -
 2
2 -
 3
3 -
 4
4 -
 5
5 -
 6
6 -
 7
7 -
8
-
9
-
10
-
11
-
12
-
13
-
14
-
15
-
16
-
17
-
18
-
19
-
20
-
21
-
22
-
23
-
24
-
25
-
26
-
27
-
28
-
29
-
30
-
31
-
32
-
33
-
34
-
35
-
36
-
37
-
38
-
39
-
40
-
41
-
42
-
43
-
44
-
45
-
46
-
47
-
48
-
49
-
50
-
51
-
52
-
53
-
54
-
55
-
56
-
57
-
58
-
59
-
60
-
61
-
62
-
63
-
64
-
65
-
66
-
67
-
68
-
69
-
70
-
71
-
72
-
73
-
74
-
75
-
76
-
77
-
78
-
79
-
80
-
81
-
82
 |
 |
10
9
12
11
13
14
15
16
17
18
20
19
28
29
30
31
32
33
34
35
36
37
38
39
40
®
S
ewing
M
achine
OPERATION MANUAL