Brother International PQ1600S Operation Manual
Brother International PQ1600S Manual
 |
View all Brother International PQ1600S manuals
Add to My Manuals
Save this manual to your list of manuals |
Brother International PQ1600S manual content summary:
- Brother International PQ1600S | Operation Manual - Page 1
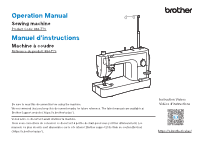
Code: 884-T79 Manuel d'instructions Machine à coudre Référence du produit: 884-T79 Be sure to read this document before using the machine. We recommend that you keep this document nearby for future reference. The latest manuals are available at Brother Support website ( https://s.brother/cpiac - Brother International PQ1600S | Operation Manual - Page 2
- Brother International PQ1600S | Operation Manual - Page 3
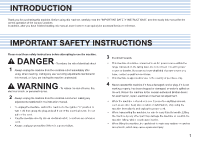
Please read these safety instructions before attempting to use the machine. DANGER - To reduce the risk of electrical shock 1 Always unplug the machine from the electrical outlet immediately after using, when cleaning, making any user servicing adjustments mentioned in this manual, or if you are - Brother International PQ1600S | Operation Manual - Page 4
pull the fabric while sewing, and follow the instructions carefully when free motion stitching so that you not use outdoors. 8 For a longer service life: • When using and storing this troubleshooting table in the back of the Operation Manual to inspect and adjust the machine yourself. If the problem - Brother International PQ1600S | Operation Manual - Page 5
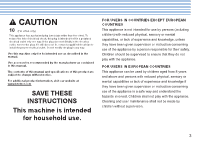
by the manufacturer as contained in this manual. The contents of this manual and specifications of this product are subject to change without notice. For additional product information, visit our website at www.brother.com SAVE THESE INSTRUCTIONS This machine is intended for household use - Brother International PQ1600S | Operation Manual - Page 6
the machine. Be sure to observe the precautions described in the sign. 1 1 CAUTION Moving parts -To reduce risk of injury, disconnect from supply circuit before servicing. Replace cover. Close door before operating machine. 4 - Brother International PQ1600S | Operation Manual - Page 7
CONTENTS INTRODUCTION 1 IMPORTANT SAFETY INSTRUCTIONS 1 Accessories 6 Machine Features 7 Before You Begin (1 8 Power Cord and Foot 23 Free Motion Quilting Foot 24 Pulling Up the Bobbin Thread 24 Seam Guide 24 Fabric Separator (for joining lining to fabric) ..........25 Caring for Your Machine - Brother International PQ1600S | Operation Manual - Page 8
101 15 Zipper Foot 112797-001 16 Invisible Zipper Foot XC0093-001 17 1/4" Foot XA7258-001 18 Free Motion Quilting Foot XA7255-301 19 Seam Guide XA7256-001 20 Foot Controller XD0501-121 (EU area) XC8816-071 (Other areas) 21 Fabric Extension Table XC3117-052 22 Spool Net XA5523-050 23 - Brother International PQ1600S | Operation Manual - Page 9
Bobbin Thread Device (Page 14) Thread Cutter Button (Page 10) Thread Tension Dial (Page 8 and 18) Feed Dog (Page 10 and 20) Thread Guide Bar (Page 12) Stitch Length Regulator (Page 8) Bobbin Winder (Page 12) Handwheel (Page 8) Indicator Lamp Needle Stop Position Button (Page 10) Main Power - Brother International PQ1600S | Operation Manual - Page 10
Before You Begin (1) Power Cord and Foot Controller WARNING Please use common household current. ● Attach power cord. ● Insert foot controller jack into machine. ● When you press the foot controller down lightly, the machine will run at a low speed. When more pressure is applied to foot controller, - Brother International PQ1600S | Operation Manual - Page 11
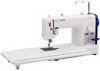
Pressure Adjustment Dial Pressure Indicator Needle Fabric Extension Table ● Lower the adjustable table feet and slide the fabric extension table on to the machine. 2 Hole Guide pin 2 1 Table feet 3 3 Stopper Hook 9 - Brother International PQ1600S | Operation Manual - Page 12
Before You Begin (2) Thread Cutter Button CAUTION When the machine stops due to jammed threads and so forth, do not press on the foot controller; turn power off, and move the needle with the handwheel to check the situation. Otherwise broken needles could result. ● The thread cutter trims upper and - Brother International PQ1600S | Operation Manual - Page 13
Changing Needles CAUTION • Please make sure the power to the machine is turned off before carrying out the following operations. There is a chance of injury if the machine accidentally starts running during this operation. • Only use recommended sewing machine needles. Use of any other needle may - Brother International PQ1600S | Operation Manual - Page 14
Note • Do not move bobbin winding clutch while machine is running. 3 3 2 81 Spool Cap 1 2 82 Spool Cushion 1 5679 - Brother International PQ1600S | Operation Manual - Page 15
again by pressing down on the foot controller. Bobbin Winding Clutch 9 Stop winding process when bobbin is full. Remove your foot from the foot controller. 0 Manually move bobbin winding clutch back to original position. A Cut thread and remove bobbin. 13 - Brother International PQ1600S | Operation Manual - Page 16
To reduce risk of injury, turn the power to the machine off before servicing. Open covers. Latch Spring 1 Needle Plate 1 2 Thread Notch 3 8 process towards you to check that the bobbin case eliminates the need to manually pull the is set securely. bobbin thread through the hole in the - Brother International PQ1600S | Operation Manual - Page 17
lever. pass the thread through the holes in the 2 Turn the handwheel toward you until the thread take-up lever is positioned three-holed thread guide from above. as shown in the diagram. The needle is raised to it's highest position. 3 Pass the thread through the triangular hole of the thread - Brother International PQ1600S | Operation Manual - Page 18
around the thread tension dial. 4 Pass the thread through the thread take-up spring. 5 Pass the thread through the thread guide (lower). 6 Pass the thread through the thread guide (right) again. 7 Pass the thread through the thread take-up lever from right to left. 8 Pass the thread through the - Brother International PQ1600S | Operation Manual - Page 19
foot controller. Using the Needle Threader ✽ The needle threader can be used with machine needles #11 through #16. When using #9 needles or thinner, manually thread the needle. 2 Needle Threader 1 1 132 1 Make sure that the thread take-up lever is positioned as shown in the diagram and the - Brother International PQ1600S | Operation Manual - Page 20
Turn the handwheel toward you to raise the needle and thread take-up lever to their highest positions. 6 Raise the presser foot and remove fabric. Manually cut the thread with the thread trimmer located on the left side of the machine, or with a pair of scissors. ✽ When using thread cutter: 5 Press - Brother International PQ1600S | Operation Manual - Page 21
. ● General Purpose Foot This foot is used for most sewing. (Can also be used for sewing thick fabrics or seams.) ✽ When sewing thick seams, lightly guide the fabric with your hand on the downward side of the seam. ✽ Can also be used with pin feeding. ● Invisible Zipper Foot Use to attach - Brother International PQ1600S | Operation Manual - Page 22
Basic Sewing (1) Basic Sewing Before sewing. Begin sewing. Backstitches 1 cm Finish sewing. 8 When changing sewing directions. 1 cm 1 Raise presser foot, pull about 2 Lower presser foot lever to ✽ At the beginning and end 15 cm (approx. 6 inches) of lower foot. of a seam, press down the - Brother International PQ1600S | Operation Manual - Page 23
before changing presser feet. Rolled Hem Foot 1 Attach rolled hem foot. ✽ Refer to page 19 for instructions on changing sewing feet. 2 Position the fabric (reverse side facing up) under the presser foot. continue feeding folded hem under foot while sewing towards the curved guide on the foot. 21 - Brother International PQ1600S | Operation Manual - Page 24
When attaching zippers to stretch fabrics, use the pin feed method and adjust foot pressure accordingly. ✽ The zipper foot can also be used as a guide when attaching piping to fabric. Zipper Foot 1 Attach zipper foot. ✽ See "Changing Presser Feet (Zipper Foot)" on page 19. 2 Turn the handwheel - Brother International PQ1600S | Operation Manual - Page 25
position. Basting Basting 8 Fit the zipper teeth into the presser foot groove, guide the teeth to prevent them from coming out of the groove, and sew 6.4 mm) when piecing together a quilt. Seam allowance (1/4", 6.4 mm) • Use guides (mark) to begin, end, or pivot 1/4" (6.4 mm) from edge of fabric - Brother International PQ1600S | Operation Manual - Page 26
hand to lower and then raise the needle. Carefully pull the upper thread upward to pull out the end of the bobbin thread. Seam Guide 1 Tighten the screw securely with a screwdriver since it might otherwise loosen due to vibration. 1 Installation Turn adjustment screws as arrow images suggest to set - Brother International PQ1600S | Operation Manual - Page 27
Fabric Separator (for joining lining to fabric) ✽ Use this technique for sewing velvet and lining together. 1 Raise needle and foot. 2 Move separator so it sits under presser foot. 3 Make sure it is lined up so that the needle passes through the slot of the separator without hitting the plate itself - Brother International PQ1600S | Operation Manual - Page 28
Caring for Your Machine Cleaning the Machine CAUTION Make sure the power to the machine is off before cleaning sewing machine. There is a risk of injury if you accidentally step on the foot controller. 1 Turn machine off. 2 Remove presser foot. 3 Remove needle plate. 4 Clean out dust and thread - Brother International PQ1600S | Operation Manual - Page 29
Trouble Shooting ✽ Before taking your sewing machine in for service, check the following chart. You can solve most problems by yourself. If you need additional help, the Brother support website offers the latest FAQs and troubleshooting tips. Visit us at " https://s.brother/cpiac/ ". If you still - Brother International PQ1600S | Operation Manual - Page 30
"Trouble Shooting". When the Safety Device is Operating If a problem persists even after performing the measures in "Sewing Machine Doesn't Run" in "Trouble . Contact your authorized Brother dealer or the nearest Brother authorized service center. ✽ The machine will not operate for approximately 1 - Brother International PQ1600S | Operation Manual - Page 31
ou de blessures. 2 Débranchez toujours la machine de la prise électrique lorsque vous procédez à des réglages mentionnés dans ce manuel d'instructions. • Pour débrancher la machine, mettez-la sur « O » (position de mise hors tension), puis retirez la fiche de la prise d'alimentation électrique - Brother International PQ1600S | Operation Manual - Page 32
endommagée ou inadéquate. Vous risqueriez de casser l'aiguille. • Ne poussez pas ni ne tirez le tissu pendant la couture, et respectez scrupuleusement les instructions lors de la couture en mouvement libre, afin de ne pas faire dévier l'aiguille et la casser. 30 7 Cette machine n'est pas un jouet - Brother International PQ1600S | Operation Manual - Page 33
produit peuvent être modifiés sans avis préalable. Pour plus d'informations sur le produit, consultez notre site Web www.brother.com CONSERVEZ CES INSTRUCTIONS Cette machine est conçue pour une utilisation domestique. POUR LES UTILISATEURS DES PAYS HORS EUROPE Cet appareil n'est pas conçu pour une - Brother International PQ1600S | Operation Manual - Page 34
POUR LES UTILISATEURS AU ROYAUME-UNI, EN IRLANDE, À MALTE ET À CHYPRE UNIQUEMENT IMPORTANT • En cas de remplacement du fusible de la fiche, utilisez un fusible certifié ASTA à BS 1362, c'est-à-dire portant la marque , d'une capacité correspondant à celle indiquée sur la fiche. • Remettez toujours le - Brother International PQ1600S | Operation Manual - Page 35
TABLE DES MATIÈRES INTRODUCTION 29 INSTRUCTIONS DE SÉCURITÉ IMPORTANTES 29 Accessoires 34 Fonctions de la Pied pour quilting (courtepointe) à mouvement libre 52 Faire remonter le fil de la canette 52 Guide de couture 52 Séparateur de tissu (pour fixer une doublure au tissu 53 Entretien de la - Brother International PQ1600S | Operation Manual - Page 36
16 Pied pour fermeture à glissière invisible XC0093-001 17 Pied 1/4"/pouce XA7258-001 18 Pied pour quilting (courtepointe) à mouvement libre XA7255-301 19 Guide de couture XA7256-001 20 Pédale XD0501-121 (zone UE) XC8816-071 (autres zones) 21 Table d'extension XC3117-052 22 Filet de la - Brother International PQ1600S | Operation Manual - Page 37
et 48) Barre de guidage du fil (Page 40) Sélecteur de longueur de point (Page 36) Bobineur de canette (Page 40) Volant (Page 36) Poignée Guide-fil de bobinage de la canette (Page 40) Levier du pied-de-biche (Page 37) Voyant indicateur Touche position d'arrêt d'aiguille (Page 38) Interrupteur - Brother International PQ1600S | Operation Manual - Page 38
Avant de commencer (1) Cordon d'alimentation et pédale AVERTISSEMENT Utilisez un courant secteur domestique ordinaire. ● Branchez le cordon d'alimentation. ● Insérez le connecteur de la pédale dans la machine. ● Lorsque vous appuyez légèrement sur la pédale, la machine fonctionne à vitesse réduite. - Brother International PQ1600S | Operation Manual - Page 39
Levier du pied-de-biche ● Abaissez le levier du pied-debiche pour abaisser le pied sur le tissu et activer la fonction de tension du fil. ✽ Pour travailler dans du tissu lourd et des tissus qui ne glissent pas facilement sous le pied, relevez le levier du piedde-biche pour placer le tissu. Genouillè - Brother International PQ1600S | Operation Manual - Page 40
Avant de commencer (2) Touche coupe-fil ATTENTION Si la machine s'arrête, notamment en cas de bourrage de fils, ne pas appuyer sur la pédale ; mettre la machine hors tension et déplacer l'aiguille avec le volant pour vérifier la situation. Sinon, l'aiguille risque de casser. ● Le coupe-fil coupe le - Brother International PQ1600S | Operation Manual - Page 41
et retirez l'aiguille. 3 Tenir l'aiguille avec la section plate sur la droite, et insérez l'aiguille à fond. Assurez-vous de fixer correctement l'aiguille au support de l'aiguille en vissant à fond. ✽ Si l'aiguille n'est pas insérée correctement ou si la vis est trop lâche, l'aiguille risque de se - Brother International PQ1600S | Operation Manual - Page 42
enroulé croisé, utilisez le câle-bobine. Encoche à fil 1 Encoche à fil 2 Canette Arbre du bobineur 3 Passez le fil par l'orifice triangulaire. 4 Passez le fil par le guide-fil de bobinage de la canette comme illustré sur le schéma. 40 Tige de guidage Butée de canette 5 Faire passer le fil dans - Brother International PQ1600S | Operation Manual - Page 43
Appuyer Pédale de rhéostat 8 Placez l'extrémité du fil de façon qu'il ne ressorte pas de la canette. 8 Si vous appuyez plus fort sur la pédale, la vitesse de bobinage augmente. 7 Tout en tenant l'extrémité du fil, appuyez sur la pédale pendant quelques secondes. Quand il s'est enroulé suffisamment - Brother International PQ1600S | Operation Manual - Page 44
préalable le couvercle de mise en place du fil de la canette, puis mettez le fil de la canette en place en respectant les instructions par l'orifice de la plaque à aiguille. Fermez simplement le boîtier de la canette et poursuivez le processus de mise en place du fil sup - Brother International PQ1600S | Operation Manual - Page 45
le fil par le dessus 2 Tournez le volant vers vous jusqu'à ce que le levier de remontée du fil soit positionné dans les trous du guide-fil à trois trous. comme illustré sur le schéma. L'aiguille est relevée à sa position la plus haute. 3 Faites passer le fil dans le trou triangulaire - Brother International PQ1600S | Operation Manual - Page 46
tension du fil. 4 Faites passer le fil dans le ressort de remontée du fil. 5 Faites passer le fil dans le guide-fil (inférieur). 6 Faites passer le fil dans le guide-fil (droite) une nouvelle fois. 7 Faites passer le fil dans le levier de remontée du fil de la droite vers la - Brother International PQ1600S | Operation Manual - Page 47
ATTENTION Veillez à bien couper l'alimentation électrique avant d'utiliser l'enfile-aiguille. Vous risquez de vous blesser si vous appuyez accidentellement sur la pédale. Utilisation de l'enfile-aiguille ✽ Vous pouvez utiliser l'enfile-aiguille avec des aiguilles #11 à #16. Quand vous utilisez des - Brother International PQ1600S | Operation Manual - Page 48
Points d'essai et tableau d'aiguilles Réglez le fil supérieur pour qu'il corresponde au fil de la canette. Points d'essai 1 Réglez le sélecteur de longueur de point sur la longueur de point voulue. 2 Veillez à tirer environ 15 cm (environ 6"/pouces) de fil supérieur sous le pied-de-biche et vers l' - Brother International PQ1600S | Operation Manual - Page 49
Changement du pied-de-biche ATTENTION Bien éteindre la machine avant de changer le pied-de-biche. Changement du piedde-biche (Pied pour fermeture à glissière) 1 Relevez le pied-de-biche et relevez l'aiguille à la position maximale. 2 Desserrez la vis à l'aide d'un tournevis. 3 Fixez le pied pour - Brother International PQ1600S | Operation Manual - Page 50
Couture de base (1) Couture de base Avant de coudre. Commencer à coudre. Points arrière 1 cm Fin de la couture. 8 Pour modifier le sens de la couture 1 cm 1 Soulevez le pied-debiche, tirez environ 15 cm (environ 6"/pouces) de fil sous et derrière le pied et positionnez le tissu sous le pied. - Brother International PQ1600S | Operation Manual - Page 51
restent en place. 7 Repliez l'ourlet sur environ 0,5 cm (environ 3/16"/pouce) et continuez à faire avancer l'ourlet replié sous le pied tout en cousant vers le guide recourbé du pied. 49 - Brother International PQ1600S | Operation Manual - Page 52
la méthode d'entraînement par ergots, et régler la pression du pied en conséquence. ✽ Le pied pour fermeture à glissière peut également servir de guide lors de la fixation de rouleaux au tissu. Pied pour fermeture à glissière 5 Faufilez la fermeture à glissière pour la fixer puis coudre le long - Brother International PQ1600S | Operation Manual - Page 53
Pied pour fermeture à glissière invisible 1 Fixez le pied pour fermeture à glissière invisible. 2 Disposez la fermeture à glissière sur le tissu. Marquez la base de l'ouverture à environ 2 cm (environ 3/4"/pouce) au-dessus de l'extrémité de la fermeture à glissière. 3 Faufilez l'emplacement de la - Brother International PQ1600S | Operation Manual - Page 54
la main pour abaisser puis relever l'aiguille. Pour extraire l'extrémité du fil de la canette, tirez doucement le fil supérieur vers le haut. Guide de couture 1 Serrez la vis avec un tournevis sinon elle pourrait se desserrer en raison des vibrations. 1 Tournez les vis de réglage comme suggéré par - Brother International PQ1600S | Operation Manual - Page 55
Doublure Séparateur Velours Remarque • Relâchez légèrement la pression du pied-de-biche lorsque vous utilisez le séparateur de tissu. • Pour ajuster la position du guide de couture, tournez les vis de réglage comme indiqué par les flèches. 53 - Brother International PQ1600S | Operation Manual - Page 56
Entretien de la machine à coudre Nettoyage de la machine ATTENTION Bien éteindre la machine avant de procéder au nettoyage de la machine à coudre. Vous risquez de vous blesser si vous appuyez accidentellement sur la pédale. 1 Eteindre la machine. 2 Retirez le pied-de-biche. 3 Retirez la plaque à - Brother International PQ1600S | Operation Manual - Page 57
problèmes. Pour une aide supplémentaire, le site internet Brother support (Site Web de soutien Brother) propose des réponses aux questions rapportez la machine au magasin où vous l'avez achetée ou confiez-la au service technique Brother agréé le plus proche pour la réparer. Rupture du fil Rupture du - Brother International PQ1600S | Operation Manual - Page 58
nettoyez la machine. (page 54) La pédale doit être remplacée ou la machine réparée. Contactez votre revendeur Brother agréé ou le centre de service Brother agréé le plus proche. ✽ La machine ne fonctionnera pas pendant environ 1 seconde immédiatement après la mise sous tension ou après l'insertion - Brother International PQ1600S | Operation Manual - Page 59
- Brother International PQ1600S | Operation Manual - Page 60
être achetés séparément. Visitez notre site Web https://s.brother/coikb/. Please visit us at https://s.brother/cpiac/ where you can get product support and answers to frequently asked questions (FAQs). Visitez notre site au https://s.brother/cpiac/ pour obtenir du soutien et consulter la Foire aux
-
 1
1 -
 2
2 -
 3
3 -
 4
4 -
 5
5 -
 6
6 -
 7
7 -
8
-
9
-
10
-
11
-
12
-
13
-
14
-
15
-
16
-
17
-
18
-
19
-
20
-
21
-
22
-
23
-
24
-
25
-
26
-
27
-
28
-
29
-
30
-
31
-
32
-
33
-
34
-
35
-
36
-
37
-
38
-
39
-
40
-
41
-
42
-
43
-
44
-
45
-
46
-
47
-
48
-
49
-
50
-
51
-
52
-
53
-
54
-
55
-
56
-
57
-
58
-
59
-
60
 |
 |
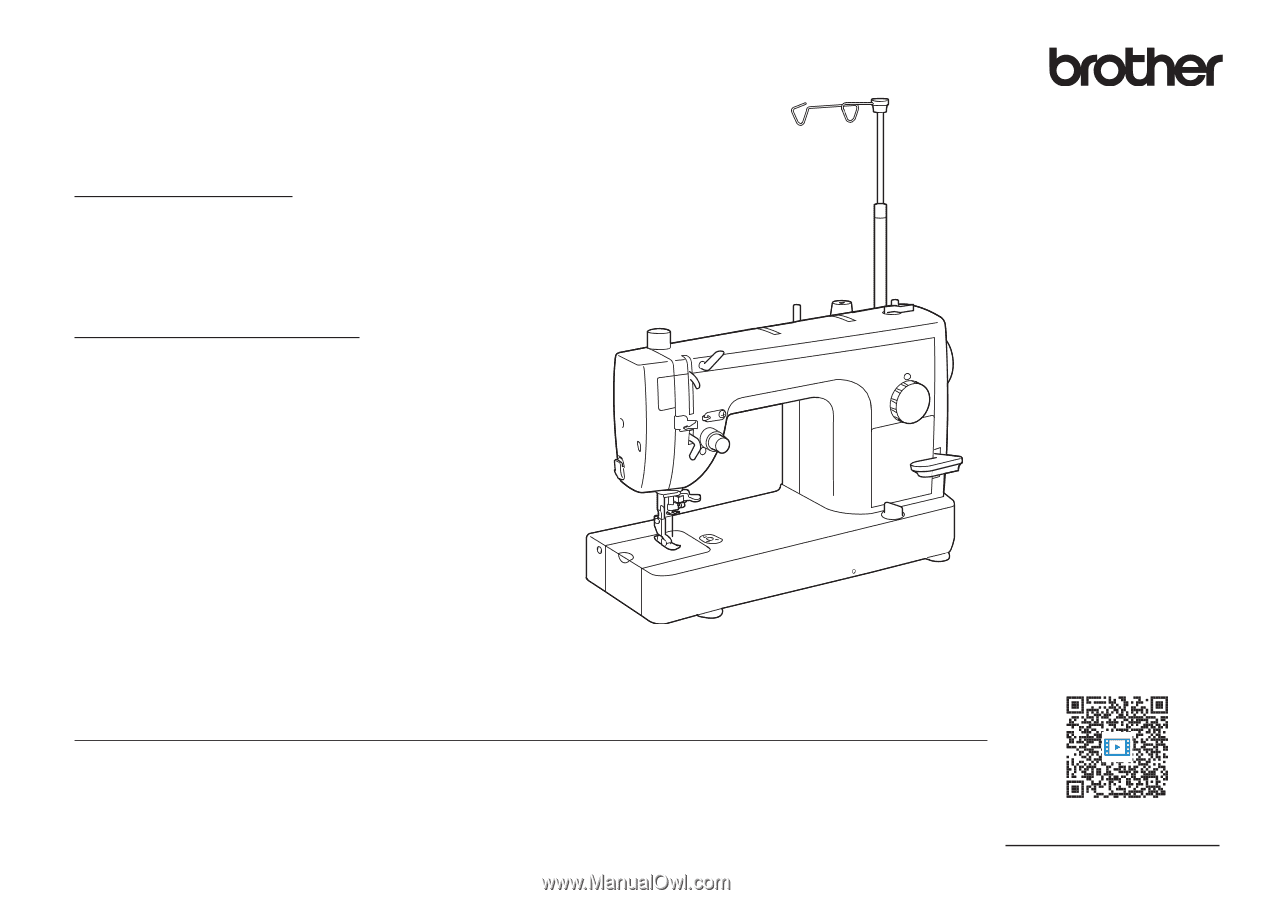
Be sure to read this document before using the machine.
We recommend that you keep this document nearby for future reference. The latest manuals are available at
Brother Support website ( https://s.brother/cpiac/ ).
Veillez à lire ce document avant d'utiliser la machine.
Nous vous conseillons de conserver ce document à portée de main pour vous y référer ultérieurement. Les
manuels les plus récents sont disponibles sur le site internet Brother support (Site Web de soutien Brother)
( https://s.brother/cpiac/ ).
Operation Manual
Sewing machine
Product Code: 884-T79
Manuel d’instructions
Machine à coudre
Référence du produit: 884-T79
Instruction Videos
Vidéos d'instructions
https://s.brother/cviac/