Brother International SB3150 Operation Manual
Brother International SB3150 Manual
 |
View all Brother International SB3150 manuals
Add to My Manuals
Save this manual to your list of manuals |
Brother International SB3150 manual content summary:
- Brother International SB3150 | Operation Manual - Page 1
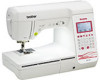
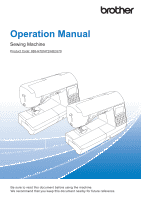
Operation Manual Sewing Machine Product Code: 888-H70/H72/H82/J70 Be sure to read this document before using the machine. We recommend that you keep this document nearby for future reference. - Brother International SB3150 | Operation Manual - Page 2
- Brother International SB3150 | Operation Manual - Page 3
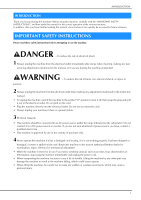
Please read these safety instructions before attempting to use the machine. DANGER - To reduce the risk of electrical shock 1 Always unplug the machine from the electrical outlet immediately after using, when cleaning, making any user servicing adjustments mentioned in this manual, or if you are - Brother International SB3150 | Operation Manual - Page 4
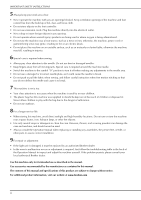
is damaged, it must be replaced by an authorized Brother dealer. • In the event a malfunction occurs or adjustment is required, first follow the troubleshooting table in the back of the Operation Manual to inspect and adjust the machine yourself. If the problem persists, please consult your local - Brother International SB3150 | Operation Manual - Page 5
INSTRUCTIONS SAVE THESE INSTRUCTIONS This machine given supervision or instruction concerning use of the been given supervision or instruction concerning use of the • In the event of replacing the plug fuse, use a fuse approved by as marked on plug. • Always replace the fuse cover. Never use plugs - Brother International SB3150 | Operation Manual - Page 6
machine, such as sewing tubular pieces and buttonholes. Chapter 1 SEWING ATTRACTIVE FINISHES Page S-2 Tips for sewing attractive finishes and various fabrics Chapter 2 UTILITY STITCHES Page S-7 Sew pre-programmed frequently used stitches D Decorative sewing This section provides instructions - Brother International SB3150 | Operation Manual - Page 7
the bobbin 18 Upper Threading 21 Threading the upper thread 21 Threading the needle 23 Threading the needle manually (without using the needle threader 24 Pulling up the bobbin thread 25 Using the twin needle 26 Fabric/Thread/Needle Combinations 28 Replacing the Needle 29 Checking - Brother International SB3150 | Operation Manual - Page 8
pattern 3 Sewing attractive finishes 3 Basic sewing 4 Combining machine 2 Cleaning the LCD screen 2 Cleaning the machine surface 2 Cleaning the race 2 Troubleshooting 4 Frequent troubleshooting topics 4 Upper thread tightened up 4 Tangled thread on wrong side of fabric 5 Incorrect thread - Brother International SB3150 | Operation Manual - Page 9
Basic operations This section provides details on the initial setup procedures as well as descriptions of this machine's more useful functions. Page number starts with "B" in this section. Chapter1 GETTING READY B-2 Chapter2 STARTING TO SEW B-34 - Brother International SB3150 | Operation Manual - Page 10
thread on the spool pin. 2 Thread guide plate Pass the thread around the thread guide plate when threading the upper thread. 3 Bobbin winding thread guide and pretension disk Pass the thread under this thread guide and lower the needle to sew one stitch. 2 Handle Carry the machine by its handle when - Brother International SB3150 | Operation Manual - Page 11
Names of Machine Parts and Their Functions Needle and presser foot section i h a b Operation buttons bc de a B f GETTING READY g c f e d 1 Needle bar thread guide Pass the upper thread through the needle bar thread guide. 2 Needle plate The needle plate is marked with guides for sewing - Brother International SB3150 | Operation Manual - Page 12
sewing settings or other settings, or to move to next pages in the settings screen. E Automatic thread cutting key * Press to select the automatic thread cutting function. F Manual settings screen. Note • The operation keys of this machine are capacitive touch sensors. Operate the keys by directly - Brother International SB3150 | Operation Manual - Page 13
Using the flat bed attachment Pull the top of the flat bed attachment to open the accessory compartment. Names of Machine Parts and Their Functions B GETTING READY A presser foot accessory tray is stored in the accessory compartment of the flat bed attachment. a b 1 Storage space of the - Brother International SB3150 | Operation Manual - Page 14
insert (mini king thread spool) 26. Spool net 27. Knee lifter 28. Bobbin case (on machine) Foot controller Accessory bag Grid sheet set Operation Manual *1 75/11 2 needles, 90/14 2 needles, 90/14 2 needles: Ball point needle (gold colored) *2 2/11 needle Quick Reference Guide Note • (For - Brother International SB3150 | Operation Manual - Page 15
guide foot "P" Adjustable zipper/piping foot Roller foot Straight stitch foot and needle plate set Memo • To obtain optional accessories or parts, contact your authorized Brother nearest authorized Brother dealer for a complete listing of optional accessories available for your machine. • Always - Brother International SB3150 | Operation Manual - Page 16
available with your sewing machine model, refer to the table below. Refer to the Quick Reference Guide for the model of your sewing machine. Fine adjustment horizontal (setting) Model 2 9 Model 1 − Page D-10 Size selection (setting) Step stitch pattern Thread tension dial Thread tension key - Brother International SB3150 | Operation Manual - Page 17
plug is damaged, take the machine to your authorized Brother dealer for repairs before continuing use. • Unplug the power cord if the machine is not to be used removed from the electrical outlet. • When servicing the machine or when removing covers, the machine must be unplugged. • (For U.S.A. only - Brother International SB3150 | Operation Manual - Page 18
to another location, be sure to turn it off. Make sure that the machine is not sewing. a Press the main power switch on the right side of the b machine in the direction of the " " symbol to turn the machine off. 1 2 1 Power supply jack 2 Main power switch Press the right side of the main power - Brother International SB3150 | Operation Manual - Page 19
sewing mode : Repeat sewing mode 7 Horizontal mirror image Appears when the stitch is mirrored. D-5 B-43 8 Stitch width Shows the stitch width of the currently selected stitch pattern. B-40 9 Stitch length Shows the stitch length of the currently selected stitch pattern. B-40 0 Thread - Brother International SB3150 | Operation Manual - Page 20
stitch that is automatically selected when the machine is turned on. 6 Changes the stitch length when 7 mm satin stitch patterns are selected. For details, refer to "Changing the pattern length" in the "Decorative sewing" section. 7 Changes the thread density when satin stitch patterns are selected - Brother International SB3150 | Operation Manual - Page 21
foot pressure" on page B-44. C Adjusts the up and down position of the pattern. For details, refer to "Realigning the pattern" in the "Decorative sewing" section. D Adjusts the left and right position of the pattern. (Equipped on some models. Refer to page B-8.) For details on this function, refer - Brother International SB3150 | Operation Manual - Page 22
the key responds, the setting value indicating the sensitivity blinks. ■ If the machine does not respond when an operation key is pressed Turn machine off, then hold down (Needle position button) and turn on the machine to reset the settings. Display the settings screen, and then adjust the settings - Brother International SB3150 | Operation Manual - Page 23
to the machine. • The included bobbin was designed specifically for this machine. If bobbins from other models are used, the machine will not foot controller. Winding the bobbin This section describes how to wind thread onto a bobbin. Remove the spool cap that is inserted onto the spool d - Brother International SB3150 | Operation Manual - Page 24
too small for the spool being used, the thread may catch on the slit in the spool or the machine may be damaged. When using mini king thread spool, use the thread spool insert (mini king thread spool). For details on thread spool insert (mini king thread spool), refer to "Memo" on page B-16. Memo - Brother International SB3150 | Operation Manual - Page 25
the cutter built into the slit in the bobbin winder seat, the thread may become tangled in the bobbin or the needle may bend or break when the bobbin thread starts to run out. Slide the sewing speed controller to the right. l 3 1 Thread guide 2 Pretension disk 3 Pull it in as far as possible Note - Brother International SB3150 | Operation Manual - Page 26
the bobbin, the machine will make a clicking sound; this is not a malfunction. Installing the bobbin Install the bobbin wound with thread. You can begin sewing immediately without pulling up the bobbin thread by simply inserting the bobbin in the bobbin case and guiding the thread through the slit - Brother International SB3150 | Operation Manual - Page 27
in the bobbin case. While lightly holding down the bobbin with your right h hand (1), guide the thread through the slit in the needle plate cover (2) and lightly pull it with your left hand (3). • The thread enters the tension spring of the bobbin case. Lightly hold down the bobbin with your right - Brother International SB3150 | Operation Manual - Page 28
1 → The bobbin threading is finished. Next, thread the upper thread. Continue with the procedure in "Upper Threading" on page B-21. Memo • You can begin sewing without pulling up the bobbin thread. If you wish to pull up the bobbin thread before starting to sew, pull up the thread according to the - Brother International SB3150 | Operation Manual - Page 29
the presser foot. b B GETTING READY 1 1 Presser foot lever → The upper thread shutter opens so the machine can be threaded. • When threading the upper thread, carefully follow the instructions. If the upper threading is not correct, the thread may become tangled or the needle may bend or break - Brother International SB3150 | Operation Manual - Page 30
lightly with your right hand, g pull the thread with your left hand, and then pass the thread behind the thread guide cover and to the front. 1 1 Shutter Note • If the presser foot has been lowered and the shutter is closed, the machine cannot be threaded. Be sure to raise the presser foot to - Brother International SB3150 | Operation Manual - Page 31
of the tab of the needle bar thread guide. 2 1 1 Needle bar thread guide 2 Tab Raise the presser foot lever. m 21 b a 1 Notch of the threader thread guide 2 Threader thread guide disk Cut the thread with the thread cutter on the left side of b the machine. Threading the needle Memo • The needle - Brother International SB3150 | Operation Manual - Page 32
. Threading the needle manually (without using the needle threader) When using specialty thread, such as transparent nylon thread, a wing needle or a twin needle which cannot be used with the needle threader, thread the needle as described below. Thread the machine to the needle bar thread guide - Brother International SB3150 | Operation Manual - Page 33
When making gathers or before free motion quilting, first pull up the bobbin thread as described below. Refer to "Threading the upper thread" (page B-21) to a thread the machine with the upper thread and thread the needle. Follow steps d to f "Installing the bobbin" (page Bb 18) for installing - Brother International SB3150 | Operation Manual - Page 34
Setting Chart" beginning on page B-45. Manually thread the left needle with the upper thread. c Pass the thread through the eye of the needle from pin tucks. Contact your nearest authorized Brother dealer to obtain the optional pin tuck foot for your machine (SA194, F069: XF5832-001). CAUTION - Brother International SB3150 | Operation Manual - Page 35
passing the thread through the needle bar h thread guide, manually thread the right needle. Insert the thread through the eye of the needle from the front to the back. • The needle threader cannot be used with the twin needle. If the needle threader is used with the twin needle, the machine may be - Brother International SB3150 | Operation Manual - Page 36
replace the needle, refer to "Checking the needle" on page B-29. • In principle, use a fine needle and thread with lightweight fabrics, and a larger needle and heavier thread ■ Transparent nylon thread Use a home sewing machine topstitching needle, regardless of the fabric or thread. Stitch length [ - Brother International SB3150 | Operation Manual - Page 37
instructions below. CAUTION • Only use recommended home sewing machine needles. Use of any other needle may bend the needle or damage the machine bobbins of thread. B Replacing the needle Use the screwdriver and a needle that has been determined to be straight according to the instructions in " - Brother International SB3150 | Operation Manual - Page 38
Replacing the Needle Hold the needle with your left hand, and then use a e , use the g screwdriver to tighten the needle clamp screw. Turn the screw toward the back of the machine (clockwise). CAUTION • Be sure to insert the needle until it touches the needle stopper and securely tighten - Brother International SB3150 | Operation Manual - Page 39
stitch that you wish to sew, otherwise the needle may hit the presser foot, causing the needle to bend or break. • Only use presser feet designed specifically for this machine. Use of any other presser foot may result in injuries or damage to the machine. Replacing the presser foot Press (Needle - Brother International SB3150 | Operation Manual - Page 40
sew. If the wrong presser foot is installed, attach the appropriate presser foot. Use the screwdriver to loosen the presser foot holder c screw. Turn the screw toward the back of the machine bar. Remove the presser foot. b • For details, refer to "Replacing the presser foot" on page B-31. B-32 - Brother International SB3150 | Operation Manual - Page 41
off and the needle may strike it, causing the needle to bend or break. Note • If the presser foot holder is not correctly installed, the thread tension will be incorrect. Replacing the Presser Foot B GETTING READY Basic operations B-33 - Brother International SB3150 | Operation Manual - Page 42
SEW Sewing CAUTION • While the machine is in operation, pay special attention to the needle location. In addition, keep your hands away from all moving parts such as the needle and handwheel, otherwise injuries may occur. • Do not pull or push the fabric too hard while sewing Reference Guide. ■ - Brother International SB3150 | Operation Manual - Page 43
of the B If a different icon is displayed, press . STARTING TO SEW → is displayed on the upper-left corner of the LCD screen. Press the stitch, refer to "Stitch Setting Chart" on page B-45 or the Quick Reference Guide. • For stitches 01 through 09, the stitch can also be selected by using - Brother International SB3150 | Operation Manual - Page 44
. Install the presser foot. d • For details on changing the presser foot, refer to "Replacing the Presser Foot" on page B-31. Lower the presser foot. f You do not have to pull up the bobbin thread. Adjust the sewing speed with the sewing speed g controller. You can use this controller to adjust - Brother International SB3150 | Operation Manual - Page 45
is no fabric set in the machine or during machine operation. The thread may tangle, possibly resulting in damage. Note • When cutting thread such as nylon monofilament thread, or other decorative threads, use the thread cutter on the side of the machine. Sewing Insert the foot controller plug into - Brother International SB3150 | Operation Manual - Page 46
The key will be lit. Memo • Some stitches, such as buttonholes and bar tacks, require reinforcement stitches at the beginning of sewing. If you select one of these stitches, the machine will automatically turn on this function (the key is lit when the stitch is selected). Set the fabric in the start - Brother International SB3150 | Operation Manual - Page 47
other than stitch button. the straight or zigzag stitches. Machine sews 3 - 5 reinforcement stitches while holding the Reinforcement stitch button. When the automatic Machine sews Machine sews reinforcement reinforcement reinforcement stitching function is active while selecting stitches - Brother International SB3150 | Operation Manual - Page 48
Setting the Stitch Setting the Stitch This machine is preset with the default settings for the stitch width and stitch length for each stitch. Some models are also preset with the default settings for upper thread tension for each stitch. However, you can change their settings or adjust them by - Brother International SB3150 | Operation Manual - Page 49
is pressed more tension is applied. STARTING TO SEW B 1 2 3 5 4 1 Wrong side of fabric 2 Right side of fabric 3 Upper thread 4 Bobbin thread 5 The bobbin thread is visible from the right side of the fabric. ■ Upper thread is too loose If the upper thread is visible from the wrong side of the - Brother International SB3150 | Operation Manual - Page 50
are displayed even if the machine was turned off. If the settings are changed again, or if is pressed to reset the setting to its default, the new settings are not saved unless is pressed another time. Even if is pressed, the settings for programmed thread cutting and automatic reverse/reinforcement - Brother International SB3150 | Operation Manual - Page 51
the reverse stitching or reinforcement stitching has been done, the machine stops, and the thread is cut. Mirroring stitches You can sew the mirror image of a stitch horizontally (left and right). Turn on the machine. a Select a stitch. b • For details on selecting a stitch, refer to "Selecting - Brother International SB3150 | Operation Manual - Page 52
knee, leaving both hands free to handle the fabric. → The presser foot is raised. Release the knee lifter. c → The presser foot is lowered. CAUTION • While sewing, keep your knee away from the knee lifter. If the knee lifter is pressed while the machine is operating, the needle may break or the - Brother International SB3150 | Operation Manual - Page 53
STARTING TO SEW Applications, stitch lengths and widths and whether the twin needle can be used are listed for utility stitches in the following table. This table applies to several models (Model 3, 2 and 1). Refer to the Quick Reference Guide for the model of your machine. *1 Patterns printed - Brother International SB3150 | Operation Manual - Page 54
29 25 (Right) Piecing stitch 30 26 (Middle) Piecing stitch 31 - (Left) Presser foot Applications Auto. Manual Start from left needle position, 3.5 (1/8) J*2 zigzag sew at right. 2.5 - 5.0 (3/32 - 3/16) Overcasting (medium weight J*2 and stretch fabrics), tape and elastic 5.0 (3/16 - Brother International SB3150 | Operation Manual - Page 55
thread for the upper thread and a thread color matching the quilt for J*2 the bobbin thread. Sew with a tight thread tension so that the bobbin thread 5.0 (3/16) 0.0 - 7.0 (0 - 1/4) 4.0 (3/16) 0.0 - 7.0 (0 - 1/4) Auto. Manual Twin Reverse needle button 2.5 (3/32) 0.4 - 5.0 (1/64 - 3/16) NO - Brother International SB3150 | Operation Manual - Page 56
67 - stitch Heirloom, decorative hems N*2 Hemstitching 68 53 Heirloom, decorative hems N*2 Auto. Manual Auto. Manual Twin Reverse needle button 4.0 (3/16) 0.0 - 7.0 (0 - 1/4) 3.0 (1/8) 0.4 - 5.0 (1/64 - 3/16) NO Reinforcement 4.0 (3/16) 0.0 - 7.0 (0 - 1/4) 2.5 (3/32) 0.4 - 5.0 (1/64 - Brother International SB3150 | Operation Manual - Page 57
85 65 86 66 87 67 88 68 Stitch name Presser foot Applications Auto. Manual Hemstitching Heirloom, decorative hems N*2 6.0 (15/64) 0.0 - 7.0 (0 - reinforce- (1/64 - 3/32) ment 2.0 (1/16) Automatic 0.4 - 2.5 NO reinforce- (1/64 - 3/32) ment STARTING TO SEW B Basic operations B-49 - Brother International SB3150 | Operation Manual - Page 58
Presser foot Applications Stitch number 89 69 Bar tack stitch Button sewing 90 70 stitch Eyelet stitch 91 71 Reinforcement at opening of - stitch) N tubular pieces of fabric and mitering corners Auto. Manual Auto. Manual Twin Reverse needle button 2.0 (1/16) 0.4 (1/64) Automatic 1.0 - Brother International SB3150 | Operation Manual - Page 59
01 01 02 02 03 03 04 04 09 08 10 09 05 05 06 06 15 13 14 12 Stitch Setting Chart B STARTING TO SEW Basic operations B-51 - Brother International SB3150 | Operation Manual - Page 60
Stitch Setting Chart B-52 - Brother International SB3150 | Operation Manual - Page 61
in addition to the more expressive features of the machine, such as sewing tubular pieces and buttonholes. Page number starts with "S" in this section. Chapter1 SEWING ATTRACTIVE FINISHES S-2 Chapter2 UTILITY STITCHES S-7 CAUTION • Before replacing the presser foot, be sure to press (Presser foot - Brother International SB3150 | Operation Manual - Page 62
Tips 1 Chapter SEWING ATTRACTIVE FINISHES Sewing Tips Trial sewing After you have set up the machine with the thread and needle appropriate for the type of fabric being sewn, the machine automatically sets the stitch length and width for the stitch that is selected. However, a trial piece of - Brother International SB3150 | Operation Manual - Page 63
5 mm (3/16 inch). For stitches with a left needle position (Stitch width: 0.0 mm) S SEWING ATTRACTIVE FINISHES 1 Seam 2 Presser foot ■ Aligning the fabric with the stitch guide foot (sold separately with some models) Sew while keeping the right edge of the fabric aligned with a desired position - Brother International SB3150 | Operation Manual - Page 64
foot The presser foot lever can be raised to two different positions. If the fabric does not fit under the presser foot, for example, when sewing together thick fabrics, raise the presser foot lever to its highest position so that the fabric can be placed under the presser foot. While holding - Brother International SB3150 | Operation Manual - Page 65
replace the presser foot with the walking foot*, non stick foot* or roller foot*. * Sold separately with some models. S 1 SEWING * Stitch patterns can be selected directly by pressing the numeric keys on the machine during preset utility stitch mode. Refer to "Basic operations" section. 1 Copy - Brother International SB3150 | Operation Manual - Page 66
-loop fastener tape before sewing. And then, sew the edge of the hook-and-loop fastener tape at a slow speed. If the needle does not pass through the hook-and-loop fastener tape, replace the needle with the needle size for thicker fabrics. For details, refer to "Fabric/Thread/Needle Combinations" in - Brother International SB3150 | Operation Manual - Page 67
of the machine (refer to "Pulling up the bobbin thread" in the "Basic operations" section). Hold the upper thread and bobbin thread when beginning to sew, and when finished sewing, cut the threads leaving an excess amount of thread. Finally, hold the upper thread and bobbin thread at the beginning - Brother International SB3150 | Operation Manual - Page 68
12 mm (1/2 inch). If the stitch width is changed (between 0 and 7.0 mm (1/4 inch)), the needle position will also change. By changing the stitch width and sewing with the right side of the presser foot aligned with the edge of the fabric, a seam allowance can be sewn with a fixed width - Brother International SB3150 | Operation Manual - Page 69
Secure the bottoms of skirts and pants with a blind hem. • Using the table below, refer to "Using the utility stitch tables in the "Sewing" section" in the "Basic operations" section. Model 4 Model 3, 2 Model 1 Presser foot Stitch name Stitch Blind hem stitch Blind hem stretch stitch Stitch - Brother International SB3150 | Operation Manual - Page 70
feeds correctly, and then start sewing. 1 Free arm Position the fabric with the edge of the folded hem j against the guide of the presser foot, and . If you experience either of these cases, perform the following instructions to solve the problem. ■ If the needle catches too much of the hem fold - Brother International SB3150 | Operation Manual - Page 71
the hem. … Example: Thick fabric … Example: Normal fabric 1 Wrong side of fabric 2 Right side of fabric Sew with the fold of the hem against the presser foot l guide. Press the "Start/Stop" button to stop sewing when you m are finished, and raise the presser foot and needle to remove the fabric by - Brother International SB3150 | Operation Manual - Page 72
selected directly by pressing the numeric keys on the machine during preset utility stitch mode. Refer to " guide. 1 1 Needle drop point CAUTION • Be sure to pull the fabric backward after finished sewing. If you pull the fabric toward side or forward, the presser foot pin may be damaged. • If thread - Brother International SB3150 | Operation Manual - Page 73
machine during preset utility stitch mode. Refer to "Basic operations" section. Attach zigzag foot "J". a J Select a stitch. b Sew along Sewing" section" in the "Basic operations" section. Note • Thread the needle manually when using the side cutter, or only attach the side cutter after threading - Brother International SB3150 | Operation Manual - Page 74
securely attached. Pass the upper thread under the side cutter, and then e pull it out toward the rear of the machine. a 1 Guide plate • If the fabric feeding properly, gently guide fabric under foot the same as with regular sewing feet. Lower the presser foot lever, and then start sewing. i → A - Brother International SB3150 | Operation Manual - Page 75
63 4-08 84 64 4-09 85 65 4-10 86 4-14 90 66 70 M Buttonhole sewing The maximum buttonhole length is about 28 mm (1-1/8 inches) (diameter + thickness of the button). , are indicated below. 1 2 5 3 4 A 1 Button guide plate 2 Presser foot scale 3 Pin 4 Marks on buttonhole foot 5 5 mm (3/16 - Brother International SB3150 | Operation Manual - Page 76
1 1 Marks on fabric 2 Buttonhole sewing Pull out the button guide plate of buttonhole foot "A", b and then insert the button that will be put through the buttonhole. Attach buttonhole foot "A". c Position the upper thread under the presser foot by guiding thread through the hole in the presser foot - Brother International SB3150 | Operation Manual - Page 77
the rounded end of the buttonhole, and then use the seam ripper to cut open the buttonhole. → Once sewing is completed, the machine automatically sews reinforcement stitches, then stops. Press (Thread cutter button) once. h Raise the presser foot, and then remove the fabric. Memo • If the automatic - Brother International SB3150 | Operation Manual - Page 78
on a scrap piece of fabric. ■ Sewing buttonholes on stretch fabrics When sewing buttonholes on stretch fabrics, use a gimp thread. Hook the gimp thread onto the part of buttonhole foot a "A" shown in the illustration. Button sewing Buttons can be sewn on with the machine. Buttons with two or with - Brother International SB3150 | Operation Manual - Page 79
the fabric, and then tie it with the bobbin thread. a 1 Button • When attaching four-hole buttons, first sew the two holes closest to you. Then, slide the button so that the needle goes into the two holes toward the rear of the machine, and then sew them in the same way. Turn the handwheel - Brother International SB3150 | Operation Manual - Page 80
can be selected directly by pressing the numeric keys on the machine during preset utility stitch mode. Refer to "Basic operations" sides of the fabric facing each other, sew reverse stitches after reaching the zipper opening. Using a basting stitch, continue sewing to the edge of c the fabric. - Brother International SB3150 | Operation Manual - Page 81
the edge of c the fabric. 1 Stitching 2 Right side of fabric 3 Basting stitching 4 End of zipper opening CAUTION • When sewing, be sure that the needle does not touch the zipper, otherwise the needle may bend or break. Remove the basting stitching. j 1 3 2 4 1 Basting stitching 2 Reverse stitches - Brother International SB3150 | Operation Manual - Page 82
to the left pin of the zipper foot. 1 I 2 CAUTION • When sewing, be sure that the needle does not touch the zipper, otherwise the needle may j the zipper, stop the machine with the needle lowered (in the fabric), raise the presser foot lever. Open the zipper and continue sewing. k Close the zipper, - Brother International SB3150 | Operation Manual - Page 83
opening 3 Reverse stitches 4 Beginning of stitching 5 Basting stitching CAUTION • When sewing, be sure that the needle does not touch the zipper, otherwise the needle (2 inches) from the end of o the zipper, stop the machine with the needle lowered (in the fabric), and then raise the presser - Brother International SB3150 | Operation Manual - Page 84
, refer to "Using the utility stitch tables in the "Sewing" section" in the "Basic operations" section. Slide the pressing the numeric keys on the machine during preset utility stitch mode. Refer a g screwdriver. Note • Make sure that the thread between the spool and the bobbin is pulled tight. - Brother International SB3150 | Operation Manual - Page 85
turn them over. d S UTILITY STITCHES 1 Stitching 2 Right side of fabric 3 Basting stitching 4 End of zipper opening CAUTION • When sewing, be sure that the needle does not touch the zipper, otherwise the needle may bend or break. Remove the basting stitching. i Inserting a piping Place the - Brother International SB3150 | Operation Manual - Page 86
Stitch patterns can be selected directly by pressing the numeric keys on the machine during preset utility stitch mode. Refer to "Basic operations" section. Stretch the presser foot with your right hand. Select stitch . b Sew the fabric without stretching it. c Elastic attaching When elastic tape - Brother International SB3150 | Operation Manual - Page 87
below, refer to "Using the utility stitch tables in the "Sewing" section" in the "Basic operations" section. Stitch name Stitch * Stitch patterns can be selected directly by pressing the numeric keys on the machine during preset utility stitch mode. Refer to "Basic operations" section. Memo • - Brother International SB3150 | Operation Manual - Page 88
presser foot. Baste or pin along the seam allowance of the fabric a that you wish to piece together. Attach zigzag foot "J". b J When sewing around corners, stop the machine with the needle in the fabric just outside of the appliqué, raise the presser foot lever, and then turn the fabric as needed - Brother International SB3150 | Operation Manual - Page 89
, and then attach the 1/4" quilting foot with a guide. Use the guide and marks on the presser foot to sew b accurate seam allowances. Piecing a 1/4 inch seam allowance Sew keeping the edge of the fabrics against the guide. b Appliqué, Patchwork and Quilt Stitching Topstitching quilting, 1/8 inch - Brother International SB3150 | Operation Manual - Page 90
walking foot* and the quilting guide*. * Sold separately with some models. Note • Thread the needle manually when using the walking foot, or attach the walking foot only after threading the needle using the needle threader. • When quilting, use a 90/14 home sewing machine needle. • The walking foot - Brother International SB3150 | Operation Manual - Page 91
from the rear of the machine). Adjust the stem of the quilting guide so that the guide b aligns with the seam that has already been sewn. Free motion quilting We recommend attaching the foot controller and sewing at a consistent speed. You can adjust the sewing speed with the speed control slide - Brother International SB3150 | Operation Manual - Page 92
"Width Control" to "ON". The settings screens differ depending on the models. 1 Stitch After sewing is finished, slide the feed dog position g switch lever to (to the right as seen from the rear of the machine) and turn the handwheel to raise the feed dogs. Memo • Do not be discouraged with - Brother International SB3150 | Operation Manual - Page 93
with the foot controller. When you are finished sewing, set the stitch width g control setting back to "OFF". Memo • Although the stitching result differs depending on the type of fabric being sewn and the thickness of the thread being used, for best results, adjust the stitch length to between - Brother International SB3150 | Operation Manual - Page 94
Sewing" section" in the "Basic operations" section. Determine the desired length of the bar tack. a Set the button guide the numeric keys on the machine during preset utility stitch mode. J Select stitch . b Start sewing. c 1 1 2 mm (1/16 inch) Pass the upper thread down through the hole in the - Brother International SB3150 | Operation Manual - Page 95
thread in your left f hand, and then start sewing. 1 Reinforcement stitching Determine the desired length of the darning. a Set the button guide mm (1-1/8 inches) can be sewn. → Once sewing is completed, the machine automatically sews reinforcement stitches, then stops. Attach buttonhole foot "A". - Brother International SB3150 | Operation Manual - Page 96
of the area to be darned. 1 2 1 Tear 2 2 mm (1/16 inch) Pass the upper thread down through the hole in the presser foot, and then lower the presser foot. • When lowering the presser Buttonhole lever 2 Bracket Gently hold the end of the upper thread in your left f hand, and then start sewing. S-36 - Brother International SB3150 | Operation Manual - Page 97
before punching the hole in the fabric. Memo • If thin thread is used, the stitching may be too open. If this occurs, sew the eyelet twice before removing the fabric, one on top of lever. Start sewing. e → Once sewing is completed, the machine automatically sews reinforcement stitches, then stops - Brother International SB3150 | Operation Manual - Page 98
the flat bed attachment. a Attach monogramming foot "N". b → The fabric is fed toward the back of the machine, as usual. After you have sewn to the corner, stop the machine, e and then select stitch . Start sewing. f → The fabric is fed to the right. After you have sewn to the corner, stop the - Brother International SB3150 | Operation Manual - Page 99
k and then select stitch again. After sewing 3 to 5 stitches at the beginning of the l stitching, stop the machine. Memo • The feeding direction of the fabric differs depending on the stitch that is selected. Be sure to guide the fabric while machine is sewing. Attaching Patches or Emblems to Shirt - Brother International SB3150 | Operation Manual - Page 100
on blouses and children's clothing. This stitch is more decorative when thicker thread is used. Use an iron to fold the two pieces of fabric along you draw a line down the middle of the thin paper or water-soluble stabilizer, sewing is easier. 3 1 2 1 Thin paper or water soluble stabilizer 2 Basting - Brother International SB3150 | Operation Manual - Page 101
b Stitch along the edge of the fabric, making sure not to c sew directly on the edge of the fabric. Decorative Stitching Sew parallel stitching at intervals of 1 cm (3/8 inch). c 1 1 1 cm (3/8 inch) • Do not use reverse/reinforcement stitching or thread cutting. • At the end of the stitching, the - Brother International SB3150 | Operation Manual - Page 102
zigzag foot "J". b J Select stitch , and then increase the thread tension. c Sew while making sure that the needle drops slightly d off the edge of . c Turn the fabric over so that the right side faces up, and d then sew over the seam with the center of the presser foot aligned with the seam. a - Brother International SB3150 | Operation Manual - Page 103
Replacing the Needle" in the "Basic operations" section. • The needle threader cannot be used with the wing needle, otherwise the machine may be damaged. Manually pass the thread " section. → The pattern displayed on the screen is mirrored. Sew along the other edge of the frayed section so that f it - Brother International SB3150 | Operation Manual - Page 104
Decorative Stitching ■ Drawnwork (Example 2) Pull out several threads from two sections of the fabric, a separated by an unfrayed section of about 4 mm (3/16 inch). 1 1 4 mm (3/16 inch) Attach monogramming foot "N". b Select stitch . c Sew along the center of the unfrayed section. d N S-44 - Brother International SB3150 | Operation Manual - Page 105
provides instructions on sewing character stitches and decorative stitches as well as on adjusting and editing them. In addition, it describes how to use MY CUSTOM STITCH, which allows you to create original stitch patterns. Page number starts with "D" in this section. The screen display and machine - Brother International SB3150 | Operation Manual - Page 106
Satin stitches 7 mm satin stitches Cross stitch stitches Note • The stitch numbers vary depending on your sewing machine model. Refer to the Quick Character stitch patterns Reference Guide. • The stitch pattern displayed on the screen shows Operation key Font Icon an image of the actual - Brother International SB3150 | Operation Manual - Page 107
→ The selected pattern is removed. Thread Needle Presser foot Twin needle 1 Fabric 2 Stabilizer 3 Thin paper #50 - #60 With lightweight, regular, or stretch fabrics: the Ball point needle (golden colored) 90/14 With heavyweight fabrics: home sewing machine needle 90/14 Monogramming foot "N". Using - Brother International SB3150 | Operation Manual - Page 108
needle into fabric and then lower the presser foot. Memo • When sewing character stitches, the machine automatically sews reinforcement stitches at the beginning and end of each character. • When sewing is completed, trim any excess thread between letters. d Press the "Start/Stop" button to begin - Brother International SB3150 | Operation Manual - Page 109
Memo • Up to 70 patterns can be combined. • If multiple patterns have been combined, the sewing machine stops once all the selected patterns displayed in the LCD have been sewn. To repeatedly sew the combined pattern, refer to "Repeating combined patterns" on page D-5. • The combined pattern can be - Brother International SB3150 | Operation Manual - Page 110
Sewing can be switched between large and small. Depending on your machine model, the size of Handwriting font characters, Decorative stitches, screen, and select (Large) or (Small). b Select select the (Thread density) in the desired stitch density. settings screen, and Select for coarser - Brother International SB3150 | Operation Manual - Page 111
Sewing the Various Built-in Decorative Patterns Changing the pattern length The length of one part of a 7 mm satin stitch can be set to , the narrower the character spacing will be. → The next pattern selected is moved half a width to the right. c Select the same pattern. Decorative sewing D-7 - Brother International SB3150 | Operation Manual - Page 112
Sewing the Various Built-in Decorative Patterns d Press . Mirroring a pattern image a After the patterns have been combined, (Mirror image) in the settings screen. select → The next - Brother International SB3150 | Operation Manual - Page 113
be stored for later use. Since stored patterns are not lost after the sewing machine is turned off, they can be recalled at any time. Up to 15 an empty pocket is selected. c Press . • Do not turn off the sewing machine while the pattern is being stored, otherwise the pattern data may be lost. Memo - Brother International SB3150 | Operation Manual - Page 114
of scrap fabric that is the same as what is used for your project. The pattern used for making adjustments differs depending on the sewing machine model. For models equipped with vertical and horizontal fine adjustment settings: (No. 36 of ) For models equipped with only vertical fine adjustment - Brother International SB3150 | Operation Manual - Page 115
the Various Built-in Decorative Patterns i Press . j Select or once again, start the sewing machine and check the stitching. Continue adjusting the pattern until it is sewn correctly. → Make space in the design. Press "-" to decrease the horizontal space in the design. Decorative sewing D-11 - Brother International SB3150 | Operation Manual - Page 116
Designing a Stitch With the MY CUSTOM STITCH function, you can sew stitch patterns that you design yourself Drawing a sketch of the pattern with the start point and the end point of the design at the same height. d Determine the sewing order. 98 10 11 13 12 01 14 6 5 4 7 3 2 15 16 17 For - Brother International SB3150 | Operation Manual - Page 117
panel as many times as necessary until is displayed, and press . Designing a Stitch f Select to the whether to finish editing the pattern and sewing screen or to continue editing. return Select either of them using the "-" or "+" key, and then press . 1 2 → The MY CUSTOM STITCH screen is - Brother International SB3150 | Operation Manual - Page 118
Designing a Stitch Examples of designs Enter each of the points indicated in the table to sew the sample stitch. Point Point 1 0 0 21 38 13 2 12 0 22 35 14 3 18 3 23 32 13 4 22 6 24 30 10 5 23 10 25 32 6 6 21 - Brother International SB3150 | Operation Manual - Page 119
This section provides important information for operating this machine. Please read this section to find troubleshooting tips and pointers as well as how to keep your machine in the best working order. Page number starts with "A" in this section. Chapter1 MAINTENANCE AND TROUBLESHOOTING ........ A-2 - Brother International SB3150 | Operation Manual - Page 120
oiling unnecessary. If problems occur, such as difficulty turning the handwheel or an unusual noise, immediately stop using the machine, and contact your authorized Brother dealer or the nearest Brother authorized service center. Precautions on storing the machine Do not store the machine in any of - Brother International SB3150 | Operation Manual - Page 121
aligns with the z mark on the machine. a 2 Grasp both sides of and z marks. A MAINTENANCE AND TROUBLESHOOTING a 1 Needle plate cover Remove the thread may become tangled, the needle may break or sewing performance may suffer. For a new bobbin case, contact your nearest Brother authorized service - Brother International SB3150 | Operation Manual - Page 122
If the machine stops operating correctly, check the following possible problems before requesting service. You can solve most problems by yourself. If you need additional help, the Brother Solutions Center offers the latest FAQs and troubleshooting tips. Visit us at " http://support.brother.com - Brother International SB3150 | Operation Manual - Page 123
threading. Raise the presser foot using the presser foot lever. MAINTENANCE AND TROUBLESHOOTING 3 Slit 4 Cutter Sewing with the correct thread → The upper thread shutter opens so the machine can be threaded. • If the presser foot is not raised, the machine cannot be threaded correctly. Press ( - Brother International SB3150 | Operation Manual - Page 124
Troubleshooting While holding the thread lightly with your right hand, f pass the thread under the thread guide plate, and then pull it up. 1 Thread guide plate Pass the thread through the thread channel in the order g shown below. Incorrect thread tension ■ Symptoms • Symptom 1: The bobbin thread - Brother International SB3150 | Operation Manual - Page 125
key. Refer to page B-8) Press "-" to decrease the tension of the upper thread. Troubleshooting • If the upper thread is visible from the wrong side of the fabric Using thread tension key (For models equipped with thread tension key. Refer to page B-8) Press "+" to increase the tension of the - Brother International SB3150 | Operation Manual - Page 126
thread may have become tangled under the needle plate. Follow the procedure described below to remove the fabric from the machine. If the operation cannot be completed according to this procedure, instead of attempting to remove it forcefully, contact your nearest Brother authorized service center - Brother International SB3150 | Operation Manual - Page 127
Troubleshooting p Ibnosbebrtinthceasbeoablbiginnscawsiethsothtehazt thmeaSrk mark on the on the machine. a If the fabric cannot be removed, even after completing these steps, contact your nearest Brother authorized service center. Remove any threads the needle" and "Replacing the needle" in the - Brother International SB3150 | Operation Manual - Page 128
toward you e (counterclockwise) and check that the needle bar and feed dogs operate correctly. If the needle or feed dogs contact the needle plate, the machine may be malfunctioning; therefore, contact your nearest Brother authorized service center. 1 Thread 2 Bobbin winder seat 2 1 A-10 - Brother International SB3150 | Operation Manual - Page 129
. • Do not remove the screw on the bobbin winder guide post, otherwise the machine may be damaged; you cannot wind off the thread by removing the screw. 1 Troubleshooting Hold the thread end with your left hand, and wind off d the thread clockwise with your right hand as shown below. 1 Screw - Brother International SB3150 | Operation Manual - Page 130
position. nearest Brother authorized service center. - A size 65/9 needle is being used. The needle is incompatible with the needle threader. Manually pass the thread through the eye of the needle. B-24 The thread is not passed through the bobbin winding thread guide correctly. Correctly - Brother International SB3150 | Operation Manual - Page 131
Troubleshooting Symptom Probable Cause The sewing light does not come on. The sewing light is damaged. (Light) is set to "OFF" in the settings screen. Remedy Contact your authorized Brother dealer or the nearest Brother authorized service center. Reference - Change the setting to "ON". B-12 - Brother International SB3150 | Operation Manual - Page 132
. There are scratches on the bobbin case. Replace the bobbin case, or consult your authorized Brother dealer. Using improper needle or thread for the selected fabric. Check the "Fabric/Thread/Needle Combinations" chart. While sewing, the thread became knotted or tangled. Rethread upper and - Brother International SB3150 | Operation Manual - Page 133
Needle is turned, bent or the point is dull. Replace the needle. B-29 Bobbin is set incorrectly. Reset the bobbin thread correctly. B-18 Upper threading is incorrect. Check the steps for threading the machine and rethread the machine. B-21 MAINTENANCE AND TROUBLESHOOTING A Appendix A-15 - Brother International SB3150 | Operation Manual - Page 134
If the handwheel does not turn smoothly or the needle that fell into the machine cannot be removed, contact your authorized Brother dealer or the nearest Brother authorized service center. The handwheel feels sluggish when it is turned. Thread is tangled in the bobbin case. Remove the tangled - Brother International SB3150 | Operation Manual - Page 135
material. S-4, D-3 Adjust the thread tension. B-41, A-6 Sew while guiding the fabric with your hands so that the fabric is fed in a straight line. B-36 Remove the tangle thread. If the thread is tangled in the bobbin case, clean the race. A-8 MAINTENANCE AND TROUBLESHOOTING A Appendix A-17 - Brother International SB3150 | Operation Manual - Page 136
Troubleshooting Error messages If the "Start/Stop" button is pressed before the machine is correctly set up or if an operation is performed incorrectly, an error message appears in the LCD. Follow the instructions that appear. The message will disappear if or is pressed while the message is - Brother International SB3150 | Operation Manual - Page 137
also displayed when the needle plate is removed while the machine is still turned on. If error message "F**" appears in the LCD while the machine is being used, the machine may be malfunctioning. Contact your nearest Brother authorized service center. MAINTENANCE AND TROUBLESHOOTING Appendix A-19 - Brother International SB3150 | Operation Manual - Page 138
locks up, for example, because the thread is tangled The machine beeps for four seconds and the machine automatically stops. Be sure to check for the cause of the error and correct it before continuing to sew. ■ Canceling the operation beep Select a "OFF". (Buzzer) in the settings screen and - Brother International SB3150 | Operation Manual - Page 139
thread guide B-2 B-15 Button guide plate S-16 Button sewing S-18 , Buttonhole lever B-3 S-17 Buttonhole sewing S-15 Buttonhole stitching S-15 Buzzer A-20 C Changing sewing direction S-2 Character spacing D-7 , Character stitches B-35 D-2 Checking needle B-29 Cleaning cleaning machine - Brother International SB3150 | Operation Manual - Page 140
B-44 replacement B-31 Thread guide plate B-2 Thread tension adjustment B-41 , Thread tension dial B-2 B-41, A-7 Threading threading needle B-23 threading needle manually B-24 upper threading B-21 Tips S-2 Top cover B-2 Trial sewing S-2 , Triple stretch stitch S-7 S-34 Troubleshooting - Brother International SB3150 | Operation Manual - Page 141
W Walking foot S-30 Winding bobbin B-15 Wing needle S-43 Z , Zigzag stitches S-13 S-27 Zigzag width adjustment B-40 Zipper insertion , centered S-20 S-24 side S-21 Index A MAINTENANCE AND TROUBLESHOOTING Appendix A-23 - Brother International SB3150 | Operation Manual - Page 142
- Brother International SB3150 | Operation Manual - Page 143
- Brother International SB3150 | Operation Manual - Page 144
Please visit us at http://support.brother.com/ where you can get product support and answers to frequently asked questions (FAQs). English 888-H70/H72/H82/J70 Printed in Vietnam XG5455-3013
-
 1
1 -
 2
2 -
 3
3 -
 4
4 -
 5
5 -
 6
6 -
 7
7 -
8
-
9
-
10
-
11
-
12
-
13
-
14
-
15
-
16
-
17
-
18
-
19
-
20
-
21
-
22
-
23
-
24
-
25
-
26
-
27
-
28
-
29
-
30
-
31
-
32
-
33
-
34
-
35
-
36
-
37
-
38
-
39
-
40
-
41
-
42
-
43
-
44
-
45
-
46
-
47
-
48
-
49
-
50
-
51
-
52
-
53
-
54
-
55
-
56
-
57
-
58
-
59
-
60
-
61
-
62
-
63
-
64
-
65
-
66
-
67
-
68
-
69
-
70
-
71
-
72
-
73
-
74
-
75
-
76
-
77
-
78
-
79
-
80
-
81
-
82
-
83
-
84
-
85
-
86
-
87
-
88
-
89
-
90
-
91
-
92
-
93
-
94
-
95
-
96
-
97
-
98
-
99
-
100
-
101
-
102
-
103
-
104
-
105
-
106
-
107
-
108
-
109
-
110
-
111
-
112
-
113
-
114
-
115
-
116
-
117
-
118
-
119
-
120
-
121
-
122
-
123
-
124
-
125
-
126
-
127
-
128
-
129
-
130
-
131
-
132
-
133
-
134
-
135
-
136
-
137
-
138
-
139
-
140
-
141
-
142
-
143
-
144
 |
 |
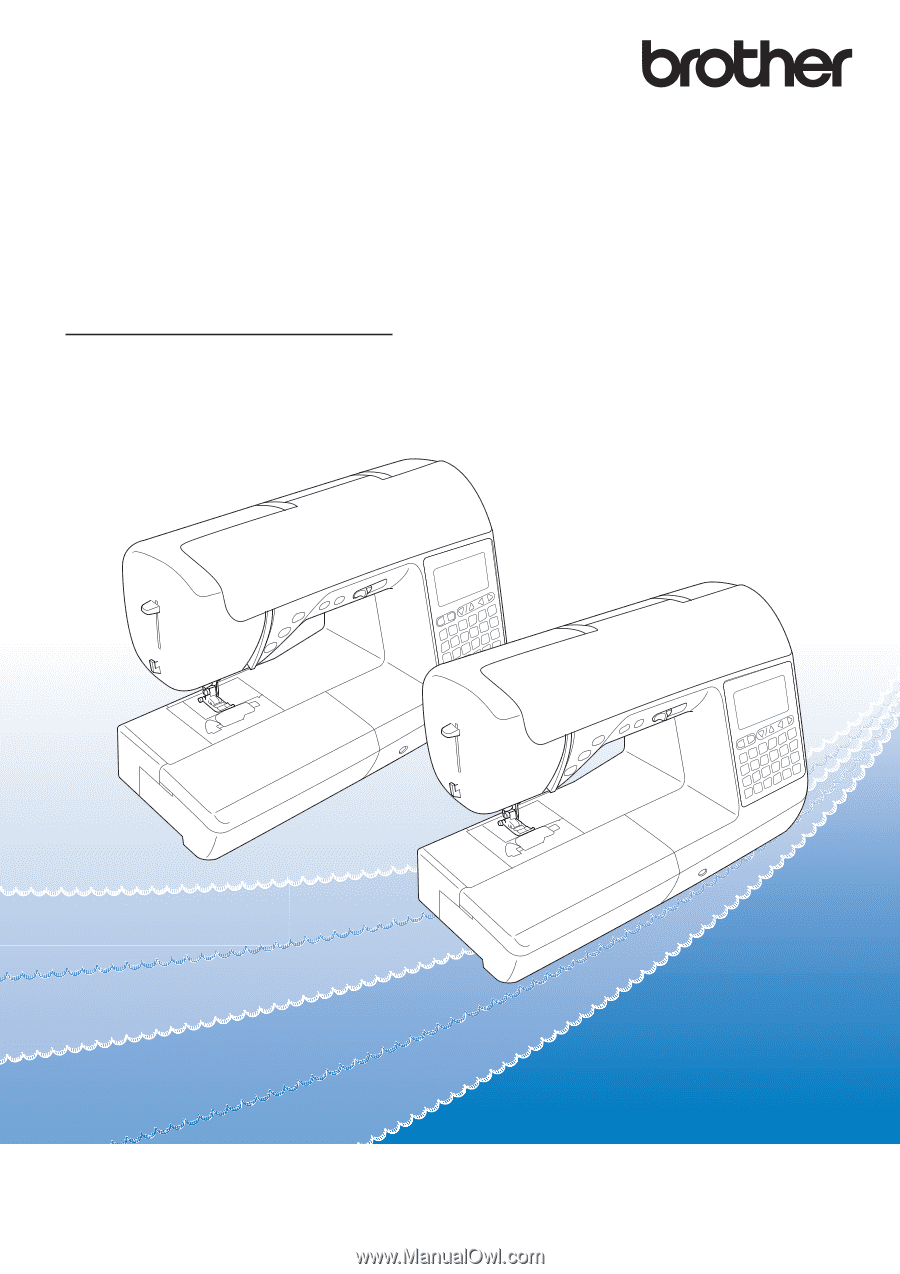
Operation Manual
Sewing Machine
Product Code: 888-H70/H72/H82/J70
Be sure to read this document before using the machine.
We recommend that you keep this document nearby for future reference.