Brother International SB3150 Operation Manual - Page 12
Operation panel and operation keys
 |
View all Brother International SB3150 manuals
Add to My Manuals
Save this manual to your list of manuals |
Page 12 highlights
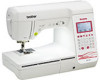
Names of Machine Parts and Their Functions Operation panel and operation keys a b s r c q p d o e n f m g h i jkl The keys with * are lit while they are ON. 1 LCD (liquid crystal display) Settings for the selected stitch and error messages for incorrect operations appear in the LCD. For details, refer to "LCD" on page B-11 2 Stitch width keys/Settings screen page selection keys Press to adjust the stitch width or to move to previous/next pages in the settings screen. 3 Preset utility stitch/saved pattern key * Press to select the utility stitch assigned to a numeric key or to retrieve a pattern that has been saved. 4 Utility stitch key * Press to select a utility stitch. 5 Decorative stitch key * Press to select a decorative stitch. 6 Character stitch key * Press to select a character stitch. 7 Back key Press this key to cancel the operation and return to the previous screen. In addition, pressing this key removes the last pattern added when combining characters or decorative stitches. 8 Numeric keys Use these keys to quickly select one of the ten most often used stitches. When selecting other stitches, use these keys to type in the number of the desired stitch. 9 OK key Press to apply the selection or perform the operation. 0 Reset key Press to reset the selected stitch to its original settings. A Memory key Press to save stitch pattern combinations to machine memory. B Presser foot/Needle exchange key Press this key before changing the needle, the presser foot, etc. This key locks all key and button functions to prevent operation of the machine. C Back to beginning key Press this key to return to the beginning of the pattern. D Settings key Press to select sewing settings or other settings, or to move to next pages in the settings screen. E Automatic thread cutting key * Press to select the automatic thread cutting function. F Manual memory key Press to save the adjusted stitch width and length settings. For models equipped with the thread tension keys (Refer to page B-8.), the thread tension setting is also saved. G Automatic reverse/reinforcement key * Press to use the automatic reverse/reinforcement stitching function. H Thread tension keys (Equipped on some models. Refer to page B-8)/Value selection keys Press to adjust the thread tension or to change the value of the selected item in the settings screen. I Stitch length keys/Item selection keys Press to adjust the stitch length or to select the next/previous items in the settings screen. Note • The operation keys of this machine are capacitive touch sensors. Operate the keys by directly touching them with your finger. The response of the keys varies according to the user. The pressure exerted on the keys does not affect the response of the keys. • Since the operation keys react differently depending on the user, adjust the setting for the input sensitivity. (page B-14) • When using an electrostatic touch pen, make sure that its point is 8 mm or more. Do not use a touch pen with a thin point or a unique shape. B-4
-
 1
1 -
2
-
3
-
4
-
5
-
6
-
 7
7 -
 8
8 -
 9
9 -
 10
10 -
 11
11 -
 12
12 -
 13
13 -
 14
14 -
 15
15 -
 16
16 -
 17
17 -
18
-
19
-
20
-
21
-
22
-
23
-
24
-
25
-
26
-
27
-
28
-
29
-
30
-
31
-
32
-
33
-
34
-
35
-
36
-
37
-
38
-
39
-
40
-
41
-
42
-
43
-
44
-
45
-
46
-
47
-
48
-
49
-
50
-
51
-
52
-
53
-
54
-
55
-
56
-
57
-
58
-
59
-
60
-
61
-
62
-
63
-
64
-
65
-
66
-
67
-
68
-
69
-
70
-
71
-
72
-
73
-
74
-
75
-
76
-
77
-
78
-
79
-
80
-
81
-
82
-
83
-
84
-
85
-
86
-
87
-
88
-
89
-
90
-
91
-
92
-
93
-
94
-
95
-
96
-
97
-
98
-
99
-
100
-
101
-
102
-
103
-
104
-
105
-
106
-
107
-
108
-
109
-
110
-
111
-
112
-
113
-
114
-
115
-
116
-
117
-
118
-
119
-
120
-
121
-
122
-
123
-
124
-
125
-
126
-
127
-
128
-
129
-
130
-
131
-
132
-
133
-
134
-
135
-
136
-
137
-
138
-
139
-
140
-
141
-
142
-
143
-
144
 |
 |
