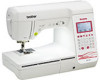
Brother International SB3150 Operation Manual - Page 23
Winding/Installing the Bobbin
 |
View all Brother International SB3150 manuals
Add to My Manuals
Save this manual to your list of manuals |
Page 23 highlights
Winding/Installing the Bobbin Winding/Installing the Bobbin CAUTION • Only use the Bobbin (part code: SA156, SFB: XA5539-151) designed specifically for this machine. Use of any other bobbin may result in injuries or damage to the machine. • The included bobbin was designed specifically for this machine. If bobbins from other models are used, the machine will not operate correctly. Use only the included bobbin or bobbins of the same type (part code: SA156, SFB: XA5539-151). SA156 is Class15 type bobbin. Place the bobbin on the bobbin winder shaft so that the b spring on the shaft fits into the notch in the bobbin. Press down on the bobbin until it snaps into place. B 1 2 GETTING READY 1 Notch 2 Bobbin winder shaft spring Slide the bobbin winder in the direction of the arrow c until it snaps into place. * Made of plastic 1 This model 2 Other models 3 11.5 mm (approx. 7/16 inch) Memo • When the foot controller is connected, bobbin winding can be started and stopped with the foot controller. Winding the bobbin This section describes how to wind thread onto a bobbin. Remove the spool cap that is inserted onto the spool d pin. 1 2 1 Spool pin 2 Spool cap Place the spool of thread for the bobbin onto the spool e pin. Slide the spool onto the pin so that the spool is horizontal and the thread unwinds to the front at the bottom. Open the top cover. a • If the spool is not positioned so that the thread unwinds correctly, the thread may become tangled around the spool pin. Basic operations B-15
-
 1
1 -
2
-
3
-
4
-
5
-
6
-
7
-
8
-
9
-
10
-
11
-
12
-
13
-
14
-
15
-
16
-
17
-
 18
18 -
 19
19 -
 20
20 -
 21
21 -
 22
22 -
 23
23 -
 24
24 -
 25
25 -
 26
26 -
 27
27 -
 28
28 -
29
-
30
-
31
-
32
-
33
-
34
-
35
-
36
-
37
-
38
-
39
-
40
-
41
-
42
-
43
-
44
-
45
-
46
-
47
-
48
-
49
-
50
-
51
-
52
-
53
-
54
-
55
-
56
-
57
-
58
-
59
-
60
-
61
-
62
-
63
-
64
-
65
-
66
-
67
-
68
-
69
-
70
-
71
-
72
-
73
-
74
-
75
-
76
-
77
-
78
-
79
-
80
-
81
-
82
-
83
-
84
-
85
-
86
-
87
-
88
-
89
-
90
-
91
-
92
-
93
-
94
-
95
-
96
-
97
-
98
-
99
-
100
-
101
-
102
-
103
-
104
-
105
-
106
-
107
-
108
-
109
-
110
-
111
-
112
-
113
-
114
-
115
-
116
-
117
-
118
-
119
-
120
-
121
-
122
-
123
-
124
-
125
-
126
-
127
-
128
-
129
-
130
-
131
-
132
-
133
-
134
-
135
-
136
-
137
-
138
-
139
-
140
-
141
-
142
-
143
-
144
 |
 |
