Brother International Simplicity SB530T Users Manual - English and Spanish - Page 17
Caution
 |
View all Brother International Simplicity SB530T manuals
Add to My Manuals
Save this manual to your list of manuals |
Page 17 highlights
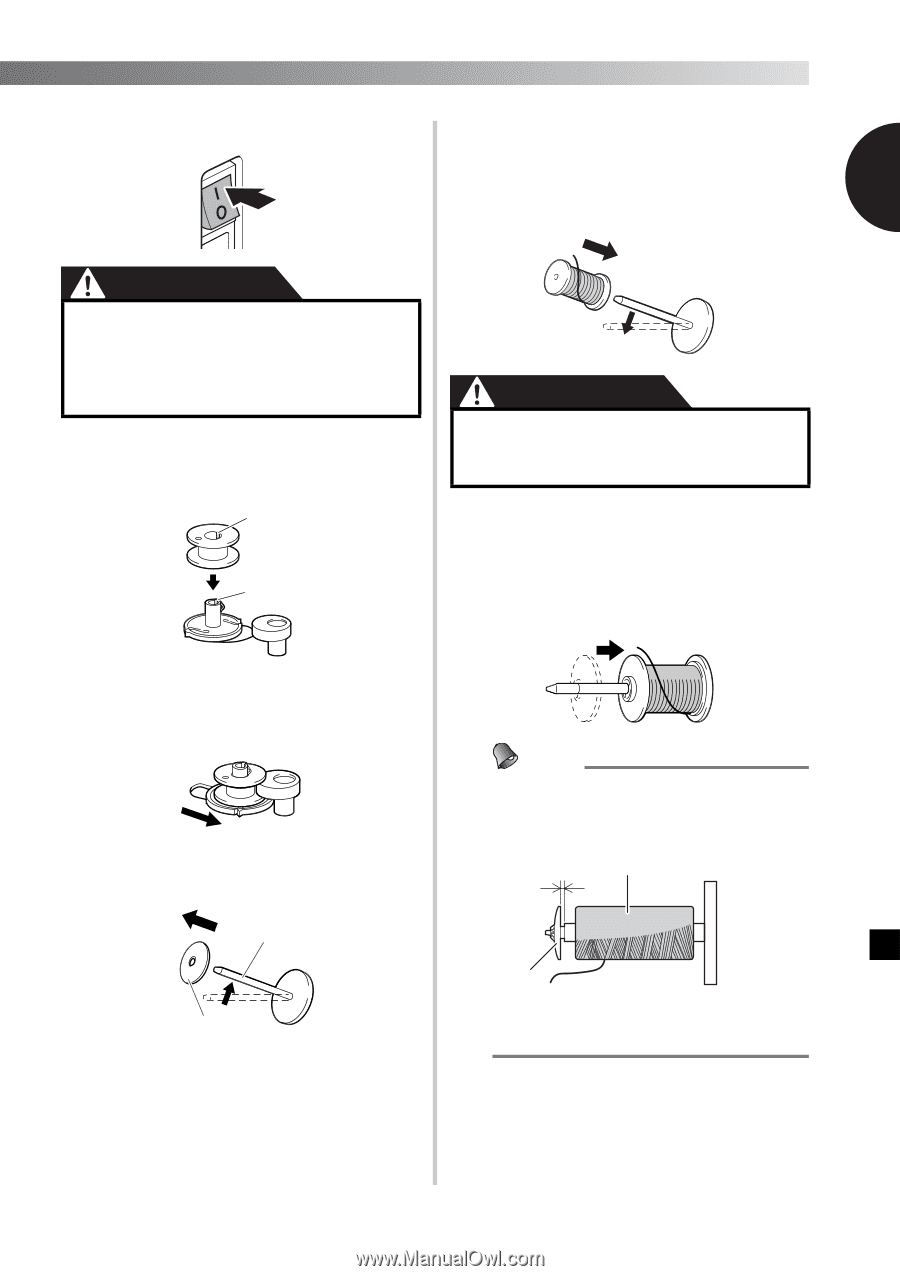
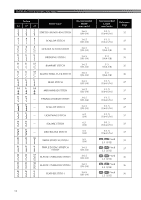
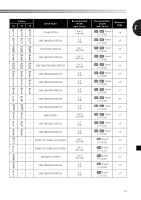
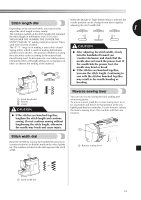
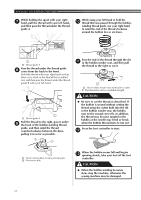
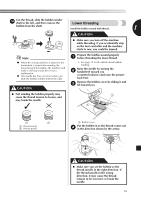
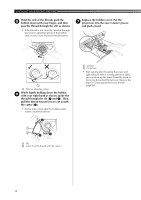
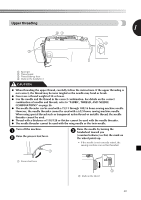
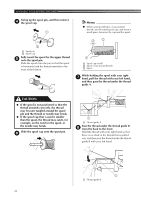
Turn on the machine. 1 Fully insert the spool of thread for the 5 bobbin onto the spool pin. Slide the spool onto the pin so that the spool is horizontal and the thread unwinds to the 1 front at the bottom. CAUTION ● Do not turn on the machine while pressing down the foot controller. The machine may start unexpectedly and cause personal injury or damage to the machine. Place the bobbin on the bobbin winder 2 shaft so that the spring on the shaft fits into the notch of the bobbin. a b CAUTION ● If the spool is not positioned so that the thread unwinds correctly, the thread may become tangled around the spool pin. Slide the spool cap onto the spool pin. 6 With the slightly rounded side of the spool cap positioned toward the left, slide the spool cap onto the spool pin as far as possible to the right so that the spool is moved to the right end of the spool pin. 1 Notch 2 Spring on the shaft Slide the bobbin winder shaft to the right 3 until it snaps into place. Swing up the spool pin, and then remove 4 the spool cap. a b 1 Spool pin 2 Spool cap Memo ● When sewing with fine, cross-wound thread, use the small spool cap, and leave a small space between the cap and the spool. c b a 1 Spool cap (small) 2 Spool (cross-wound thread) 3 Space 16
-
 1
1 -
2
-
3
-
4
-
5
-
6
-
7
-
8
-
9
-
10
-
11
-
 12
12 -
 13
13 -
 14
14 -
 15
15 -
 16
16 -
 17
17 -
 18
18 -
 19
19 -
 20
20 -
 21
21 -
 22
22 -
23
-
24
-
25
-
26
-
27
-
28
-
29
-
30
-
31
-
32
-
33
-
34
-
35
-
36
-
37
-
38
-
39
-
40
-
41
-
42
-
43
-
44
-
45
-
46
-
47
-
48
-
49
-
50
-
51
-
52
-
53
-
54
-
55
-
56
-
57
-
58
-
59
-
60
-
61
-
62
-
63
-
64
-
65
-
66
-
67
-
68
-
69
-
70
-
71
-
72
-
73
-
74
-
75
-
76
-
77
-
78
-
79
-
80
-
81
-
82
-
83
-
84
-
85
-
86
-
87
-
88
-
89
-
90
-
91
-
92
-
93
-
94
-
95
-
96
-
97
-
98
-
99
-
100
-
101
-
102
-
103
-
104
 |
 |