Brother International LS-2125i Users Manual - English - Page 44
and then sew a few stitches to reinforce
 |
UPC - 012502615293
View all Brother International LS-2125i manuals
Add to My Manuals
Save this manual to your list of manuals |
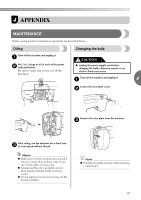
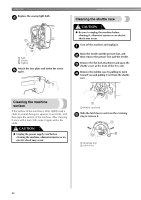
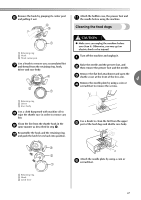
Page 44 highlights
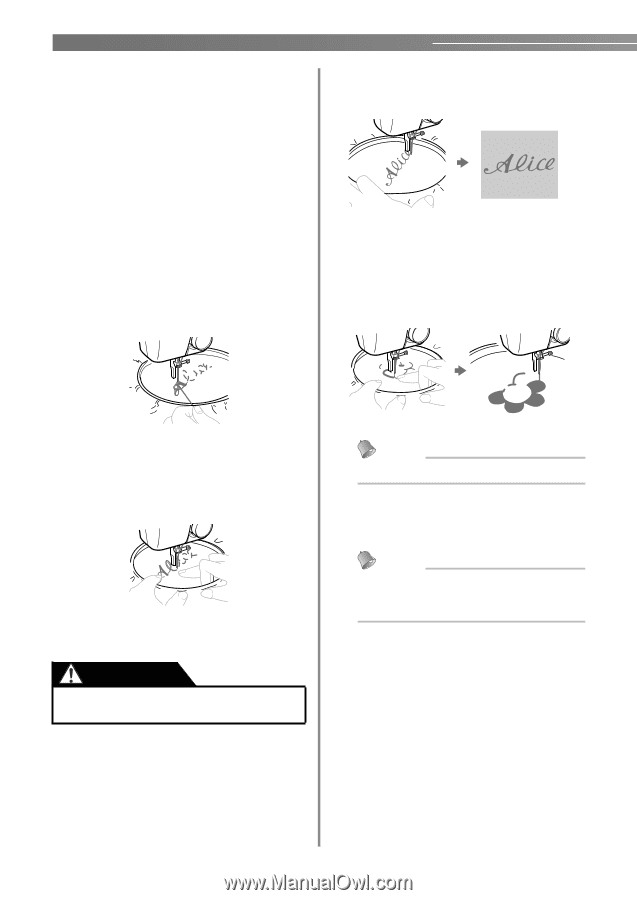
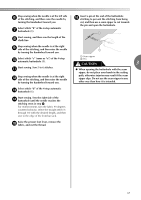
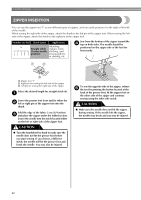
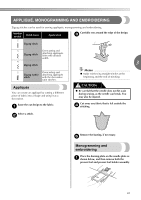
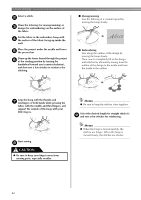
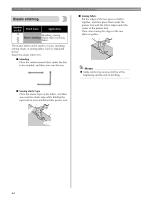
UTILITY STITCHES Select a stitch. b Draw the lettering (for monogramming) or c design (for embroidering) on the surface of the fabric. ■ Monogramming Sew the lettering at a constant speed by moving the hoop slowly. Put the fabric in the embroidery hoop with d the surface of the fabric facing up inside the well. Place the project under the needle and lower e the presser bar. Draw up the lower thread through the project f at the starting position by turning the handwheel toward you (counterclockwise), and then sew a few stitches to reinforce the stitching. ■ Embroidering Sew along the outline of the design by moving the hoop slowly. Then, sew to completely fill in the design with stitches by alternately sewing from the outline of the design to the inside and from the inside to the outline. Grip the hoop with the thumbs and g forefingers of both hands while pressing the fabric with the middle and third fingers, and support the outside of the hoop with your little fingers. Start sewing. h CAUTION ● Be sure to keep your fingers away from moving parts, especially needles. Memo ● Be sure to keep the stitches close together. Select the desired length for straight stitch (6) i and sew a few stitches for reinforcing. Memo ● When the hoop is moved quickly, the stitches are longer. When the hoop is moved slowly, the stitches are shorter. 42
-
 1
1 -
2
-
3
-
4
-
5
-
6
-
7
-
8
-
9
-
10
-
11
-
12
-
13
-
14
-
15
-
16
-
17
-
18
-
19
-
20
-
21
-
22
-
23
-
24
-
25
-
26
-
27
-
28
-
29
-
30
-
31
-
32
-
33
-
34
-
35
-
36
-
37
-
38
-
 39
39 -
 40
40 -
 41
41 -
 42
42 -
 43
43 -
 44
44 -
 45
45 -
 46
46 -
 47
47 -
 48
48 -
 49
49 -
50
-
51
-
52
-
53
-
54
-
55
-
56
 |
 |