Canon EOS C700 GS PL EOS C700 EOS C700 PL EOS C700 GS PL EOS C700 FF EOS C700 - Page 167
Searching for Access Points, Setup screen: Select [Password] and press SET.
 |
View all Canon EOS C700 GS PL manuals
Add to My Manuals
Save this manual to your list of manuals |
Page 167 highlights
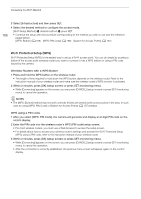
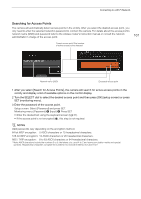
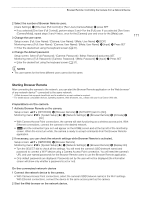
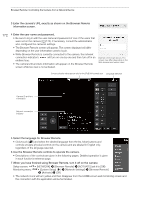
Connecting to a Wi-Fi Network Searching for Access Points The camera will automatically detect access points in the vicinity. After you select the desired access point, you only need to enter the selected network's password to connect the camera. For details about the access point's network name (SSID) and password refer to the wireless router's instruction manual or consult the network administrator in charge of the access point. 167 Current access point/Total number of active access points detected Network name (SSID) Encrypted access point 1 After you select [Search for Access Points], the camera will search for active access points in the vicinity and display a list of available options on the control display. 2 Turn the SELECT dial to select the desired access point and then press [OK] (setup screen) or press SET (monitoring menu). 3 Enter the password of the access point. Setup screen: Select [Password] and press SET. Monitoring menu: [Password] > [Input] > Press SET • Enter the desired text using the keyboard screen (A 37). • If the access point is not encrypted (C), this step is not required. NOTES Valid passwords vary depending on the encryption method. 64-bit WEP encryption: 5 ASCII characters or 10 hexadecimal characters. 128-bit WEP encryption: 13 ASCII characters or 26 hexadecimal characters. AES / TKIP encryption: 8 to 63 ASCII characters or 64 hexadecimal characters. * Note: ASCII characters include the numbers 0 to 9, the letters a to z and A to Z and some punctuation marks and special symbols. Hexadecimal characters comprise the numbers 0 to 9 and the letters a to f and A to F.
-
 1
1 -
2
-
3
-
4
-
5
-
6
-
7
-
8
-
9
-
10
-
11
-
12
-
13
-
14
-
15
-
16
-
17
-
18
-
19
-
20
-
21
-
22
-
23
-
24
-
25
-
26
-
27
-
28
-
29
-
30
-
31
-
32
-
33
-
34
-
35
-
36
-
37
-
38
-
39
-
40
-
41
-
42
-
43
-
44
-
45
-
46
-
47
-
48
-
49
-
50
-
51
-
52
-
53
-
54
-
55
-
56
-
57
-
58
-
59
-
60
-
61
-
62
-
63
-
64
-
65
-
66
-
67
-
68
-
69
-
70
-
71
-
72
-
73
-
74
-
75
-
76
-
77
-
78
-
79
-
80
-
81
-
82
-
83
-
84
-
85
-
86
-
87
-
88
-
89
-
90
-
91
-
92
-
93
-
94
-
95
-
96
-
97
-
98
-
99
-
100
-
101
-
102
-
103
-
104
-
105
-
106
-
107
-
108
-
109
-
110
-
111
-
112
-
113
-
114
-
115
-
116
-
117
-
118
-
119
-
120
-
121
-
122
-
123
-
124
-
125
-
126
-
127
-
128
-
129
-
130
-
131
-
132
-
133
-
134
-
135
-
136
-
137
-
138
-
139
-
140
-
141
-
142
-
143
-
144
-
145
-
146
-
147
-
148
-
149
-
150
-
151
-
152
-
153
-
154
-
155
-
156
-
157
-
158
-
159
-
160
-
161
-
 162
162 -
 163
163 -
 164
164 -
 165
165 -
 166
166 -
 167
167 -
 168
168 -
 169
169 -
 170
170 -
 171
171 -
 172
172 -
173
-
174
-
175
-
176
-
177
-
178
-
179
-
180
-
181
-
182
-
183
-
184
-
185
-
186
-
187
-
188
-
189
-
190
-
191
-
192
-
193
-
194
-
195
-
196
-
197
-
198
-
199
-
200
-
201
-
202
-
203
-
204
-
205
-
206
-
207
-
208
-
209
-
210
-
211
-
212
-
213
-
214
-
215
-
216
-
217
-
218
-
219
-
220
-
221
-
222
-
223
-
224
-
225
-
226
-
227
-
228
-
229
-
230
-
231
-
232
-
233
-
234
-
235
-
236
-
237
-
238
-
239
-
240
-
241
-
242
-
243
-
244
-
245
-
246
-
247
-
248
-
249
-
250
-
251
-
252
-
253
-
254
-
255
 |
 |
