Canon EOS C700 GS PL EOS C700 EOS C700 PL EOS C700 GS PL EOS C700 FF EOS C700 - Page 182
IP Streaming, Preparations, If necessary, select [Dest. Port No.] and press SET.
 |
View all Canon EOS C700 GS PL manuals
Add to My Manuals
Save this manual to your list of manuals |
Page 182 highlights
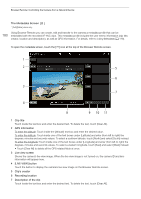
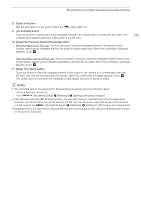
IP Streaming IP Streaming 182 When the main recording mode is set to [XF-AVC (CFast)], after you connect the camera to a network (Wi-Fi (Infrastructure) or wired (Ethernet)), you can stream the camera's live video and audio* over IP to a compatible IP video decoder** connected to the network. You can use IP streaming for live broadcasts or to send a news flash report from a location with poor network connectivity, since the configuration of streamed video is lower (so the data to be transferred is smaller) than that of recorded clips. * Only 2 channels. When recording main recording clips with 4 audio channels, you can select which two channels to stream over IP. ** This can be a dedicated video transfer device or decoder software on a computer. For details about compatible decoders, please visit your local Canon Web site. Configuration of video streamed over IP Resolution, color sampling and frame rate Sensor mode 3840x2160*, YCbCr 4:2:2 59.94P, 50.00P 1920x1080, YCbCr 4:2:2 59.94P, 59.94i, 50.00P, 50.00i Super 35mm Super 35mm (cropped) Super 16mm (cropped) Bit rate (VBR) 9 Mbps 4 Mbps 2 Mbps 1.5 Mbps Streamed signal Video Resolution Frame rate 1920x1080 1920x1080 59.94i, 50.00i 1280x720 29.97P, 25.00P 720x480 59.94i 720x576 50.00i Audio format and bit rate MPEG-2 AAC 2ch 256 Kbps * Only when [Camera Setup] > [Sensor Mode] is set to [Super 35mm] or [Super 35mm (Cropped)]. Preparations Before you can stream video over IP, you need to configure settings related to the transfer like the protocol and port number to use. You can also select the configuration of the streamed video. Camera and Receiver Settings 1 Configure the network connection settings. • Use an Ethernet network (A 168) or a Wi-Fi network in Infrastructure mode (A 165). 2 Open the IP streaming settings submenu. Setup screen: Monitoring menu: [NETWORK] > [IP Streaming] > [OPTIONS] [System Setup] (B) > [Network Settings] > [IP Streaming] 3 Select the video configuration for the video streamed over IP. [Video Output Conf.] > Desired option > Press SET 4 Select the audio channels for the IP stream. [Audio Out Channels] > [CH1/CH2] or [CH3/CH4] > Press SET 5 Select the protocol to be used. [Protocol] > Desired option > Press SET • If you selected [RTP+FEC], complete the error correction settings with the following procedure (A 183). • If you selected [RTSP+RTP], configure the RTSP user name and password with the following procedure (A 183). Otherwise, continue this procedure to configure the receiver's settings. 6 Select [Dest. IP Address] and then press SET. • Enter the IP address using the keyboard screen (A 37). • Setup screen only: Press [RESET] to reset the IP address to [0.0.0.0]. 7 If necessary, select [Dest. Port No.] and press SET.
-
 1
1 -
2
-
3
-
4
-
5
-
6
-
7
-
8
-
9
-
10
-
11
-
12
-
13
-
14
-
15
-
16
-
17
-
18
-
19
-
20
-
21
-
22
-
23
-
24
-
25
-
26
-
27
-
28
-
29
-
30
-
31
-
32
-
33
-
34
-
35
-
36
-
37
-
38
-
39
-
40
-
41
-
42
-
43
-
44
-
45
-
46
-
47
-
48
-
49
-
50
-
51
-
52
-
53
-
54
-
55
-
56
-
57
-
58
-
59
-
60
-
61
-
62
-
63
-
64
-
65
-
66
-
67
-
68
-
69
-
70
-
71
-
72
-
73
-
74
-
75
-
76
-
77
-
78
-
79
-
80
-
81
-
82
-
83
-
84
-
85
-
86
-
87
-
88
-
89
-
90
-
91
-
92
-
93
-
94
-
95
-
96
-
97
-
98
-
99
-
100
-
101
-
102
-
103
-
104
-
105
-
106
-
107
-
108
-
109
-
110
-
111
-
112
-
113
-
114
-
115
-
116
-
117
-
118
-
119
-
120
-
121
-
122
-
123
-
124
-
125
-
126
-
127
-
128
-
129
-
130
-
131
-
132
-
133
-
134
-
135
-
136
-
137
-
138
-
139
-
140
-
141
-
142
-
143
-
144
-
145
-
146
-
147
-
148
-
149
-
150
-
151
-
152
-
153
-
154
-
155
-
156
-
157
-
158
-
159
-
160
-
161
-
162
-
163
-
164
-
165
-
166
-
167
-
168
-
169
-
170
-
171
-
172
-
173
-
174
-
175
-
176
-
 177
177 -
 178
178 -
 179
179 -
 180
180 -
 181
181 -
 182
182 -
 183
183 -
 184
184 -
 185
185 -
 186
186 -
 187
187 -
188
-
189
-
190
-
191
-
192
-
193
-
194
-
195
-
196
-
197
-
198
-
199
-
200
-
201
-
202
-
203
-
204
-
205
-
206
-
207
-
208
-
209
-
210
-
211
-
212
-
213
-
214
-
215
-
216
-
217
-
218
-
219
-
220
-
221
-
222
-
223
-
224
-
225
-
226
-
227
-
228
-
229
-
230
-
231
-
232
-
233
-
234
-
235
-
236
-
237
-
238
-
239
-
240
-
241
-
242
-
243
-
244
-
245
-
246
-
247
-
248
-
249
-
250
-
251
-
252
-
253
-
254
-
255
 |
 |
