Canon EOS C700 GS PL EOS C700 EOS C700 PL EOS C700 GS PL EOS C700 FF EOS C700 - Page 219
Troubleshooting, Power source, Recording
 |
View all Canon EOS C700 GS PL manuals
Add to My Manuals
Save this manual to your list of manuals |
Page 219 highlights
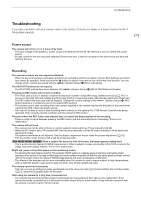
Troubleshooting Troubleshooting If you have a problem with your camera, refer to this section. Consult your dealer or a Canon Service Center if the problem persists. 219 Power source The camera will not turn on or it turns off by itself. - The input voltage of the battery or power source connected to the DC IN 12V terminal is too low. Check the power source. - Excess current to the lens has been detected. Remove the lens. Clean the contacts on the lens mount and lens and reattach the lens. Recording The camera's controls are not responsive/disabled. - When the key lock function is activated, all buttons (or all buttons with the exception of some REC buttons) are locked and cannot be operated. Press and hold the C button for about 4 seconds to turn off the key lock function. You can change which controls are locked with the [System Setup] > [Key Lock] setting. The ND FILTER buttons do not respond. - The ND FILTER buttons have been disabled. Set [System Setup] > [ND FILTER Button] to [Enable]. Pressing the REC button will not start recording. - The CFast card is full or it already contains the maximum number of clips (999 clips). Delete some clips (A 147) or save your clips (A 161) and initialize the CFast card (A 51) to free some space. Alternatively, replace the CFast card. - The REC button that was used may be disabled. Change the current settings in the [System Setup] > [REC Button] submenu to enable the use of the desired REC buttons. - The camera cannot start recording when input power supplied to the camera reaches the level set for the power level warning (A 199). Check the power source. - You may not be able to start or stop recording while controls on the optional RC-V100 Remote Controller are being operated. Stop using the remote controller and then press the REC button. The point where the REC button was pressed does not match the beginning/end of the recording. - There is a slight interval between pressing the REC button and the actual start/end of recording. This is not a malfunction. The camera will not focus. - The camera may not be able to focus on certain subjects using autofocus. Focus manually (A 90). - When the AF mode is set to AF-boosted MF, start focusing manually until the AF frame changes to white (automatic adjustment range). - The optional viewfinder is not adjusted. Use the dioptric adjustment ring to make the proper adjustment (A 42). - The lens is dirty. Clean the lens with a soft lens-cleaning cloth. Z[qr When a subject flits across in front of the lens, the image appears slightly bent. - This is a phenomenon typical of CMOS image sensors. When a subject crosses very quickly in front of the camera, the image may seem slightly warped. This is not a malfunction. Bright red, green or blue dots appear on the monitoring screen. - Try adjusting the black balance (A 54). The camera's CMOS sensor is a delicate piece of precision engineering. Direct exposure of the sensor to ion rays or other types of cosmic radiation may affect it and this may rarely appear as bright colored dots on the screen. This is the nature of CMOS image sensors and does not represent a malfunction. - The effects of the damage may be more noticeable when the camera is used in places subject to high temperatures, when a high ISO speed or gain level is used and when slow shutter speeds are used. The camera cannot record properly. - This may occur as recordings are made and deleted over time. Save your clips (A 161) and initialize the recording media (A 51), using the [Complete] option for SD cards. After using the camera for a long time, it becomes hot. - The camera may become hot after using it continuously for long periods of time; this is not a malfunction. If the camera becomes unusually hot or it becomes hot after using it only for a short while, it may indicate a problem with the camera. Consult a Canon Service Center.
-
 1
1 -
2
-
3
-
4
-
5
-
6
-
7
-
8
-
9
-
10
-
11
-
12
-
13
-
14
-
15
-
16
-
17
-
18
-
19
-
20
-
21
-
22
-
23
-
24
-
25
-
26
-
27
-
28
-
29
-
30
-
31
-
32
-
33
-
34
-
35
-
36
-
37
-
38
-
39
-
40
-
41
-
42
-
43
-
44
-
45
-
46
-
47
-
48
-
49
-
50
-
51
-
52
-
53
-
54
-
55
-
56
-
57
-
58
-
59
-
60
-
61
-
62
-
63
-
64
-
65
-
66
-
67
-
68
-
69
-
70
-
71
-
72
-
73
-
74
-
75
-
76
-
77
-
78
-
79
-
80
-
81
-
82
-
83
-
84
-
85
-
86
-
87
-
88
-
89
-
90
-
91
-
92
-
93
-
94
-
95
-
96
-
97
-
98
-
99
-
100
-
101
-
102
-
103
-
104
-
105
-
106
-
107
-
108
-
109
-
110
-
111
-
112
-
113
-
114
-
115
-
116
-
117
-
118
-
119
-
120
-
121
-
122
-
123
-
124
-
125
-
126
-
127
-
128
-
129
-
130
-
131
-
132
-
133
-
134
-
135
-
136
-
137
-
138
-
139
-
140
-
141
-
142
-
143
-
144
-
145
-
146
-
147
-
148
-
149
-
150
-
151
-
152
-
153
-
154
-
155
-
156
-
157
-
158
-
159
-
160
-
161
-
162
-
163
-
164
-
165
-
166
-
167
-
168
-
169
-
170
-
171
-
172
-
173
-
174
-
175
-
176
-
177
-
178
-
179
-
180
-
181
-
182
-
183
-
184
-
185
-
186
-
187
-
188
-
189
-
190
-
191
-
192
-
193
-
194
-
195
-
196
-
197
-
198
-
199
-
200
-
201
-
202
-
203
-
204
-
205
-
206
-
207
-
208
-
209
-
210
-
211
-
212
-
213
-
 214
214 -
 215
215 -
 216
216 -
 217
217 -
 218
218 -
 219
219 -
 220
220 -
 221
221 -
 222
222 -
 223
223 -
 224
224 -
225
-
226
-
227
-
228
-
229
-
230
-
231
-
232
-
233
-
234
-
235
-
236
-
237
-
238
-
239
-
240
-
241
-
242
-
243
-
244
-
245
-
246
-
247
-
248
-
249
-
250
-
251
-
252
-
253
-
254
-
255
 |
 |
