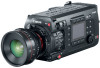
Canon EOS C700 GS PL EOS C700 EOS C700 PL EOS C700 GS PL EOS C700 FF EOS C700 - Page 87
Auto White Balance (AWB), Registering a Custom White Balance, HOME screen only: Press [WB SET].
 |
View all Canon EOS C700 GS PL manuals
Add to My Manuals
Save this manual to your list of manuals |
Page 87 highlights
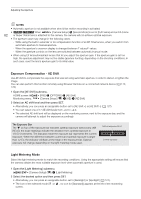
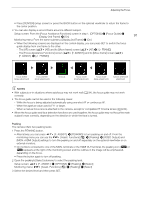
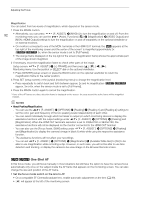
White Balance Auto White Balance (AWB) The camera constantly adjusts the white balance automatically to achieve an optimal level. The camera will adjust the white balance if the light source changes. 87 1 Select the [ AWB] setting and press SET (A 86). • The icon and the current color temperature and CC value set automatically by the camera will appear on the HOME screen and at the top of the monitoring screen. NOTES • Custom white balance may provide better results in the following cases: - Changing lighting conditions - Close-ups - Subjects in a single color (sky, sea or forest) - Under mercury lamps and certain types of fluorescent and LED lights • You can use the [WB] > [OPTIONS] > [AWB Response] setting to change how quickly the white balance changes in auto white balance (AWB) mode. • If you set an assignable button to [AWB Lock] (A 127), you can press the button to lock the current white balance settings set automatically by the camera. To cancel the lock, press the button again (resume auto white balance mode) or select a different white balance setting. Registering a Custom White Balance 1 Select the [Å Set A] or [Å Set B] setting (A 86). • To apply the stored color temperature and CC value without changes, press SET. The rest of the procedure is not necessary. 2 HOME screen only: Press [WB SET]. 3 Point the camera at a gray card or white object so that it fills the center of the monitoring screen. • Use the same lighting conditions you plan to use when recording. 4 Press [OK] (HOME screen) or press an assignable button set to [Set White Balance] (A 127) (monitoring screen/direct setting mode). • The Å icon will flash on the control display. The ÅA or ÅB icon will flash quickly at the top of the monitoring screen. • Make sure the gray card or white object fills the center of the monitoring screen until the procedure is completed. • When the procedure is completed, the [White Balance] screen will appear on the control display and the icon will stop flashing on the monitoring screen. The color temperature and CC value registered by the camera will appear on the HOME screen and at the top of the monitoring screen, next to the ÅA or ÅB icon. These settings are saved even if you turn off the camera. • If necessary, adjust the color temperature or CC value (A 88). NOTES • Readjust the custom white balance if the light source changes. • Very rarely and depending on the light source, the icon will not stop flashing. Even so, the white balance is correctly calibrated and you can continue shooting. • After the camera registers a custom white balance the color temperature or CC value may appear in gray. This indicates that the value registered exceeds the range of values that can be displayed but the white balance is correctly calibrated and you can continue shooting.
-
 1
1 -
2
-
3
-
4
-
5
-
6
-
7
-
8
-
9
-
10
-
11
-
12
-
13
-
14
-
15
-
16
-
17
-
18
-
19
-
20
-
21
-
22
-
23
-
24
-
25
-
26
-
27
-
28
-
29
-
30
-
31
-
32
-
33
-
34
-
35
-
36
-
37
-
38
-
39
-
40
-
41
-
42
-
43
-
44
-
45
-
46
-
47
-
48
-
49
-
50
-
51
-
52
-
53
-
54
-
55
-
56
-
57
-
58
-
59
-
60
-
61
-
62
-
63
-
64
-
65
-
66
-
67
-
68
-
69
-
70
-
71
-
72
-
73
-
74
-
75
-
76
-
77
-
78
-
79
-
80
-
81
-
 82
82 -
 83
83 -
 84
84 -
 85
85 -
 86
86 -
 87
87 -
 88
88 -
 89
89 -
 90
90 -
 91
91 -
 92
92 -
93
-
94
-
95
-
96
-
97
-
98
-
99
-
100
-
101
-
102
-
103
-
104
-
105
-
106
-
107
-
108
-
109
-
110
-
111
-
112
-
113
-
114
-
115
-
116
-
117
-
118
-
119
-
120
-
121
-
122
-
123
-
124
-
125
-
126
-
127
-
128
-
129
-
130
-
131
-
132
-
133
-
134
-
135
-
136
-
137
-
138
-
139
-
140
-
141
-
142
-
143
-
144
-
145
-
146
-
147
-
148
-
149
-
150
-
151
-
152
-
153
-
154
-
155
-
156
-
157
-
158
-
159
-
160
-
161
-
162
-
163
-
164
-
165
-
166
-
167
-
168
-
169
-
170
-
171
-
172
-
173
-
174
-
175
-
176
-
177
-
178
-
179
-
180
-
181
-
182
-
183
-
184
-
185
-
186
-
187
-
188
-
189
-
190
-
191
-
192
-
193
-
194
-
195
-
196
-
197
-
198
-
199
-
200
-
201
-
202
-
203
-
204
-
205
-
206
-
207
-
208
-
209
-
210
-
211
-
212
-
213
-
214
-
215
-
216
-
217
-
218
-
219
-
220
-
221
-
222
-
223
-
224
-
225
-
226
-
227
-
228
-
229
-
230
-
231
-
232
-
233
-
234
-
235
-
236
-
237
-
238
-
239
-
240
-
241
-
242
-
243
-
244
-
245
-
246
-
247
-
248
-
249
-
250
-
251
-
252
-
253
-
254
-
255
 |
 |
