Canon MX850 Network Setup Guide - Page 10
Network Setup of the Card Slot, Setup Completion, Finish, View Setup, Results
 |
UPC - 013803087871
View all Canon MX850 manuals
Add to My Manuals
Save this manual to your list of manuals |
Page 10 highlights
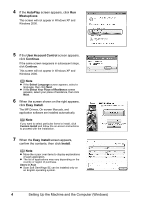
5 When the Network Setup of the Card Slot dialog box appears, specify the drive letter, then click Next. This screen will not appear in Windows Vista. Note z The Card Slot of the machine must be mounted to be used as the memory card drive of the LANconnected computer. To write files to a memory card, set the Read/write attribute setting under Device settings to LAN enabled. If the setting is set to USB enabled, you cannot access the network drive of the Card Slot. z If "Communication with the Card Slot failed." is displayed, click Retry. If it still fails, see ""Communication with the Card Slot failed." is displayed" on page 35. z If "Cannot map any more drives, because all the drive letters are assigned." is displayed, click Skip to complete the setup. After software installation is complete, remove any drive letter and try the network setup of the Card Slot again using the Canon IJ Network Tool. z If "The Card Slot is already mapped as Network Drive to this computer." is displayed, the Card Slot is already set up. Click OK, then click Next. 6 When the Setup Completion dialog box appears, remove the USB cable, then click Finish. The network connection between the machine and the computer is now successfully established. To confirm the setup results, click View Setup Results. Note z To change the port name, click View Setup Results, then click Set Port Name on the Setup Results dialog box. For details, see "Changing the Port Name (Windows)" on page 37. z If "Unsafe Removal of Device" is displayed, click OK. 7 When the Setup Complete screen appears, click Next. 8 Setting Up the Machine and the Computer (Windows)
-
 1
1 -
2
-
3
-
4
-
 5
5 -
 6
6 -
 7
7 -
 8
8 -
 9
9 -
 10
10 -
 11
11 -
 12
12 -
 13
13 -
 14
14 -
 15
15 -
16
-
17
-
18
-
19
-
20
-
21
-
22
-
23
-
24
-
25
-
26
-
27
-
28
-
29
-
30
-
31
-
32
-
33
-
34
-
35
-
36
-
37
-
38
-
39
-
40
-
41
-
42
-
43
 |
 |
