Canon SELPHY CP740 SELPHY CP750 / CP740 Printer User Guide - Page 14
LCD Monitor, Button Functions, Full Screen Display - ink for
 |
View all Canon SELPHY CP740 manuals
Add to My Manuals
Save this manual to your list of manuals |
Page 14 highlights
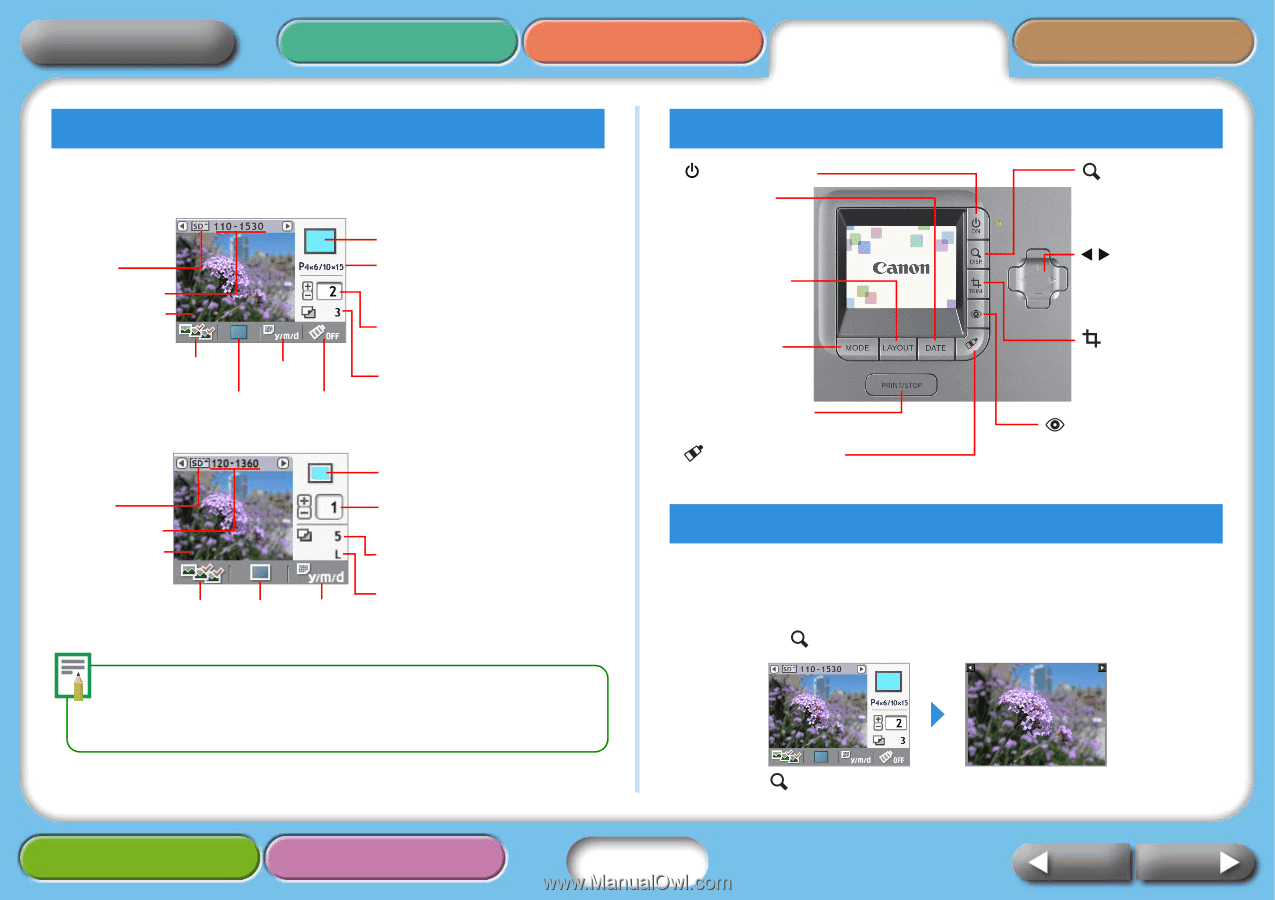
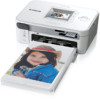
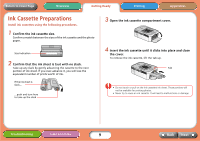
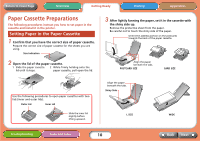
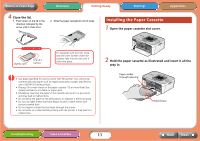
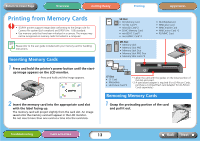
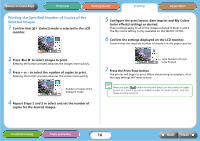
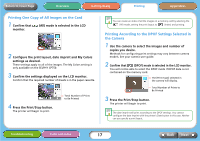
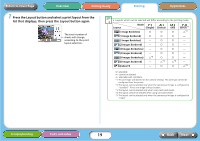
Return to Cover Page Overview Getting Ready Printing Appendices LCD Monitor The following types of information appear on the LCD monitor. SELPHY CP750 Card slot with memory card inserted Image Number Selected Image Mode Date Print Layout My Colors Print Image Installed Ink Cassette Type (in this example, [P] for Postcard-Size) Number of Prints of Selected Image Total Number of Prints SELPHY CP740 Card slot with memory card inserted Image Number Selected Image Print Image Number of Prints of Selected Image Total Number of Prints Mode Print Date Layout Installed Ink Cassette Type Although there are some differences in the information displayed by the SELPHY CP750 and SELPHY CP740 as shown above, the fundamental elements are the same. Therefore, the examples that follow use only the SELPHY CP750 monitor to explain the procedures. Button Functions (Power) Button Date Button Switches between date imprint modes. Layout Button Switches between print layouts. Mode Button Switches between operating modes. Print/Stop Button Starts and stops printing. (My Colors) Button Switches between My Colors modes (CP750 only). (Display) Button Displays images at full size on the monitor. W X + - Buttons Switches between images and sets the number of prints. (Trimming) Button Enlarges and prints a portion of the image (CP750 only) (Red-Eye Correction) Button Corrects the red-eye in images shot with a flash. Full Screen Display When selecting images, you can hide the image data and show the image so that it fills the monitor. Use this function when you wish to check detailed portions of images. 1 Press the (Display) button. Pressing the (Display) button again restores the standard view. Troubleshooting Tasks and Index 14 Back Next
-
 1
1 -
2
-
3
-
4
-
5
-
6
-
7
-
8
-
 9
9 -
 10
10 -
 11
11 -
 12
12 -
 13
13 -
 14
14 -
 15
15 -
 16
16 -
 17
17 -
 18
18 -
 19
19 -
20
-
21
-
22
-
23
-
24
-
25
-
26
-
27
-
28
-
29
-
30
-
31
-
32
-
33
-
34
-
35
-
36
-
37
-
38
-
39
-
40
-
41
-
42
-
43
-
44
-
45
-
46
-
47
-
48
-
49
-
50
 |
 |