Canon SELPHY CP740 SELPHY CP750 / CP740 Printer User Guide - Page 24
Printing from Cameras - supplies
 |
View all Canon SELPHY CP740 manuals
Add to My Manuals
Save this manual to your list of manuals |
Page 24 highlights
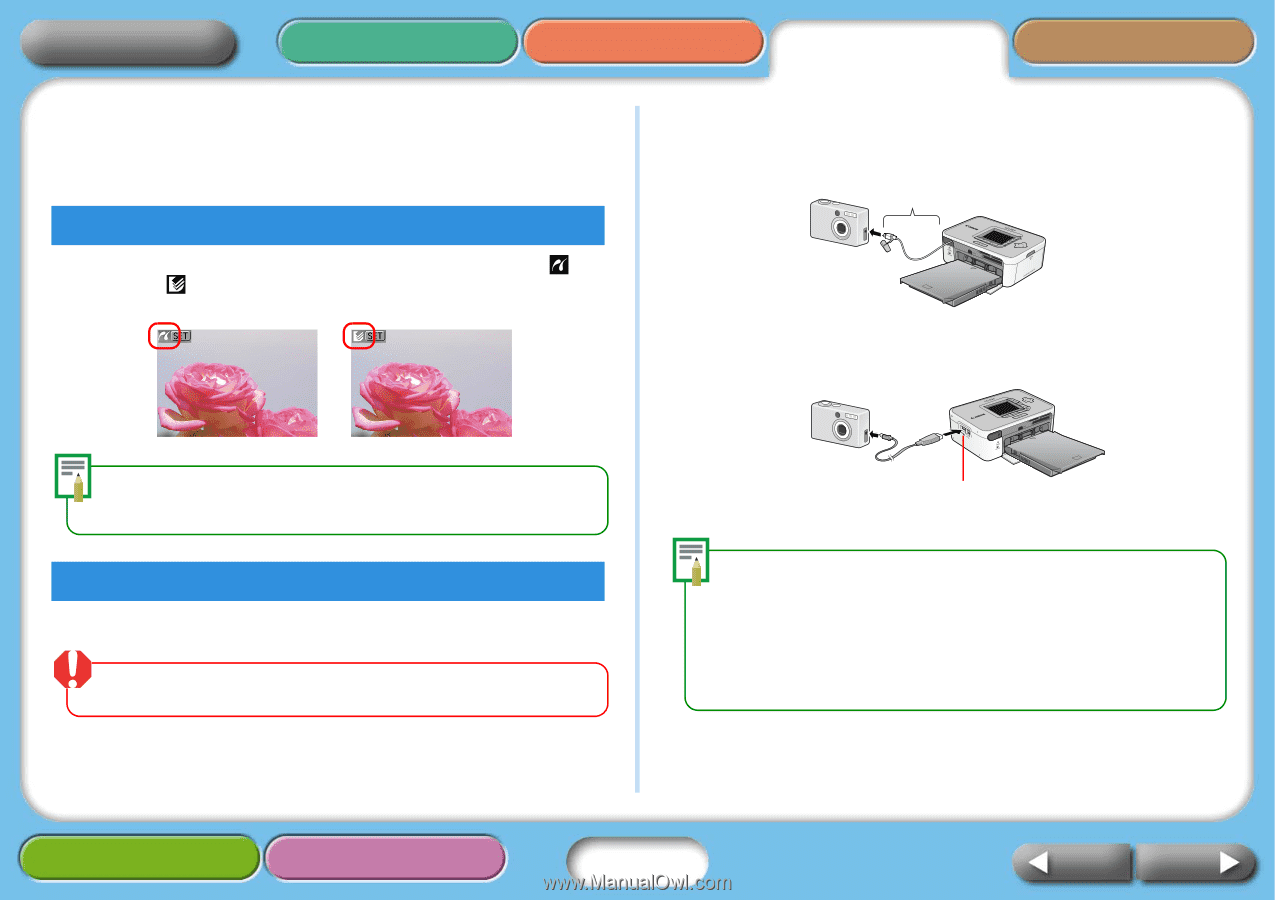
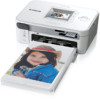
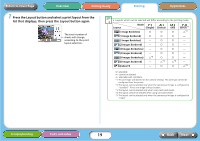
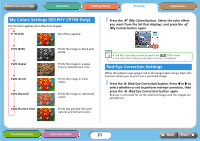
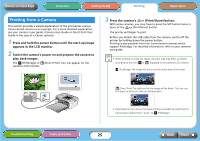
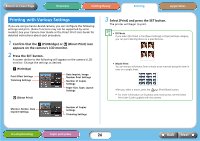
Return to Cover Page Overview Getting Ready Printing Appendices Printing from Cameras These procedures are for printing images from a camera connected to the printer. Camera Check On cameras that support printing via this method, icons such as (PictBridge) or (Direct Print) will appear on the camera's LCD monitor when the camera is connected to the printer. 1 Pull the retractable USB cable from the printer and attach it to the camera. Up to approximately 30 cm (12 in.) If the connector on the retractable USB cable does not match the camera's terminal, connect the camera using the USB cable supplied with the camera. PictBridge is an industry standard that allows any digital camera or video camera, regardless of the manufacturer or model, to print images directly to a printer without using a computer. Connecting the Camera Connect the camera to the printer with the following procedures. Before you connect the camera to the printer, ensure there are no memory cards in the printer or that the printer is not connected to a computer. USB Connector for Camera • When connecting a camera to the printer to print, you are recommended to power the camera from a power outlet to avoid having the camera cancel the print partway for lack of battery charge. If you are using a battery, ensure that it is fully charged or new. • To have the retractable USB cable recoil, pull it lightly forward, then while holding the cable let it retract into the printer. • The cable can be extended approximately 30 cm (12 in.). Be careful not to over-extend it, which may lead to malfunctions. Troubleshooting Tasks and Index 24 Back Next
-
 1
1 -
2
-
3
-
4
-
5
-
6
-
7
-
8
-
9
-
10
-
11
-
12
-
13
-
14
-
15
-
16
-
17
-
18
-
 19
19 -
 20
20 -
 21
21 -
 22
22 -
 23
23 -
 24
24 -
 25
25 -
 26
26 -
 27
27 -
 28
28 -
 29
29 -
30
-
31
-
32
-
33
-
34
-
35
-
36
-
37
-
38
-
39
-
40
-
41
-
42
-
43
-
44
-
45
-
46
-
47
-
48
-
49
-
50
 |
 |