Canon SELPHY CP740 SELPHY CP750 / CP740 Printer User Guide - Page 26
Printing with Various Settings
 |
View all Canon SELPHY CP740 manuals
Add to My Manuals
Save this manual to your list of manuals |
Page 26 highlights
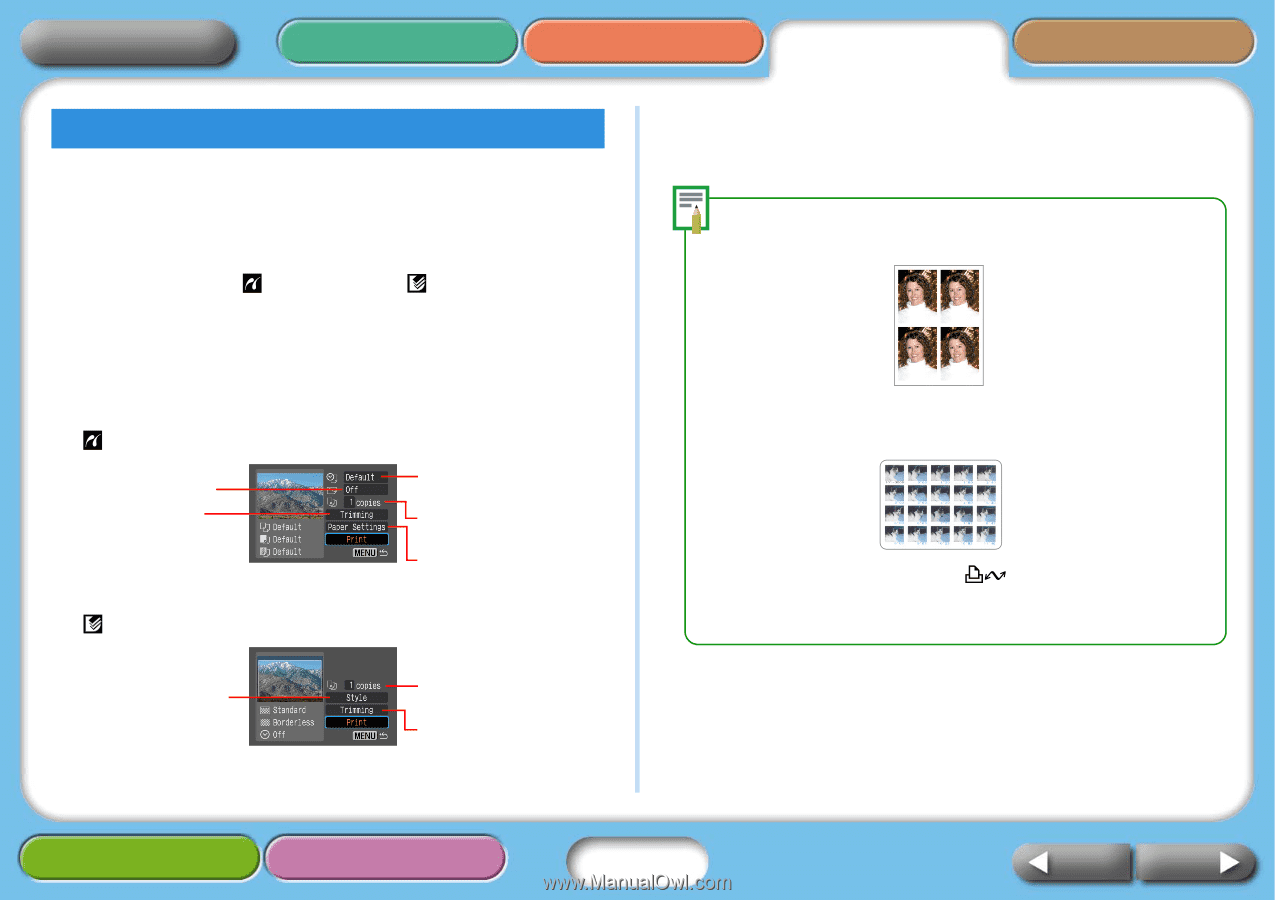
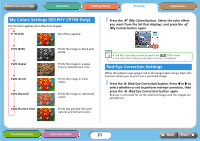
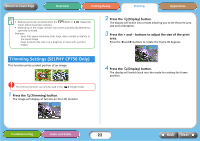
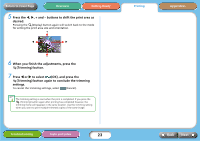
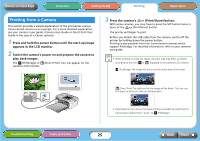
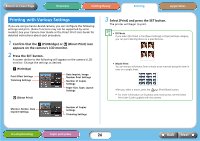
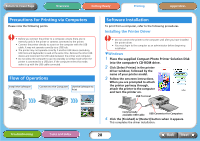
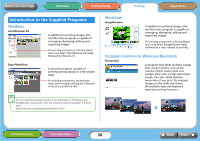
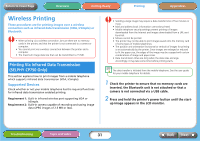
Return to Cover Page Overview Getting Ready Printing Appendices Printing with Various Settings If you are using a Canon-brand camera, you can configure the following settings and print. (Some functions may not be supported by some models.) See your Camera User Guide or the Direct Print User Guide for detailed instructions about each procedure. 1 Confirm that the (PictBridge) or (Direct Print) icon appears on the camera's LCD monitor. 2 Press the SET button. A screen similar to the following will appear on the camera's LCD monitor. Change the settings as desired. (PictBridge) Print Effect Settings Trimming Settings Date Imprint, Image Number Print Settings Number of Copies Settings Paper Size, Type, Layout Settings (Direct Print) Monitor, Border, Date Imprint Settings Number of Copies Settings Trimming Settings 3 Select [Print] and press the SET button. The printer will begin to print. • ID Photo If you select [ID Photo] in the [Paper Settings] or [Style] settings category, you can print identity photos at a specified size. • Movie Print You can extract still photos from a movie at set intervals and print them in rows on a single sheet. After you select a movie, press the (Print/Share) button. • For more information on ID photos and movie prints, see the Direct Print User Guide supplied with the camera. Troubleshooting Tasks and Index 26 Back Next
-
 1
1 -
2
-
3
-
4
-
5
-
6
-
7
-
8
-
9
-
10
-
11
-
12
-
13
-
14
-
15
-
16
-
17
-
18
-
19
-
20
-
 21
21 -
 22
22 -
 23
23 -
 24
24 -
 25
25 -
 26
26 -
 27
27 -
 28
28 -
 29
29 -
 30
30 -
 31
31 -
32
-
33
-
34
-
35
-
36
-
37
-
38
-
39
-
40
-
41
-
42
-
43
-
44
-
45
-
46
-
47
-
48
-
49
-
50
 |
 |