Canon SELPHY CP740 SELPHY CP750 / CP740 Printer User Guide - Page 23
Trimming button.
 |
View all Canon SELPHY CP740 manuals
Add to My Manuals
Save this manual to your list of manuals |
Page 23 highlights
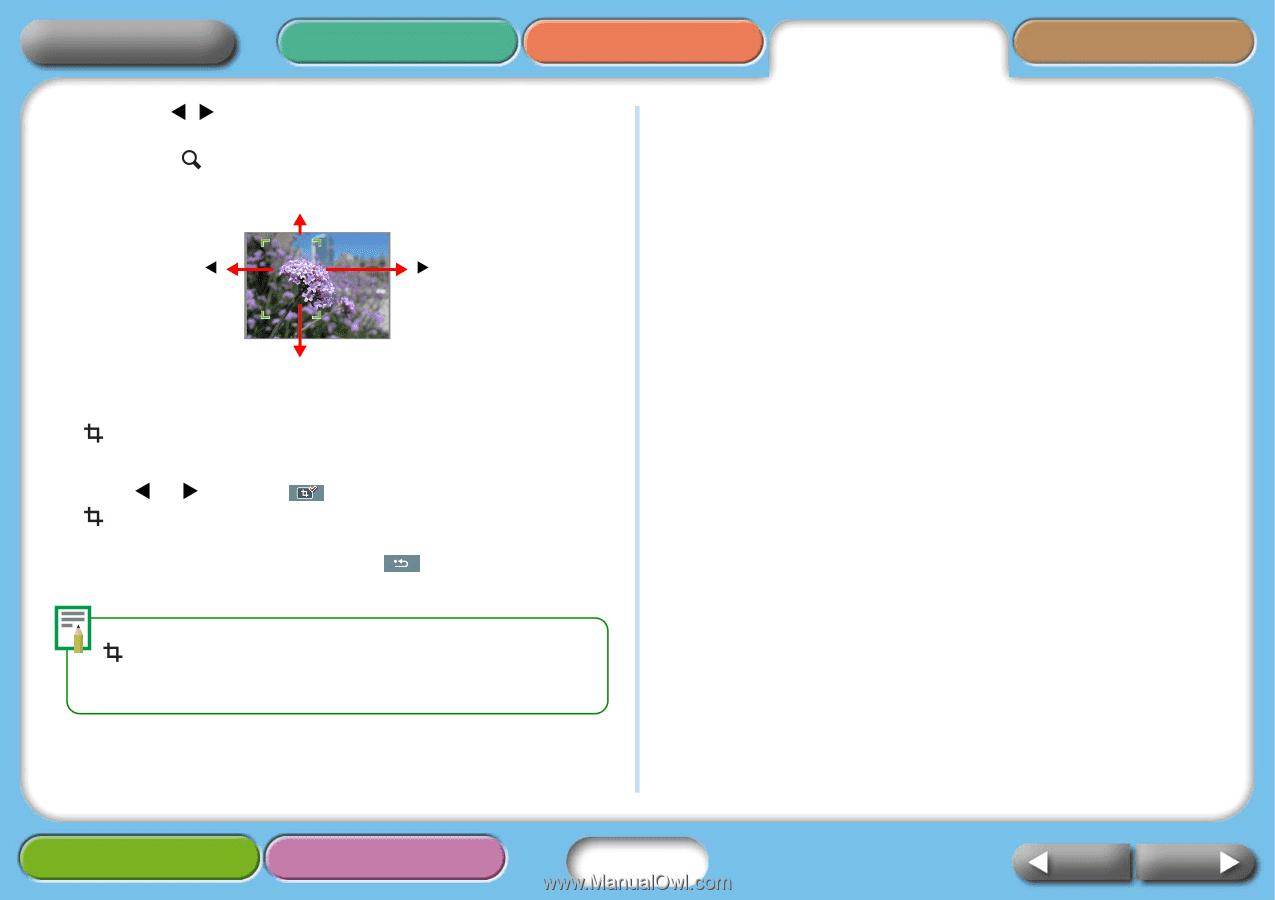
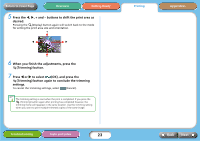
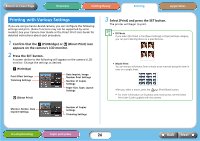
Return to Cover Page Overview Getting Ready 5 Press the W, X, + and - buttons to shift the print area as desired. Pressing the (Display) button again will switch back to the mode for setting the print area size and orientation. + W X - 6 When you finish the adjustments, press the (Trimming) button. 7 Press W or X to select (OK), and press the (Trimming) button again to conclude the trimming settings. To cancel the trimming settings, select (Cancel). The trimming setting is reset when the print is completed. If you press the (Trimming) button again after printing has completed however, the trimming frame will reappear in the same location. Use this trimming setting when you want to print multiple trimmed copies of the same image. Printing Appendices Troubleshooting Tasks and Index 23 Back Next
-
 1
1 -
2
-
3
-
4
-
5
-
6
-
7
-
8
-
9
-
10
-
11
-
12
-
13
-
14
-
15
-
16
-
17
-
 18
18 -
 19
19 -
 20
20 -
 21
21 -
 22
22 -
 23
23 -
 24
24 -
 25
25 -
 26
26 -
 27
27 -
 28
28 -
29
-
30
-
31
-
32
-
33
-
34
-
35
-
36
-
37
-
38
-
39
-
40
-
41
-
42
-
43
-
44
-
45
-
46
-
47
-
48
-
49
-
50
 |
 |