Canon SELPHY CP740 SELPHY CP750 / CP740 Printer User Guide - Page 16
Printing the Specified Number of Copies of the, Selected Images - paper cassette
 |
View all Canon SELPHY CP740 manuals
Add to My Manuals
Save this manual to your list of manuals |
Page 16 highlights
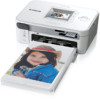
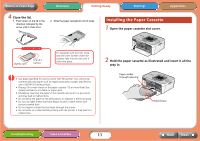
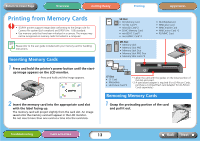
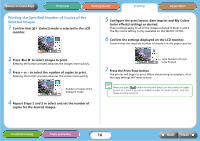
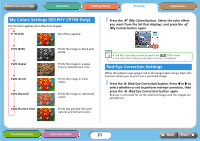
Return to Cover Page Overview Getting Ready Printing Appendices Printing the Specified Number of Copies of the Selected Images 1 Confirm that (Select) mode is selected in the LCD monitor. 5 Configure the print layout, date imprint and My Colors (color effects) settings as desired. These settings apply to all of the images selected in Steps 3 and 4. The My Colors setting is only available on the SELPHY CP750. 6 Confirm the settings displayed on the LCD monitor. Confirm that the required number of sheets is in the paper cassette. 2 Press W or X to select images to print. Keeping the button pressed advances the images more quickly. 3 Press + or - to select the number of copies to print. Keeping the button pressed advances the values more quickly. Number of copies of the displayed image 4 Repeat Steps 2 and 3 to select and set the number of copies for the desired images. Total Number of Prints to Be Printed 7 Press the Print/Stop button. The printer will begin to print. When the printing is complete, all of the copy settings will reset to zero. When you select (Index) for the print layout, set the number of copies to print to 1. Even if you set a multiple number of copies to print, only one image at a time will print. Troubleshooting Tasks and Index 16 Back Next
-
 1
1 -
2
-
3
-
4
-
5
-
6
-
7
-
8
-
9
-
10
-
 11
11 -
 12
12 -
 13
13 -
 14
14 -
 15
15 -
 16
16 -
 17
17 -
 18
18 -
 19
19 -
 20
20 -
 21
21 -
22
-
23
-
24
-
25
-
26
-
27
-
28
-
29
-
30
-
31
-
32
-
33
-
34
-
35
-
36
-
37
-
38
-
39
-
40
-
41
-
42
-
43
-
44
-
45
-
46
-
47
-
48
-
49
-
50
 |
 |