Casio WK3800 User Guide - Page 58
Playing Back from Song Memory, Recording Melody and Chords, with Step Recording
 |
View all Casio WK3800 manuals
Add to My Manuals
Save this manual to your list of manuals |
Page 58 highlights
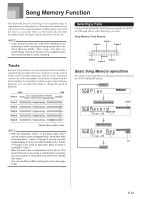
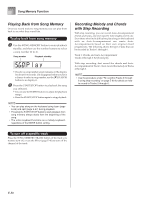
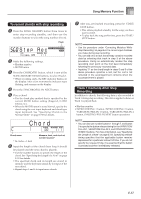
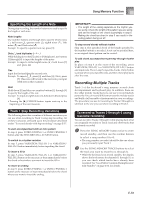
Song Memory Function Playing Back from Song Memory Once you record tracks to song memory, you can play them back to see what they sound like. To play back from song memory 1 Use the SONG MEMORY button to enter playback standby, and then use the number buttons to select a song number (0 to 4). Song number Playback standby Pl ay • The above song number screen remains on the display for about five seconds. If it disappears before you have a chance to select a song number, use the [̄] CURSOR button to re-display it. 2 Press the START/STOP button to playback the song you selected. • You can use the TEMPO buttons to adjust the playback tempo. • Press the START/STOP button again to stop playback. NOTE • You can play along on the keyboard using layer (page E-66) and split (page E-67) during playback. • Pressing the START/STOP button to start playback from song memory always starts from the beginning of the song. • The entire keyboard functions as a melody keyboard, regardless of the MODE button setting. Recording Melody and Chords with Step Recording With step recording, you can record Auto-Accompaniment chords and notes, and even specify note lengths one by one. Even those who find it difficult to play along on the keyboard with an Auto-Accompaniment can create AutoAccompaniments based on their own original chord progressions. The following shows the type of data that can be recorded in Tracks 1 through 6. Track 1: Chords and Auto-Accompaniment Tracks 2 through 6: Keyboard play With step recording, first record the chords and AutoAccompaniment in Track 1. Next, record the melody in Tracks 2 through 6. NOTE • Use the procedure under "To record to Tracks 2 through 6 using step recording" on page E-60 for details on how to record to Tracks 2 through 6. To turn off a specific track Press the SONG MEMORY TRACK button of the track you want to turn off, or use the Mixer (page E-40) to turn off the channel of the track. E-56
-
 1
1 -
2
-
3
-
4
-
5
-
6
-
7
-
8
-
9
-
10
-
11
-
12
-
13
-
14
-
15
-
16
-
17
-
18
-
19
-
20
-
21
-
22
-
23
-
24
-
25
-
26
-
27
-
28
-
29
-
30
-
31
-
32
-
33
-
34
-
35
-
36
-
37
-
38
-
39
-
40
-
41
-
42
-
43
-
44
-
45
-
46
-
47
-
48
-
49
-
50
-
51
-
52
-
 53
53 -
 54
54 -
 55
55 -
 56
56 -
 57
57 -
 58
58 -
 59
59 -
 60
60 -
 61
61 -
 62
62 -
 63
63 -
64
-
65
-
66
-
67
-
68
-
69
-
70
-
71
-
72
-
73
-
74
-
75
-
76
-
77
-
78
-
79
-
80
-
81
-
82
-
83
-
84
-
85
-
86
-
87
-
88
-
89
-
90
-
91
-
92
-
93
-
94
-
95
-
96
-
97
-
98
-
99
-
100
-
101
-
102
-
103
-
104
-
105
-
106
-
107
-
108
 |
 |