Cisco AIR-AP1242AG-A-K9 Hardware Installation Guide - Page 4
Installing the Access Point, Troubleshooting 1240AG Series Autonomous Access Points - default ip
 |
UPC - 882658021961
View all Cisco AIR-AP1242AG-A-K9 manuals
Add to My Manuals
Save this manual to your list of manuals |
Page 4 highlights
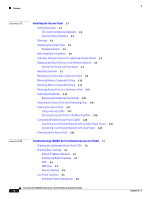
Contents 2 C H A P T E R 3 C H A P T E R Installing the Access Point 2-1 Safety Information 2-2 FCC Safety Compliance Statement 2-2 General Safety Guidelines 2-2 Warnings 2-2 Unpacking the Access Point 2-3 Package Contents 2-3 Basic Installation Guidelines 2-4 Controller Discovery Process for Lightweight Access Points 2-4 Deploying the Access Points on the Wireless Network 2-5 Access Point Layout and Connectors 2-6 Mounting Overview 2-7 Mounting on a Horizontal or Vertical Surface 2-9 Mounting Below a Suspended Ceiling 2-10 Mounting Above a Suspended Ceiling 2-11 Mounting Access Point on a Desktop or Shelf 2-14 Cable Security Bracket 2-14 Removing the Cable Security Bracket 2-15 Attaching the Access Point to the Mounting Plate 2-16 Securing the Access Point 2-17 Using a Security Cable 2-17 Securing the Access Point to the Mounting Plate 2-18 Connecting the Ethernet and Power Cables 2-20 Connecting to an Ethernet Network with an Inline Power Source 2-21 Connecting to an Ethernet Network with Local Power 2-22 Powering Up the Access Point 2-22 Troubleshooting 1240AG Series Autonomous Access Points 3-1 Checking the Lightweight Access Point LEDs 3-2 Checking Basic Settings 3-3 Default IP Address Behavior 3-4 Enabling the Radio Interfaces 3-4 SSID 3-4 WEP Keys 3-4 Security Settings 3-5 Low Power Condition 3-5 Intelligent Power Management 3-6 Cisco Aironet 1240AG Series Access Point Hardware Installation Guide iv OL-8371-05
-
 1
1 -
 2
2 -
 3
3 -
 4
4 -
 5
5 -
 6
6 -
 7
7 -
 8
8 -
 9
9 -
 10
10 -
11
-
12
-
13
-
14
-
15
-
16
-
17
-
18
-
19
-
20
-
21
-
22
-
23
-
24
-
25
-
26
-
27
-
28
-
29
-
30
-
31
-
32
-
33
-
34
-
35
-
36
-
37
-
38
-
39
-
40
-
41
-
42
-
43
-
44
-
45
-
46
-
47
-
48
-
49
-
50
-
51
-
52
-
53
-
54
-
55
-
56
-
57
-
58
-
59
-
60
-
61
-
62
-
63
-
64
-
65
-
66
-
67
-
68
-
69
-
70
-
71
-
72
-
73
-
74
-
75
-
76
-
77
-
78
-
79
-
80
-
81
-
82
-
83
-
84
-
85
-
86
-
87
-
88
-
89
-
90
-
91
-
92
-
93
-
94
-
95
-
96
-
97
-
98
-
99
-
100
-
101
-
102
-
103
-
104
-
105
-
106
-
107
-
108
-
109
-
110
-
111
-
112
-
113
-
114
-
115
-
116
-
117
-
118
-
119
-
120
-
121
-
122
-
123
-
124
 |
 |
