Cisco WRT300N User Manual - Page 22
Time Setting, DHCP Reservation, Select, Add Clients, Remove, Save Settings, Cancel, Changes, Refresh - reserved button
 |
View all Cisco WRT300N manuals
Add to My Manuals
Save this manual to your list of manuals |
Page 22 highlights
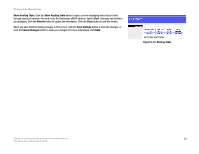
Wireless-N Broadband Router DHCP Reservation. Click the DHCP Reservation button if you want to assign a fixed local IP address to a MAC address. You will see a list of DHCP clients with the following information: Client Name, Interface, IP Address, and MAC Address. Click the Select checkbox to reserve a client's IP address. Then click the Add Clients button. If you want to manually assign an IP address, enter the client's name in the Enter Client Name field. Enter the IP address you want it to have in the Assign IP Address field. Enter its MAC Address in the To This MAC Address field. Click the Add button. A list of DHCP clients and their fixed local IP addresses will be displayed at the bottom of the screen. If you want to remove a client from this list, click the Remove button. When you have finished your changes, click the Save Settings button to save your changes. Click the Cancel Changes button to cancel your changes. To view the most up-to-date information, click the Refresh button. To exit this screen, click the Close button. Time Setting Time Zone. Select the time zone in which your network functions. If you want the Router to automatically adjust the clock for daylight savings, then select the checkbox. When you have finished making changes to this screen, click the Save Settings button to save the changes, or click the Cancel Changes button to undo your changes. For more information, click Help. Figure 5-8: DHCP Reservation NOTE: To test your settings, connect to the Internet now. Chapter 5: Configuring the Wireless-N Broadband Router 16 The Setup Tab - Basic Setup
-
 1
1 -
2
-
3
-
4
-
5
-
6
-
7
-
8
-
9
-
10
-
11
-
12
-
13
-
14
-
15
-
16
-
 17
17 -
 18
18 -
 19
19 -
 20
20 -
 21
21 -
 22
22 -
 23
23 -
 24
24 -
 25
25 -
 26
26 -
 27
27 -
28
-
29
-
30
-
31
-
32
-
33
-
34
-
35
-
36
-
37
-
38
-
39
-
40
-
41
-
42
-
43
-
44
-
45
-
46
-
47
-
48
-
49
-
50
-
51
-
52
-
53
-
54
-
55
-
56
-
57
-
58
-
59
-
60
-
61
-
62
-
63
-
64
-
65
-
66
-
67
-
68
-
69
-
70
-
71
-
72
-
73
-
74
-
75
-
76
-
77
-
78
-
79
-
80
-
81
-
82
-
83
-
84
-
85
-
86
-
87
-
88
-
89
-
90
-
91
-
92
-
93
-
94
-
95
-
96
 |
 |
