Compaq Evo Notebook PC n115 Users Guide Evo Notebook N115 - Page 45
Installing Hardware Devices, Upgrading your Notebook’s Memory, CD or Floppy
 |
View all Compaq Evo Notebook PC n115 manuals
Add to My Manuals
Save this manual to your list of manuals |
Page 45 highlights
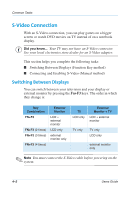
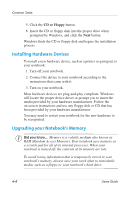
Common Tasks 5. Click the CD or Floppy button. 6. Insert the CD or floppy disk into the proper drive when prompted by Windows, and click the Next button. Windows finds the CD or floppy disk and begins the installation process. Installing Hardware Devices To install a new hardware device, such as a printer or gamepad, to your notebook: 1. Turn off your notebook. 2. Connect the device to your notebook according to the instructions that came with it. 3. Turn on your notebook. Most hardware devices are plug-and-play compliant. Windows will locate the proper device driver or prompt you to insert the media provided by your hardware manufacturer. Follow the on-screen instructions and use any floppy disk or CD that has been provided by your hardware manufacturer. You may need to restart your notebook for the new hardware to be recognized. Upgrading your Notebook's Memory S Did you know... Memory is a volatile medium also known as RAM (Random Access Memory). Your notebook uses memory as a scratch pad for all of its internal processes. When your notebook is turned off, the contents of its memory are lost. To avoid losing information that is temporarily stored in your notebook's memory, always save your work often to nonvolatile media, such as a floppy or your notebook's hard drive. 4-6 Users Guide
-
 1
1 -
2
-
3
-
4
-
5
-
6
-
7
-
8
-
9
-
10
-
11
-
12
-
13
-
14
-
15
-
16
-
17
-
18
-
19
-
20
-
21
-
22
-
23
-
24
-
25
-
26
-
27
-
28
-
29
-
30
-
31
-
32
-
33
-
34
-
35
-
36
-
37
-
38
-
39
-
 40
40 -
 41
41 -
 42
42 -
 43
43 -
 44
44 -
 45
45 -
 46
46 -
 47
47 -
 48
48 -
 49
49 -
 50
50 -
51
-
52
-
53
-
54
-
55
-
56
-
57
-
58
-
59
-
60
-
61
-
62
-
63
-
64
-
65
-
66
-
67
-
68
-
69
-
70
-
71
-
72
-
73
-
74
-
75
-
76
-
77
-
78
-
79
-
80
-
81
-
82
-
83
-
84
-
85
-
86
-
87
-
88
-
89
-
90
-
91
-
92
-
93
-
94
-
95
-
96
-
97
-
98
-
99
-
100
-
101
-
102
-
103
-
104
-
105
-
106
-
107
-
108
-
109
-
110
-
111
-
112
-
113
-
114
-
115
-
116
-
117
-
118
-
119
-
120
-
121
-
122
-
123
-
124
-
125
-
126
-
127
-
128
-
129
-
130
-
131
-
132
-
133
 |
 |
